Popular Woodworking 2004-06 № 141, страница 94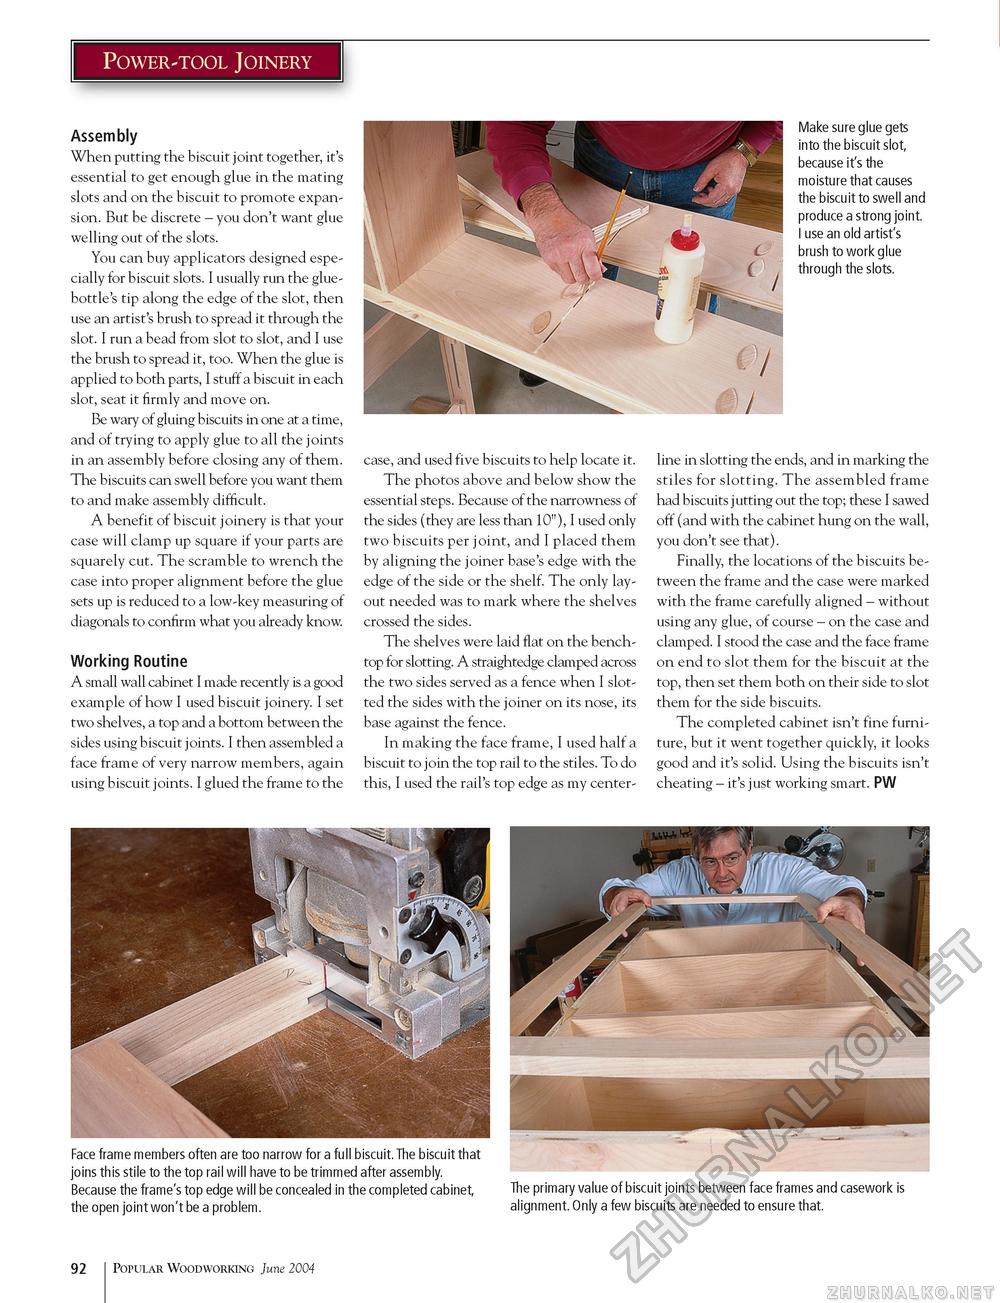
Power-tool Joinery Make sure glue gets into the biscuit slot, because it's the moisture that causes the biscuit to swell and produce a strong joint. I use an old artist's brush to work glue through the slots. Assembly When putting the biscuit joint together, it's essential to get enough glue in the mating slots and on the biscuit to promote expansion. But be discrete - you don't want glue welling out of the slots. You can buy applicators designed especially for biscuit slots. I usually run the glue-bottle's tip along the edge of the slot, then use an artist's brush to spread it through the slot. I run a bead from slot to slot, and I use the brush to spread it, too. When the glue is applied to both parts, I stuff a biscuit in each slot, seat it firmly and move on. Be wary of gluing biscuits in one at a time, and of trying to apply glue to all the joints in an assembly before closing any of them. The biscuits can swell before you want them to and make assembly difficult. A benefit of biscuit joinery is that your case will clamp up square if your parts are squarely cut. The scramble to wrench the case into proper alignment before the glue sets up is reduced to a low-key measuring of diagonals to confirm what you already know. Working Routine A small wall cabinet I made recently is a good example of how I used biscuit joinery. I set two shelves, a top and a bottom between the sides using biscuit joints. I then assembled a face frame of very narrow members, again using biscuit joints. I glued the frame to the case, and used five biscuits to help locate it. The photos above and below show the essential steps. Because of the narrowness of the sides (they are less than 10"), I used only two biscuits per joint, and I placed them by aligning the joiner base's edge with the edge of the side or the shelf. The only layout needed was to mark where the shelves crossed the sides. The shelves were laid flat on the bench-top for slotting. A straightedge clamped across the two sides served as a fence when I slotted the sides with the joiner on its nose, its base against the fence. In making the face frame, I used half a biscuit to join the top rail to the stiles. To do this, I used the rail's top edge as my center- line in slotting the ends, and in marking the stiles for slotting. The assembled frame had biscuits jutting out the top; these I sawed off (and with the cabinet hung on the wall, you don't see that). Finally, the locations of the biscuits between the frame and the case were marked with the frame carefully aligned - without using any glue, of course - on the case and clamped. I stood the case and the face frame on end to slot them for the biscuit at the top, then set them both on their side to slot them for the side biscuits. The completed cabinet isn't fine furniture, but it went together quickly, it looks good and it's solid. Using the biscuits isn't cheating - it's just working smart. PW Face frame members often are too narrow for a full biscuit.The biscuit that joins this stile to the top rail will have to be trimmed after assembly. Because the frame's top edge will be concealed in the completed cabinet, The primary value of biscuit joints between face frames and casework is the open joint won't be a problem. alignment. Only a few biscuits are needed to ensure that. 92 Popular Woodworking June 2004 |


