Popular Woodworking 2004-08 № 142, страница 48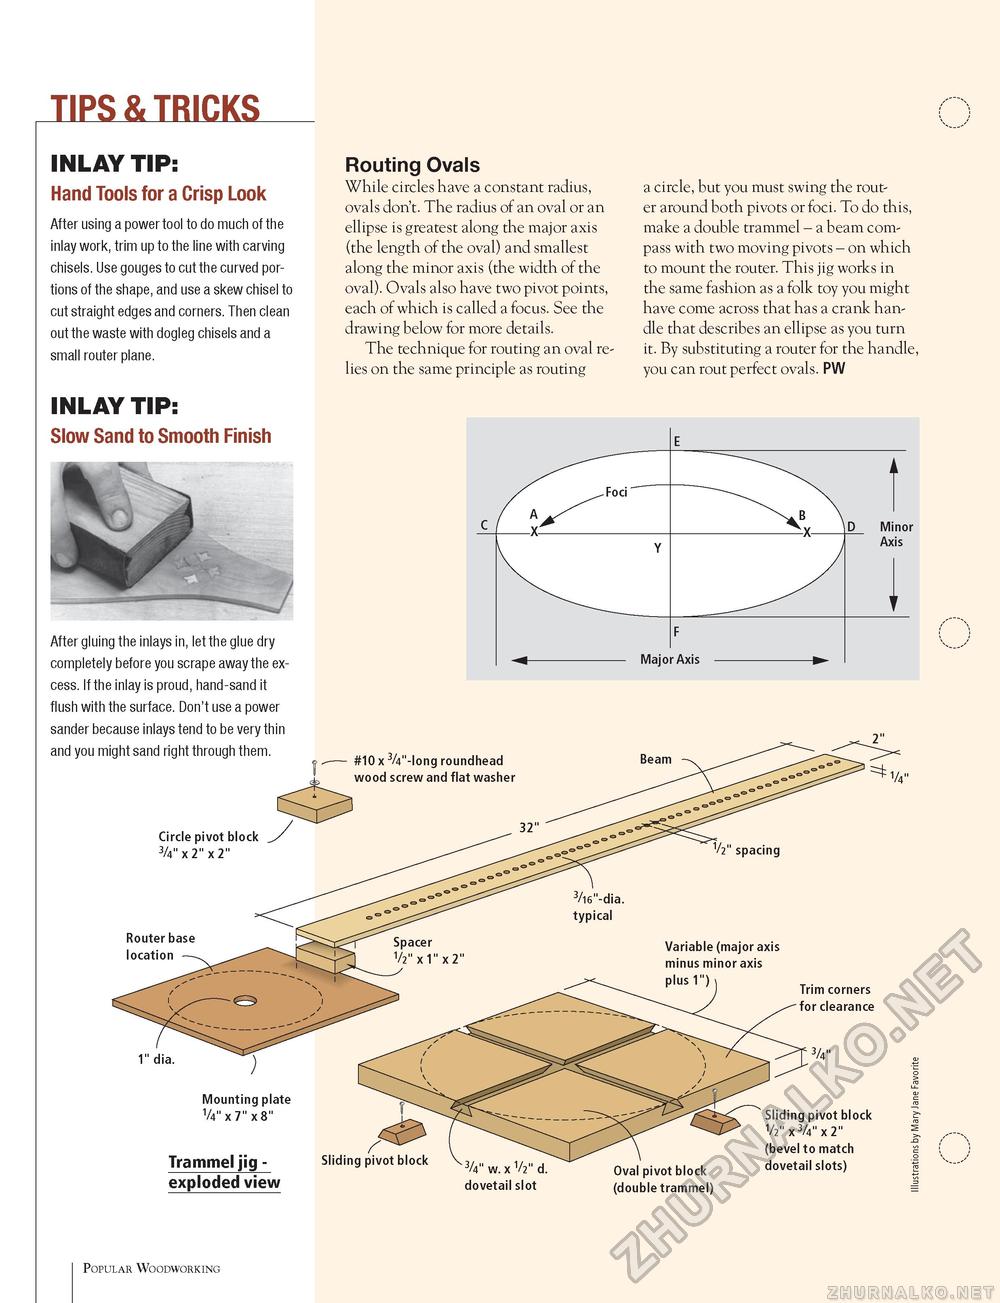
TIPS & TRICKS INLAY TIP: Hand Tools for a Crisp Look After using a power tool to do much of the inlay work, trim up to the line with carving chisels. Use gouges to cut the curved portions of the shape, and use a skew chisel to cut straight edges and corners. Then clean out the waste with dogleg chisels and a small router plane. INLAY TIP: Slow Sand to Smooth Finish After gluing the inlays in, let the glue dry completely before you scrape away the excess. If the inlay is proud, hand-sand it flush with the surface. Don't use a power sander because inlays tend to be very thin and you might sand right through them. Circle pivot block 3/4" x 2" x 2" Router base location Routing Ovals While circles have a constant radius, ovals don't. The radius of an oval or an ellipse is greatest along the major axis (the length of the oval) and smallest along the minor axis (the width of the oval). Ovals also have two pivot points, each of which is called a focus. See the drawing below for more details. The technique for routing an oval relies on the same principle as routing a circle, but you must swing the router around both pivots or foci. To do this, make a double trammel - a beam compass with two moving pivots - on which to mount the router. This jig works in the same fashion as a folk toy you might have come across that has a crank handle that describes an ellipse as you turn it. By substituting a router for the handle, you can rout perfect ovals. PW #10 x 3/4"-long roundhead wood screw and flat washer Trim corners for clearance Trammel jig -exploded view ~3A" w. x V2" d. dovetail slot Oval pivot block (double trammel) Sliding pivot block V2" x 3/4" x 2" (bevel to match dovetail slots) Popular Woodworking |


