Popular Woodworking 2004-08 № 142, страница 56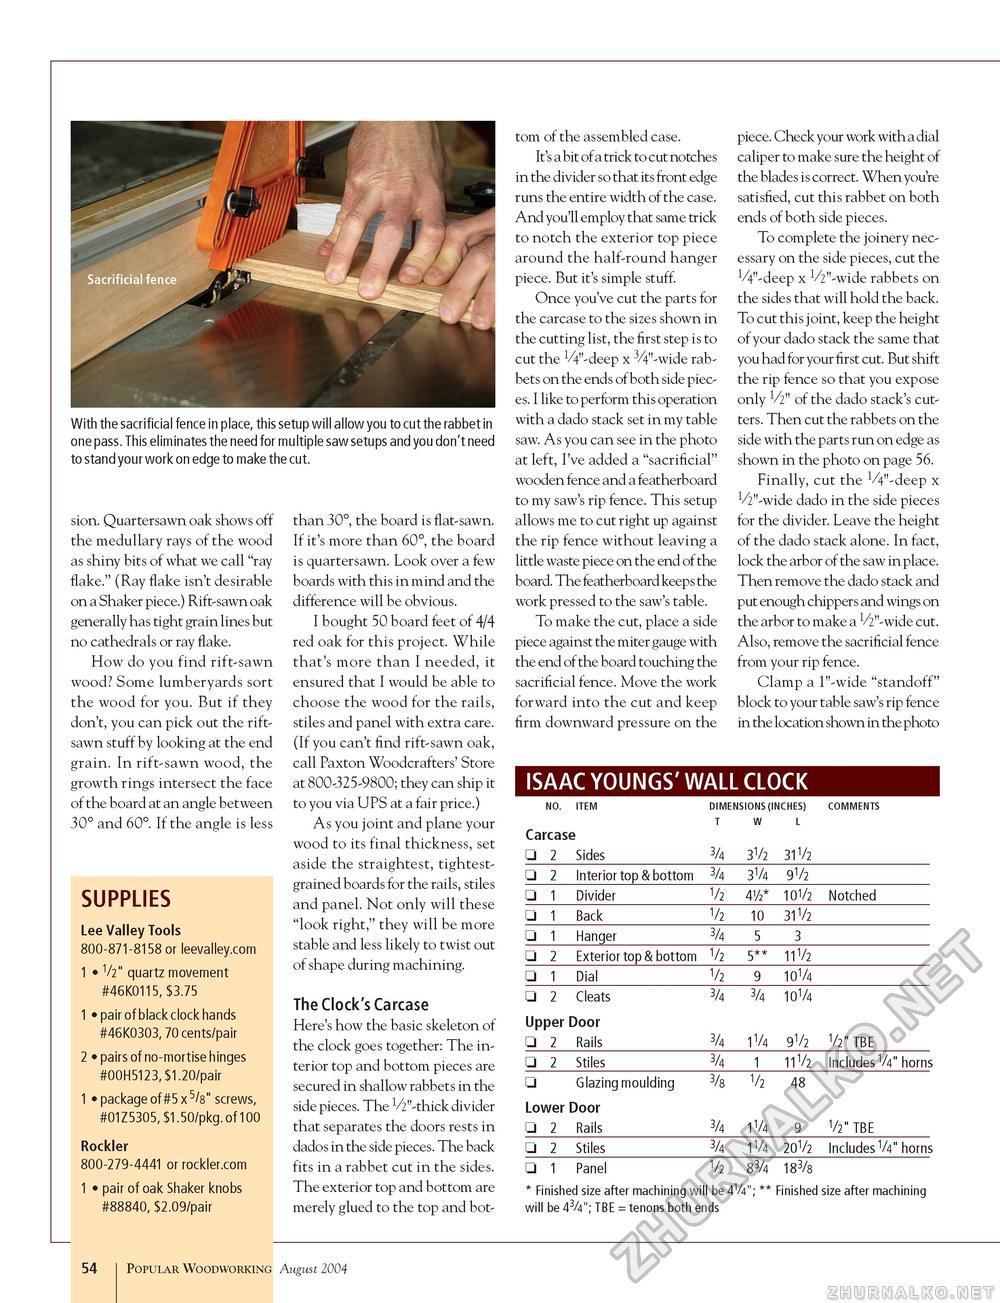
With the sacrificial fence in place, this setup will allow you to cut the rabbet in one pass. This eliminates the need for multiple saw setups and you don't need to stand your work on edge to make the cut. sion. Quartersawn oak shows off the medullary rays of the wood as shiny bits of what we call "ray flake." (Ray flake isn't desirable on a Shaker piece.) Rift-sawn oak generally has tight grain lines but no cathedrals or ray flake. How do you find rift-sawn wood? Some lumberyards sort the wood for you. But if they don't, you can pick out the rift-sawn stuff by looking at the end grain. In rift-sawn wood, the growth rings intersect the face of the board at an angle between 30° and 60°. If the angle is less SUPPLIES Lee Valley Tools 800-871-8158 or leevalley.com 1 • V2" quartz movement #46K0115, $3.75 1 • pair of black clock hands #46K0303, 70 cents/pair 2 • pairs of no-mortise hinges #00H5123, $1.20/pair 1 • package of #5 x 5/8" screws, #01Z5305, $1.50/pkg. of 100 Rockler 800-279-4441 or rockler.com 1 • pair of oak Shaker knobs #88840, $2.09/pair than 30°, the board is flat-sawn. If it's more than 60°, the board is quartersawn. Look over a few boards with this in mind and the difference will be obvious. I bought 50 board feet of 4/4 red oak for this project. While that's more than I needed, it ensured that I would be able to choose the wood for the rails, stiles and panel with extra care. (If you can't find rift-sawn oak, call Paxton Woodcrafters' Store at 800-325-9800; they can ship it to you via UPS at a fair price.) As you joint and plane your wood to its final thickness, set aside the straightest, tightest-grained boards for the rails, stiles and panel. Not only will these "look right," they will be more stable and less likely to twist out of shape during machining. The Clock's Carcase Here's how the basic skeleton of the clock goes together: The interior top and bottom pieces are secured in shallow rabbets in the side pieces. The ^"-thick divider that separates the doors rests in dados in the side pieces. The back fits in a rabbet cut in the sides. The exterior top and bottom are merely glued to the top and bot tom of the assembled case. It's a bit of a trick to cut notches in the divider so that its front edge runs the entire width of the case. And you'll employ that same trick to notch the exterior top piece around the half-round hanger piece. But it's simple stuff. Once you've cut the parts for the carcase to the sizes shown in the cutting list, the first step is to cut the W-deep x 3/4"-wide rabbets on the ends of both side pieces. I like to perform this operation with a dado stack set in my table saw. As you can see in the photo at left, I've added a "sacrificial" wooden fence and a featherboard to my saw's rip fence. This setup allows me to cut right up against the rip fence without leaving a little waste piece on the end of the board. The featherboard keeps the work pressed to the saw's table. To make the cut, place a side piece against the miter gauge with the end of the board touching the sacrificial fence. Move the work forward into the cut and keep firm downward pressure on the piece. Check your work with a dial caliper to make sure the height of the blades is correct. When you're satisfied, cut this rabbet on both ends of both side pieces. To complete the joinery necessary on the side pieces, cut the ^"-deep x V2"-wide rabbets on the sides that will hold the back. To cut this joint, keep the height of your dado stack the same that you had for your first cut. But shift the rip fence so that you expose only V2" of the dado stack's cutters. Then cut the rabbets on the side with the parts run on edge as shown in the photo on page 56. Finally, cut the VV-deep x V2"-wide dado in the side pieces for the divider. Leave the height of the dado stack alone. In fact, lock the arbor of the saw in place. Then remove the dado stack and put enough chippers and wings on the arbor to make a V2"-wide cut. Also, remove the sacrificial fence from your rip fence. Clamp a l"-wide "standoff" block to your table saw's rip fence in the location shown in the photo ISAAC YOUNGS' WALL CLOCK NO. ITEM Carcase □ 2 Sides DIMENSIONS (INCHES) COMMENTS T W L 3/4 3V2 31V2 DIMENSIONS (INCHES) COMMENTS T W L 3/4 3V2 31V2
□ 1 Panel V2 83/4 183/8 □ 1 Panel V2 83/4 183/8 * Finished size after machining will be 4V4"; ** Finished size after machining will be 43/4"; TBE = tenons both ends 54 Popular Woodworking August 2004 |


