Popular Woodworking 2004-08 № 142, страница 58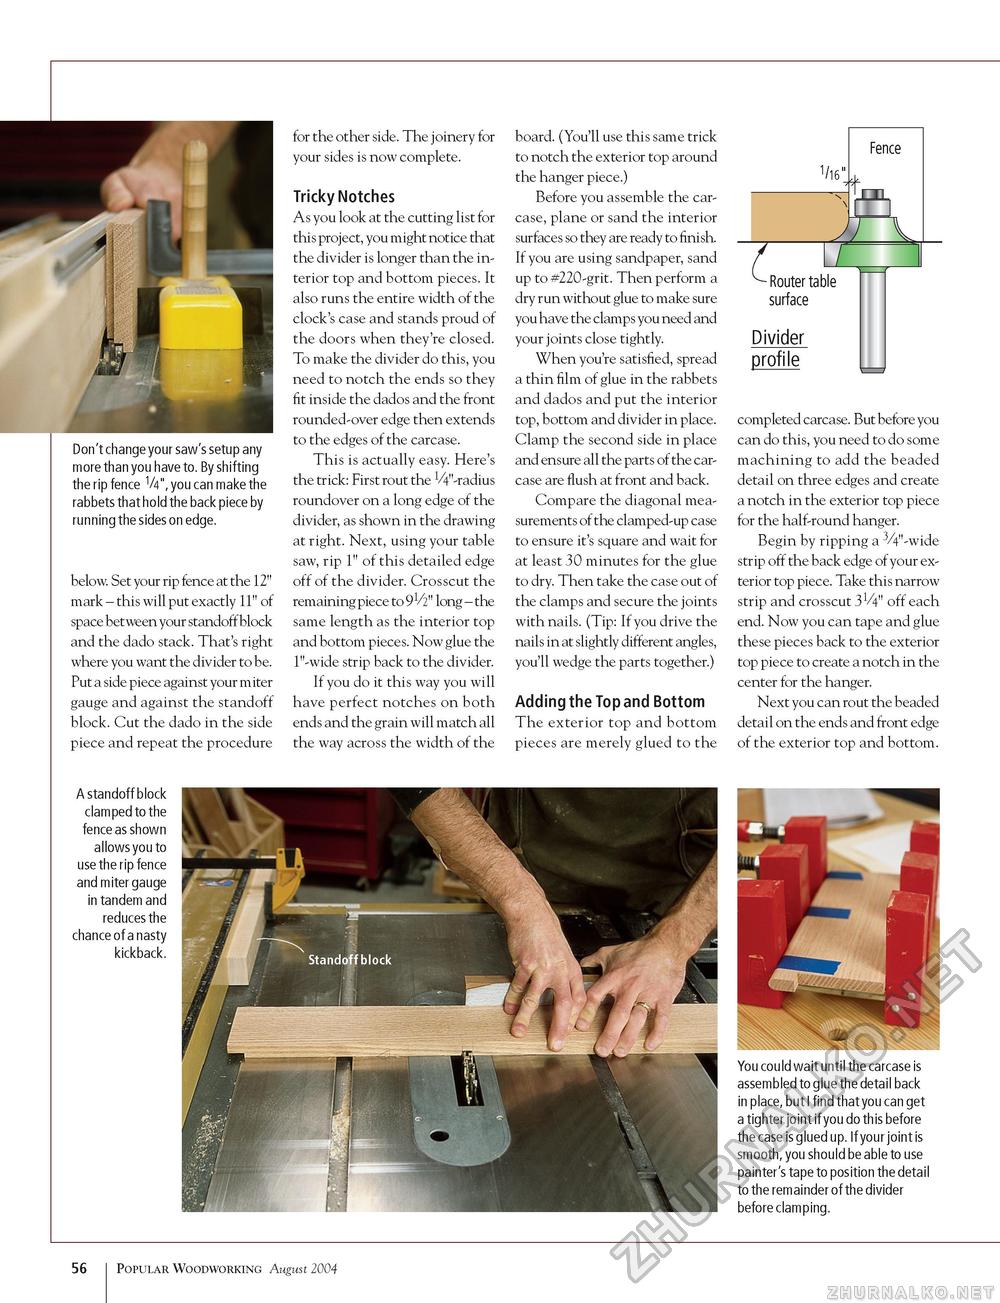
Don't change your saw's setup any more than you have to. By shifting the rip fence V4", you can make the rabbets that hold the back piece by running the sides on edge. below. Set your rip fence at the 12" mark - this will put exactly 11" of space between your standoff block and the dado stack. That's right where you want the divider to be. Put a side piece against your miter gauge and against the standoff block. Cut the dado in the side piece and repeat the procedure for the other side. The joinery for your sides is now complete. Tricky Notches As you look at the cutting list for this project, you might notice that the divider is longer than the interior top and bottom pieces. It also runs the entire width of the clock's case and stands proud of the doors when they're closed. To make the divider do this, you need to notch the ends so they fit inside the dados and the front rounded-over edge then extends to the edges of the carcase. This is actually easy. Here's the trick: First rout the V4"-radius roundover on a long edge of the divider, as shown in the drawing at right. Next, using your table saw, rip 1" of this detailed edge off of the divider. Crosscut the remaining piece to 91/2" long - the same length as the interior top and bottom pieces. Now glue the 1"-wide strip back to the divider. If you do it this way you will have perfect notches on both ends and the grain will match all the way across the width of the board. (You'll use this same trick to notch the exterior top around the hanger piece.) Before you assemble the carcase, plane or sand the interior surfaces so they are ready to finish. If you are using sandpaper, sand up to #220-grit. Then perform a dry run without glue to make sure you have the clamps you need and your joints close tightly. When you're satisfied, spread a thin film of glue in the rabbets and dados and put the interior top, bottom and divider in place. Clamp the second side in place and ensure all the parts of the carcase are flush at front and back. Compare the diagonal measurements of the clamped-up case to ensure it's square and wait for at least 30 minutes for the glue to dry. Then take the case out of the clamps and secure the joints with nails. (Tip: If you drive the nails in at slightly different angles, you'll wedge the parts together.) Adding the Top and Bottom The exterior top and bottom pieces are merely glued to the Fence T "t Router table surface Divider profile _^ completed carcase. But before you can do this, you need to do some machining to add the beaded detail on three edges and create a notch in the exterior top piece for the half-round hanger. Begin by ripping a 3-4"-wide strip off the back edge of your exterior top piece. Take this narrow strip and crosscut 3V4" off each end. Now you can tape and glue these pieces back to the exterior top piece to create a notch in the center for the hanger. Next you can rout the beaded detail on the ends and front edge of the exterior top and bottom. A standoff block clamped to the fence as shown allows you to use the rip fence and miter gauge in tandem and reduces the chance of a nasty kickback. You could wait until the carcase is assembled to glue the detail back in place, but I find that you can get a tighter joint if you do this before the case is glued up. If your joint is smooth, you should be able to use painter's tape to position the detail to the remainder of the divider before clamping. 56 Popular Woodworking August 2004 |


