Popular Woodworking 2004-08 № 142, страница 60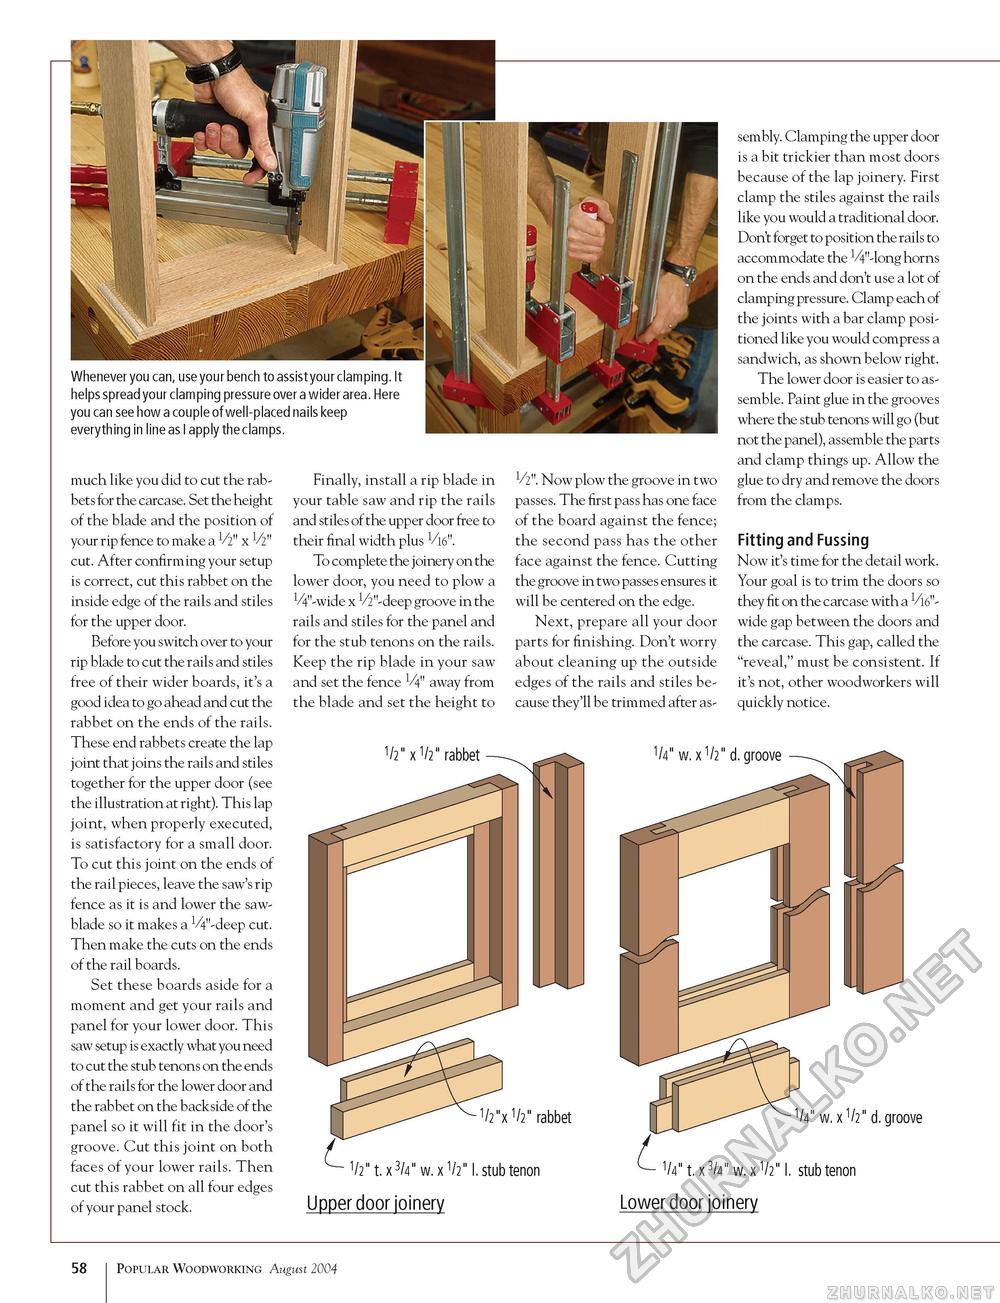
much like you did to cut the rabbets for the carcase. Set the height of the blade and the position of your rip fence to make a V2" x V2" cut. After confirming your setup is correct, cut this rabbet on the inside edge of the rails and stiles for the upper door. Before you switch over to your rip blade to cut the rails and stiles free of their wider boards, it's a good idea to go ahead and cut the rabbet on the ends of the rails. These end rabbets create the lap joint that joins the rails and stiles together for the upper door (see the illustration at right). This lap joint, when properly executed, is satisfactory for a small door. To cut this joint on the ends of the rail pieces, leave the saw's rip fence as it is and lower the saw-blade so it makes a V^'-deep cut. Then make the cuts on the ends of the rail boards. Set these boards aside for a moment and get your rails and panel for your lower door. This saw setup is exactly what you need to cut the stub tenons on the ends of the rails for the lower door and the rabbet on the backside of the panel so it will fit in the door's groove. Cut this joint on both faces of your lower rails. Then cut this rabbet on all four edges of your panel stock. Finally, install a rip blade in your table saw and rip the rails and stiles of the upper door free to their final width plus V16". To complete the joinery on the lower door, you need to plow a V4"-wide x V2"-deep groove in the rails and stiles for the panel and for the stub tenons on the rails. Keep the rip blade in your saw and set the fence V4" away from the blade and set the height to 1^/2". Now plow the groove in two passes. The first pass has one face of the board against the fence; the second pass has the other face against the fence. Cutting the groove in two passes ensures it will be centered on the edge. Next, prepare all your door parts for finishing. Don't worry about cleaning up the outside edges of the rails and stiles because they'll be trimmed after as sembly. Clamping the upper door is a bit trickier than most doors because of the lap joinery. First clamp the stiles against the rails like you would a traditional door. Don't forget to position the rails to accommodate the ^"-long horns on the ends and don't use a lot of clamping pressure. Clamp each of the joints with a bar clamp positioned like you would compress a sandwich, as shown below right. The lower door is easier to assemble. Paint glue in the grooves where the stub tenons will go (but not the panel), assemble the parts and clamp things up. Allow the glue to dry and remove the doors from the clamps. Fitting and Fussing Now it's time for the detail work. Your goal is to trim the doors so they fit on the carcase with a Vi6"-wide gap between the doors and the carcase. This gap, called the "reveal," must be consistent. If it's not, other woodworkers will quickly notice. Upper door joinery Lower door joinery 58 Popular Woodworking August 2004 |


