Popular Woodworking 2004-08 № 142, страница 59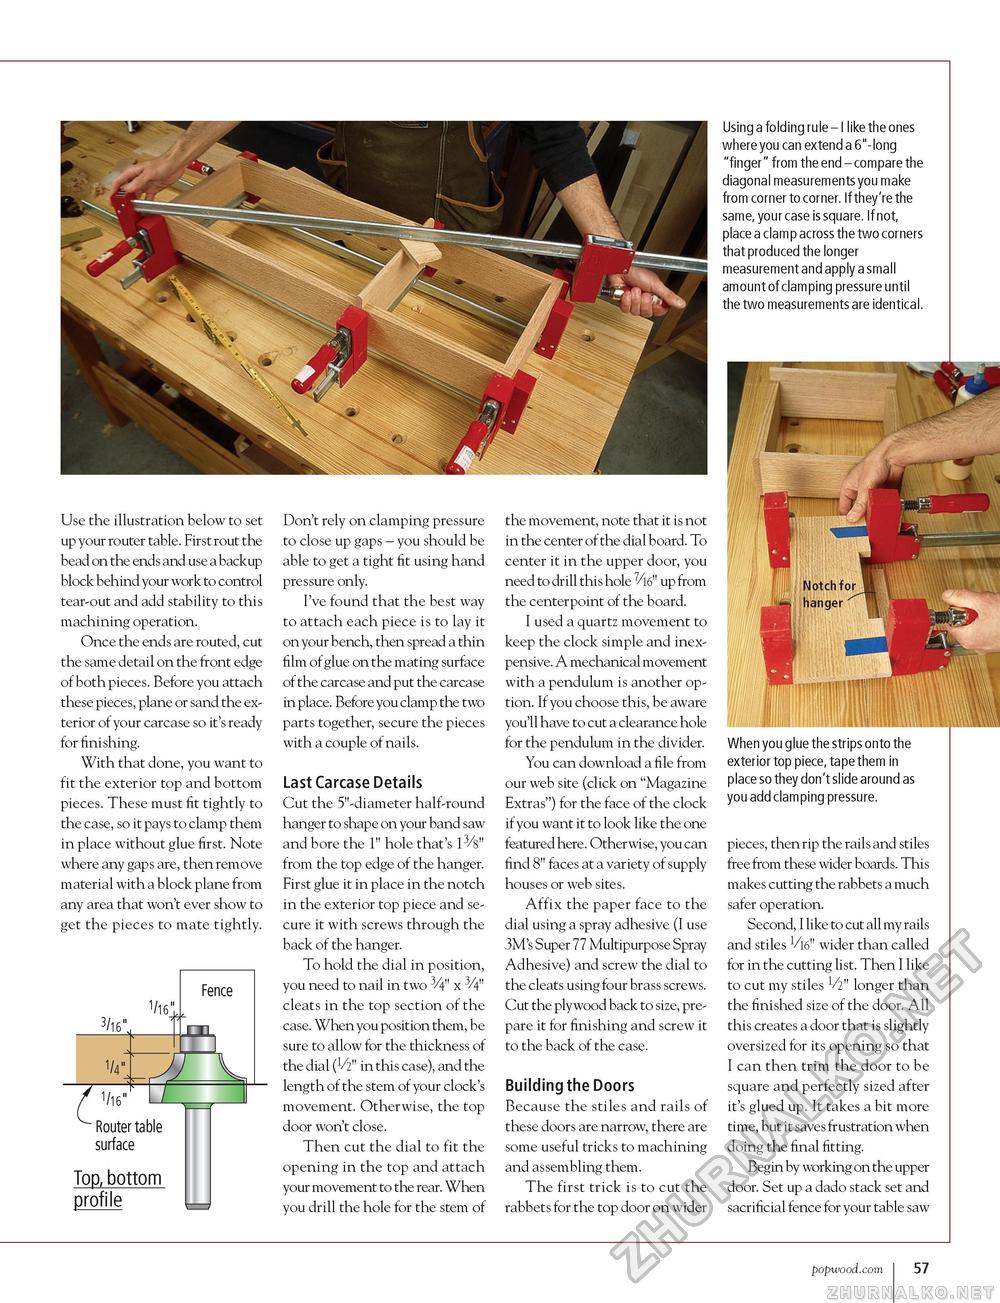
Use the illustration below to set up your router table. First rout the bead on the ends and use a backup block behind your work to control tear-out and add stability to this machining operation. Once the ends are routed, cut the same detail on the front edge of both pieces. Before you attach these pieces, plane or sand the exterior of your carcase so it's ready for finishing. With that done, you want to fit the exterior top and bottom pieces. These must fit tightly to the case, so it pays to clamp them in place without glue first. Note where any gaps are, then remove material with a block plane from any area that won't ever show to get the pieces to mate tightly. 3/16" 1/16" 1/4". Fence f 1/16" Router table surface Top, bottom profile Don't rely on clamping pressure to close up gaps - you should be able to get a tight fit using hand pressure only. I've found that the best way to attach each piece is to lay it on your bench, then spread a thin film of glue on the mating surface of the carcase and put the carcase in place. Before you clamp the two parts together, secure the pieces with a couple of nails. Last Carcase Details Cut the 5"-diameter half-round hanger to shape on your band saw and bore the l" hole that's 13/8" from the top edge of the hanger. First glue it in place in the notch in the exterior top piece and secure it with screws through the back of the hanger. To hold the dial in position, you need to nail in two 3/4" x 3/4" cleats in the top section of the case. When you position them, be sure to allow for the thickness of the dial (V2" in this case), and the length of the stem of your clock's movement. Otherwise, the top door won't close. Then cut the dial to fit the opening in the top and attach your movement to the rear. When you drill the hole for the stem of the movement, note that it is not in the center of the dial board. To center it in the upper door, you need to drill this hole 7/l6" up from the centerpoint of the board. I used a quartz movement to keep the clock simple and inexpensive. A mechanical movement with a pendulum is another option. If you choose this, be aware you'll have to cut a clearance hole for the pendulum in the divider. You can download a file from our web site (click on "Magazine Extras") for the face of the clock if you want it to look like the one featured here. Otherwise, you can find 8" faces at a variety of supply houses or web sites. Affix the paper face to the dial using a spray adhesive (I use 3M's Super 77 Multipurpose Spray Adhesive) and screw the dial to the cleats using four brass screws. Cut the plywood back to size, prepare it for finishing and screw it to the back of the case. Building the Doors Because the stiles and rails of these doors are narrow, there are some useful tricks to machining and assembling them. The first trick is to cut the rabbets for the top door on wider Using a folding rule - I like the ones where you can extend a 6"-long "finger" from the end - compare the diagonal measurements you make from corner to corner. If they're the same, your case is square. If not, place a clamp across the two corners that produced the longer measurement and apply a small amount of clamping pressure until the two measurements are identical. When you glue the strips onto the exterior top piece, tape them in place so they don't slide around as you add clamping pressure. pieces, then rip the rails and stiles free from these wider boards. This makes cutting the rabbets a much safer operation. Second, I like to cut all my rails and stiles Vl6" wider than called for in the cutting list. Then I like to cut my stiles V2" longer than the finished size of the door. All this creates a door that is slightly oversized for its opening so that I can then trim the door to be square and perfectly sized after it's glued up. It takes a bit more time, but it saves frustration when doing the final fitting. Begin by working on the upper door. Set up a dado stack set and sacrificial fence for your table saw popwood.com 57 |


