Popular Woodworking 2004-10 № 143, страница 77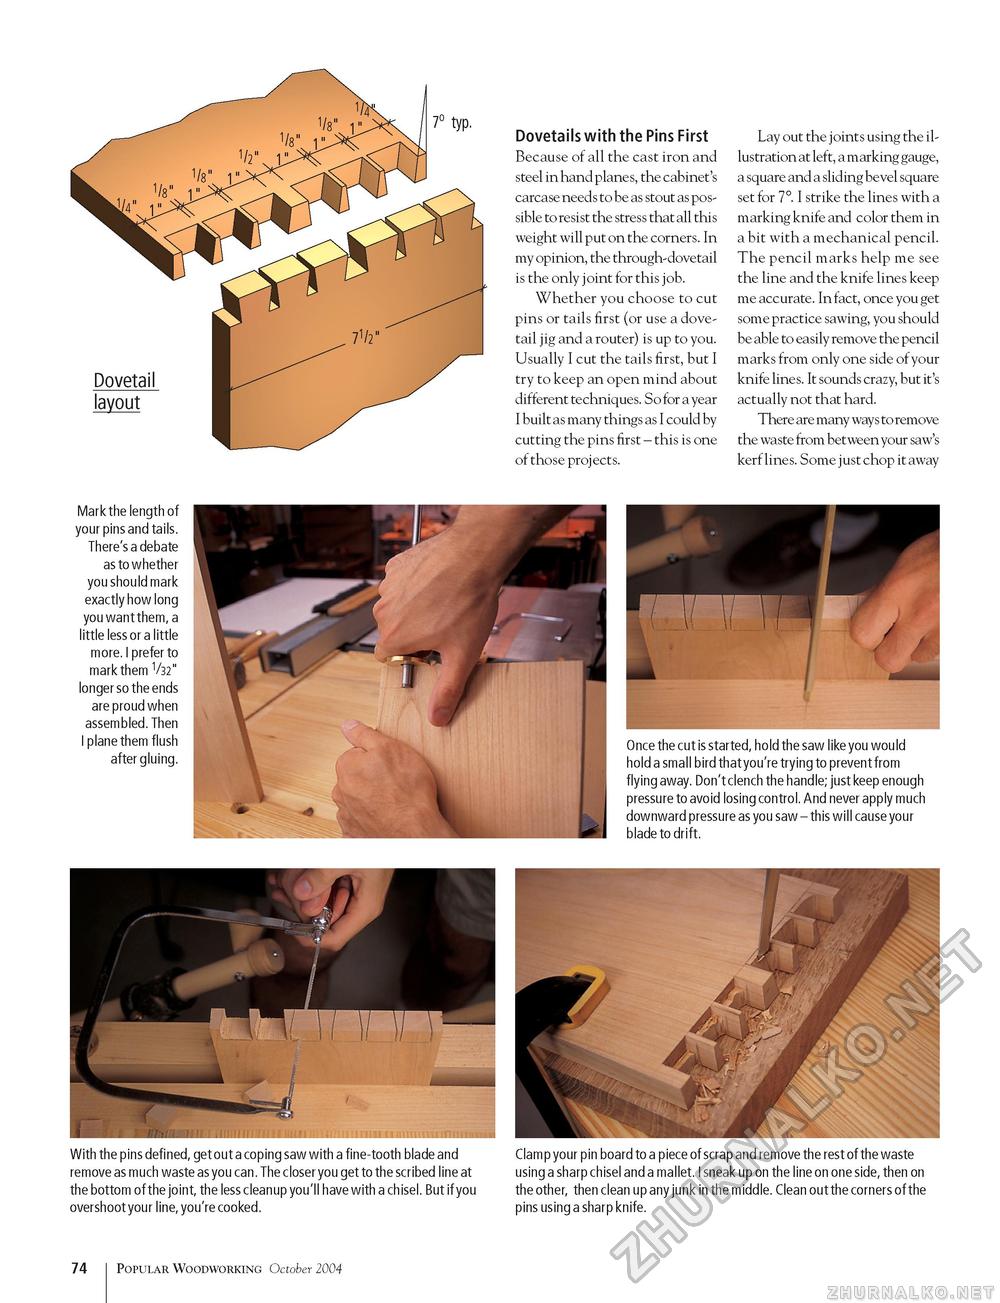
Dovetails with the Pins First Because of all the cast iron and steel in hand planes, the cabinet's carcase needs to be as stout as possible to resist the stress that all this weight will put on the corners. In my opinion, the through-dovetail is the only joint for this job. Whether you choose to cut pins or tails first (or use a dovetail jig and a router) is up to you. Usually I cut the tails first, but I try to keep an open mind about different techniques. So for a year I built as many things as I could by cutting the pins first - this is one of those projects. Lay out the joints using the illustration at left, a marking gauge, a square and a sliding bevel square set for 7°. I strike the lines with a marking knife and color them in a bit with a mechanical pencil. The pencil marks help me see the line and the knife lines keep me accurate. In fact, once you get some practice sawing, you should be able to easily remove the pencil marks from only one side of your knife lines. It sounds crazy, but it's actually not that hard. There are many ways to remove the waste from between your saw's kerf lines. Some just chop it away Mark the length of your pins and tails. There's a debate as to whether you should mark exactly how long you want them, a little less or a little more. I prefer to mark them V32" longer so the ends are proud when assembled. Then I plane them flush after gluing. Once the cut is started, hold the saw like you would hold a small bird that you're trying to prevent from flying away. Don't clench the handle; just keep enough pressure to avoid losing control. And never apply much downward pressure as you saw - this will cause your blade to drift. With the pins defined, get out a coping saw with a fine-tooth blade and remove as much waste as you can. The closer you get to the scribed line at the bottom of the joint, the less cleanup you'll have with a chisel. But if you overshoot your line, you're cooked. Clamp your pin board to a piece of scrap and remove the rest of the waste using a sharp chisel and a mallet. I sneak up on the line on one side, then on the other, then clean up any junk in the middle. Clean out the corners of the pins using a sharp knife. 74 Popular Woodworking October 2004 |


