Popular Woodworking 2004-10 № 143, страница 79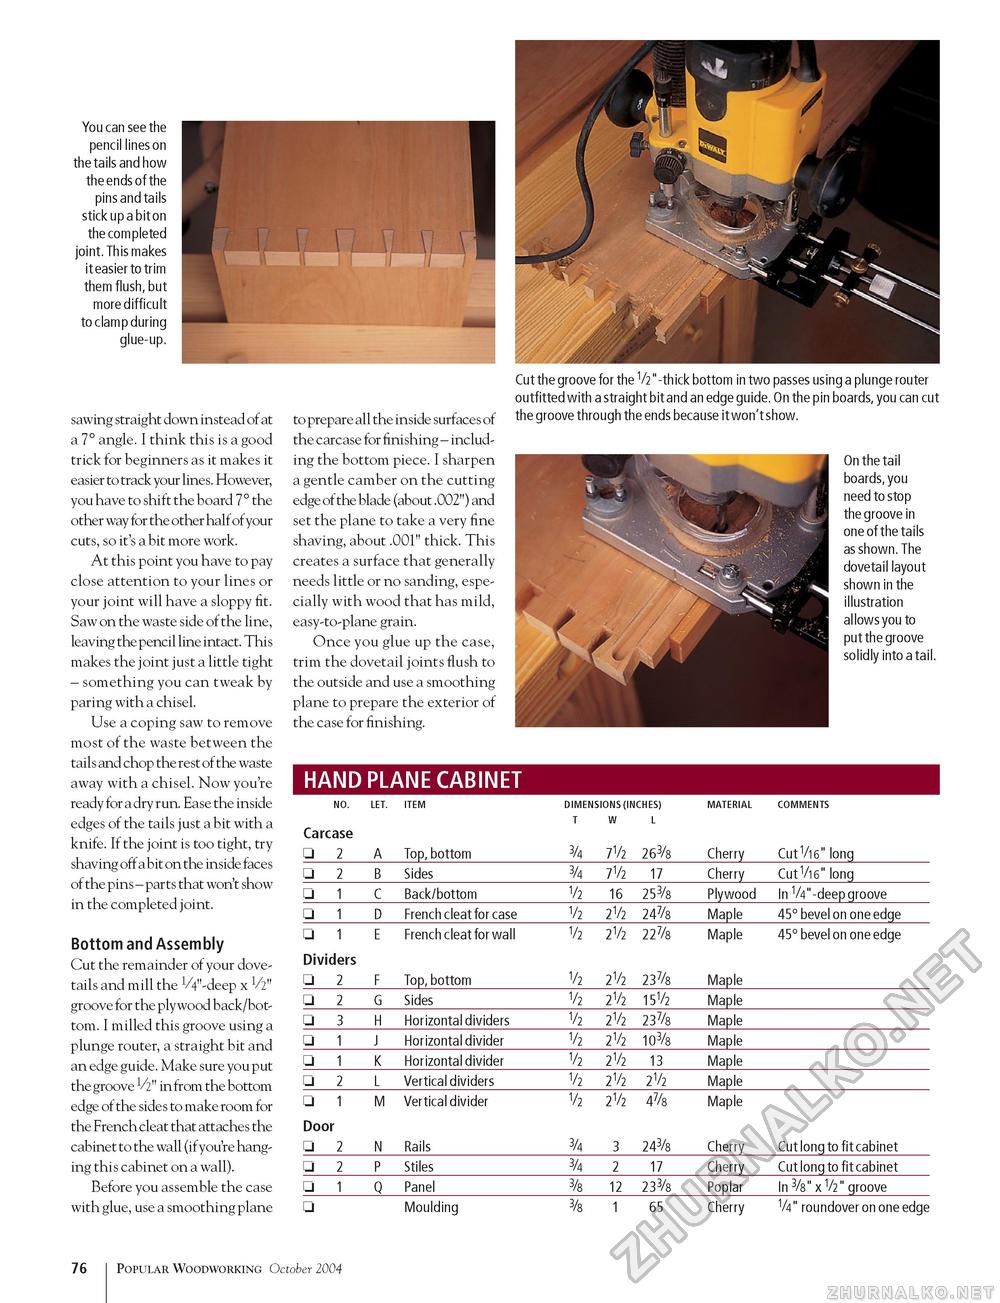
You can see the pencil lines on the tails and how the ends of the pins and tails stick up a bit on the completed joint. This makes it easier to trim them flush, but more difficult to clamp during glue-up. sawing straight down instead of at a 7° angle. I think this is a good trick for beginners as it makes it easier to track your lines. However, you have to shift the board 7 ° the other way for the other half of your cuts, so it's a bit more work. At this point you have to pay close attention to your lines or your joint will have a sloppy fit. Saw on the waste side of the line, leaving the pencil line intact. This makes the joint just a little tight - something you can tweak by paring with a chisel. Use a coping saw to remove most of the waste between the tails and chop the rest of the waste away with a chisel. Now you're ready for a dry run. Ease the inside edges of the tails just a bit with a knife. If the joint is too tight, try shaving off a bit on the inside faces of the pins - parts that won't show in the completed joint. Bottom and Assembly Cut the remainder of your dovetails and mill the VV'-deep x V2" groove for the plywood back/bottom. I milled this groove using a plunge router, a straight bit and an edge guide. Make sure you put the groove V2" in from the bottom edge of the sides to make room for the French cleat that attaches the cabinet to the wall (ifyou're hanging this cabinet on a wall). Before you assemble the case with glue, use a smoothing plane to prepare all the inside surfaces of the carcase for finishing - including the bottom piece. I sharpen a gentle camber on the cutting edge of the blade (about .002") and set the plane to take a very fine shaving, about .001" thick. This creates a surface that generally needs little or no sanding, especially with wood that has mild, easy-to-plane grain. Once you glue up the case, trim the dovetail joints flush to the outside and use a smoothing plane to prepare the exterior of the case for finishing. HAND PLANE CABINET Cut the groove for the V2 "-thick bottom in two passes using a plunge router outfitted with a straight bit and an edge guide. On the pin boards, you can cut the groove through the ends because it won't show. On the tail boards, you need to stop the groove in one of the tails as shown. The dovetail layout shown in the illustration allows you to put the groove solidly into a tail.
76 Popular Woodworking October 2004 |
||||||||||||||||||||||||||||||||||||||||||||||||||||||||||||||||||||||||||||||||||||||||||||||||||||||||||||||||||||||||||||||||||||||||


