Popular Woodworking 2004-10 № 143, страница 81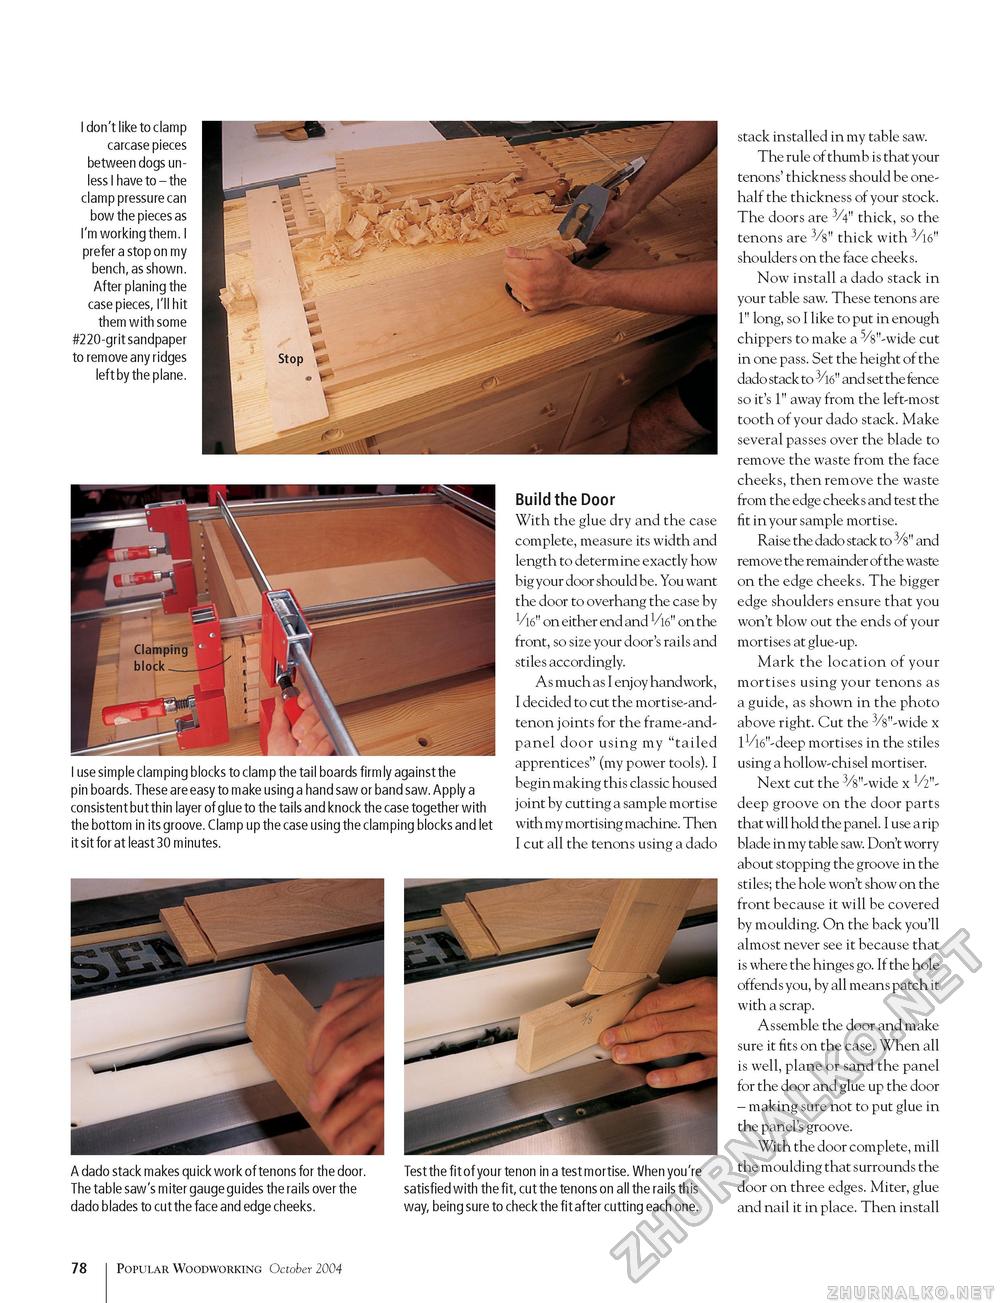
I don't like to clamp carcase pieces between dogs unless I have to - the clamp pressure can bow the pieces as I'm working them. I prefer a stop on my bench, as shown. After planing the case pieces, I'll hit them with some #220-grit sandpaper to remove any ridges left by the plane. I use simple clamping blocks to clamp the tail boards firmly against the pin boards. These are easy to make using a hand saw or band saw. Apply a consistent but thin layer of glue to the tails and knock the case together with the bottom in its groove. Clamp up the case using the clamping blocks and let it sit for at least 30 minutes. Build the Door With the glue dry and the case complete, measure its width and length to determine exactly how big your door should be. You want the door to overhang the case by VW' on either end and Vl6" on the front, so size your door's rails and stiles accordingly. As much as I enjoy handwork, I decided to cut the mortise-and-tenon joints for the frame-and-panel door using my "tailed apprentices" (my power tools). I begin making this classic housed joint by cutting a sample mortise with my mortising machine. Then I cut all the tenons using a dado A dado stack makes quick work of tenons for the door. The table saw's miter gauge guides the rails over the dado blades to cut the face and edge cheeks. Test the fit of your tenon in a test mortise. When you're satisfied with the fit, cut the tenons on all the rails this way, being sure to check the fit after cutting each one. stack installed in my table saw. The rule of thumb is that your tenons' thickness should be one-half the thickness of your stock. The doors are 3/4" thick, so the tenons are 3/s" thick with 3/l6" shoulders on the face cheeks. Now install a dado stack in your table saw. These tenons are l" long, so I like to put in enough chippers to make a 5/8"-wide cut in one pass. Set the height of the dado stack to 3/l6" and set the fence so it's l" away from the left-most tooth of your dado stack. Make several passes over the blade to remove the waste from the face cheeks, then remove the waste from the edge cheeks and test the fit in your sample mortise. Raise the dado stack to 3/s" and remove the remainder of the waste on the edge cheeks. The bigger edge shoulders ensure that you won't blow out the ends of your mortises at glue-up. Mark the location of your mortises using your tenons as a guide, as shown in the photo above right. Cut the 3/s"-wide x lVW-deep mortises in the stiles using a hollow-chisel mortiser. Next cut the 3/s"-wide x Vi"-deep groove on the door parts that will hold the panel. I use a rip blade in my table saw. Don't worry about stopping the groove in the stiles; the hole won't show on the front because it will be covered by moulding. On the back you'll almost never see it because that is where the hinges go. If the hole offends you, by all means patch it with a scrap. Assemble the door and make sure it fits on the case. When all is well, plane or sand the panel for the door and glue up the door - making sure not to put glue in the panel's groove. With the door complete, mill the moulding that surrounds the door on three edges. Miter, glue and nail it in place. Then install 78 Popular Woodworking October 2004 |


