Popular Woodworking 2004-10 № 143, страница 82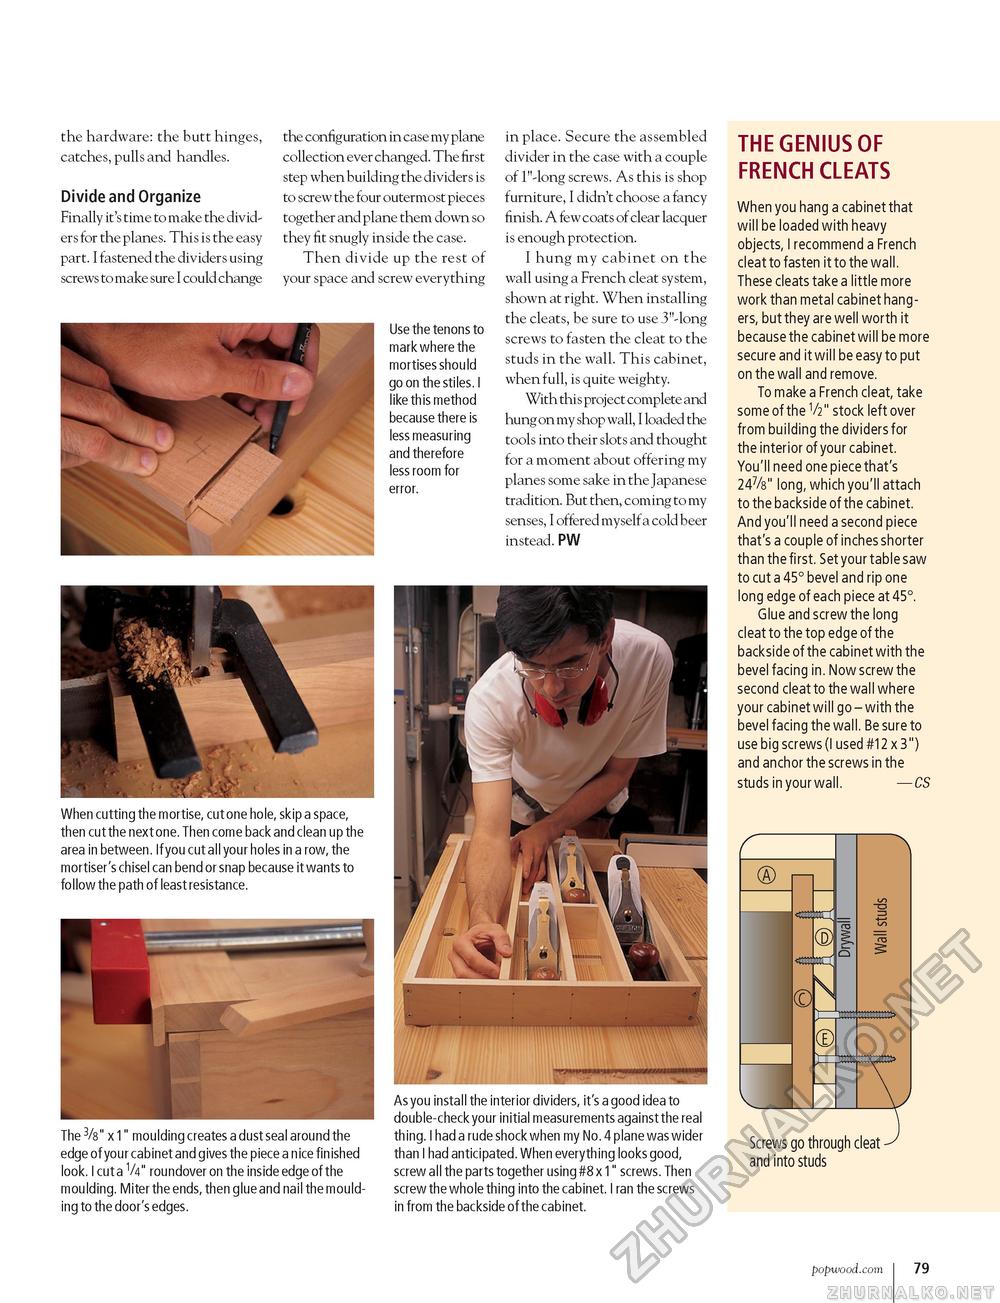
the hardware: the butt hinges, catches, pulls and handles. Divide and Organize Finally it's time to make the dividers for the planes. This is the easy part. I fastened the dividers using screws to make sure I could change the configuration in case my plane collection ever changed. The first step when building the dividers is to screw the four outermost pieces together and plane them down so they fit snugly inside the case. Then divide up the rest of your space and screw everything in place. Secure the assembled divider in the case with a couple of l"-long screws. As this is shop furniture, I didn't choose a fancy finish. A few coats of clear lacquer is enough protection. I hung my cabinet on the wall using a French cleat system, shown at right. When installing the cleats, be sure to use 3"-long screws to fasten the cleat to the studs in the wall. This cabinet, when full, is quite weighty. With this project complete and hung on my shop wall, I loaded the tools into their slots and thought for a moment about offering my planes some sake in the Japanese tradition. But then, coming to my senses, I offered myself a cold beer instead. PW Use the tenons to mark where the mortises should go on the stiles. I like this method because there is less measuring and therefore less room for error. When cutting the mortise, cut one hole, skip a space, then cut the next one. Then come back and clean up the area in between. If you cut all your holes in a row, the mortiser's chisel can bend or snap because it wants to follow the path of least resistance. The 3/8" x 1" moulding creates a dust seal around the edge of your cabinet and gives the piece a nice finished look. I cut a V4" roundover on the inside edge of the moulding. Miter the ends, then glue and nail the moulding to the door's edges. As you install the interior dividers, it's a good idea to double-check your initial measurements against the real thing. I had a rude shock when my No. 4 plane was wider than I had anticipated. When everything looks good, screw all the parts together using #8 x 1" screws. Then screw the whole thing into the cabinet. I ran the screws in from the backside of the cabinet. THE GENIUS OF FRENCH CLEATS When you hang a cabinet that will be loaded with heavy objects, I recommend a French cleat to fasten it to the wall. These cleats take a little more work than metal cabinet hangers, but they are well worth it because the cabinet will be more secure and it will be easy to put on the wall and remove. To make a French cleat, take some of the V2" stock left over from building the dividers for the interior of your cabinet. You'll need one piece that's 247/8" long, which you'll attach to the backside of the cabinet. And you'll need a second piece that's a couple of inches shorter than the first. Set your table saw to cut a 45° bevel and rip one long edge of each piece at 45°. Glue and screw the long cleat to the top edge of the backside of the cabinet with the bevel facing in. Now screw the second cleat to the wall where your cabinet will go - with the bevel facing the wall. Be sure to use big screws (I used #12 x 3") and anchor the screws in the studs in your wall. —CS
Screws go through cleat and into studs popwood.com 79 |
|||||||||||||||||||||||||||||||||||


