Popular Woodworking 2004-11 № 144, страница 79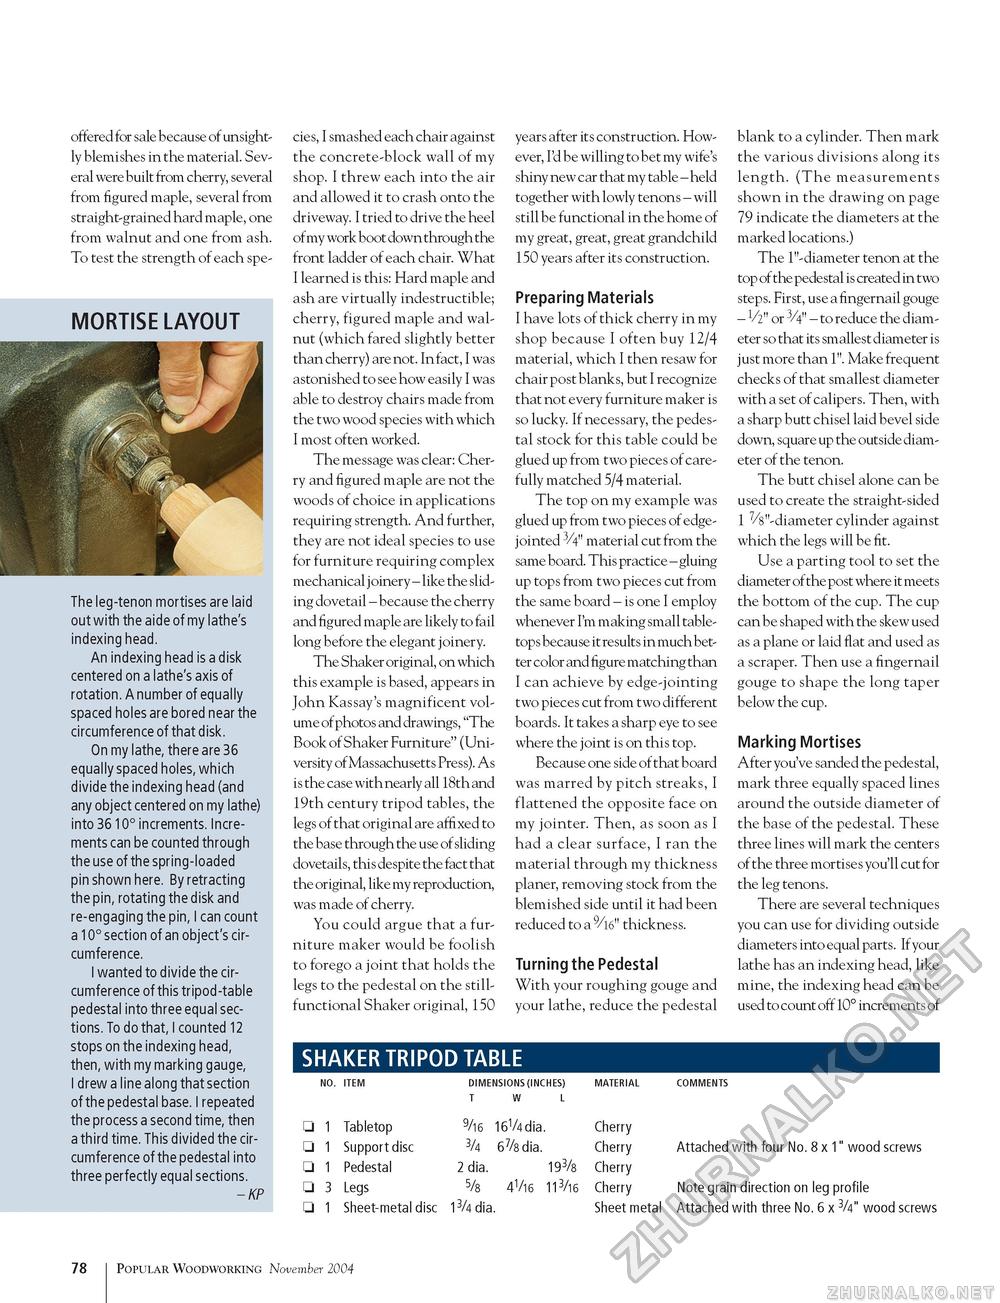
offered for sale because of unsightly blemishes in the material. Several were built from cherry, several from figured maple, several from straight-grained hard maple, one from walnut and one from ash. To test the strength of each spe- MORTISE LAYOUT The leg-tenon mortises are laid out with the aide of my lathe's indexing head. An indexing head is a disk centered on a lathe's axis of rotation. A number of equally spaced holes are bored near the circumference of that disk. On my lathe, there are 36 equally spaced holes, which divide the indexing head (and any object centered on my lathe) into 36 10° increments. Increments can be counted through the use of the spring-loaded pin shown here. By retracting the pin, rotating the disk and re-engaging the pin, I can count a 10° section of an object's circumference. I wanted to divide the circumference of this tripod-table pedestal into three equal sections. To do that, I counted 12 stops on the indexing head, then, with my marking gauge, I drew a line along that section of the pedestal base. I repeated the process a second time, then a third time. This divided the circumference of the pedestal into three perfectly equal sections. - KP cies, I smashed each chair against the concrete-block wall of my shop. I threw each into the air and allowed it to crash onto the driveway. I tried to drive the heel of my work boot down through the front ladder of each chair. What I learned is this: Hard maple and ash are virtually indestructible; cherry, figured maple and walnut (which fared slightly better than cherry) are not. In fact, I was astonished to see how easily I was able to destroy chairs made from the two wood species with which I most often worked. The message was clear: Cherry and figured maple are not the woods of choice in applications requiring strength. And further, they are not ideal species to use for furniture requiring complex mechanical joinery - like the sliding dovetail - because the cherry and figured maple are likely to fail long before the elegant joinery. The Shaker original, on which this example is based, appears in John Kassay's magnificent volume of photos and drawings, "The Book of Shaker Furniture" (University of Massachusetts Press). As is the case with nearly all 18th and 19th century tripod tables, the legs of that original are affixed to the base through the use of sliding dovetails, this despite the fact that the original, like my reproduction, was made of cherry. You could argue that a furniture maker would be foolish to forego a joint that holds the legs to the pedestal on the still-functional Shaker original, 150 years after its construction. However, I'd be willing to bet my wife's shiny new car that my table - held together with lowly tenons - will still be functional in the home of my great, great, great grandchild 150 years after its construction. Preparing Materials I have lots of thick cherry in my shop because I often buy 12/4 material, which I then resaw for chair post blanks, but I recognize that not every furniture maker is so lucky. If necessary, the pedestal stock for this table could be glued up from two pieces of carefully matched 5/4 material. The top on my example was glued up from two pieces of edge-jointed 3/4" material cut from the same board. This practice - gluing up tops from two pieces cut from the same board - is one I employ whenever I'm making small table-tops because it results in much better color and figure matching than I can achieve by edge-jointing two pieces cut from two different boards. It takes a sharp eye to see where the joint is on this top. Because one side of that board was marred by pitch streaks, I flattened the opposite face on my jointer. Then, as soon as I had a clear surface, I ran the material through my thickness planer, removing stock from the blemished side until it had been reduced to a 9/16" thickness. Turning the Pedestal With your roughing gouge and your lathe, reduce the pedestal blank to a cylinder. Then mark the various divisions along its length. (The measurements shown in the drawing on page 79 indicate the diameters at the marked locations.) The 1"-diameter tenon at the top of the pedestal is created in two steps. First, use a fingernail gouge - V2" or 3/4" - to reduce the diameter so that its smallest diameter is just more than 1". Make frequent checks of that smallest diameter with a set of calipers. Then, with a sharp butt chisel laid bevel side down, square up the outside diameter of the tenon. The butt chisel alone can be used to create the straight-sided 1 7/8"-diameter cylinder against which the legs will be fit. Use a parting tool to set the diameter of the post where it meets the bottom of the cup. The cup can be shaped with the skew used as a plane or laid flat and used as a scraper. Then use a fingernail gouge to shape the long taper below the cup. Marking Mortises After you've sanded the pedestal, mark three equally spaced lines around the outside diameter of the base of the pedestal. These three lines will mark the centers of the three mortises you'll cut for the leg tenons. There are several techniques you can use for dividing outside diameters into equal parts. If your lathe has an indexing head, like mine, the indexing head can be used to count off 10° increments of SHAKER TRIPOD TABLE DIMENSIONS (INCHES) T W L DIMENSIONS (INCHES) T W L NO. ITEM
Attached with four No. 8 x 1" wood screws Note grain direction on leg profile Attached with three No. 6 x 3/4" wood screws Attached with four No. 8 x 1" wood screws Note grain direction on leg profile Attached with three No. 6 x 3/4" wood screws NO. ITEM 78 Popular Woodworking November 2004 |


