Popular Woodworking 2004-11 № 144, страница 81
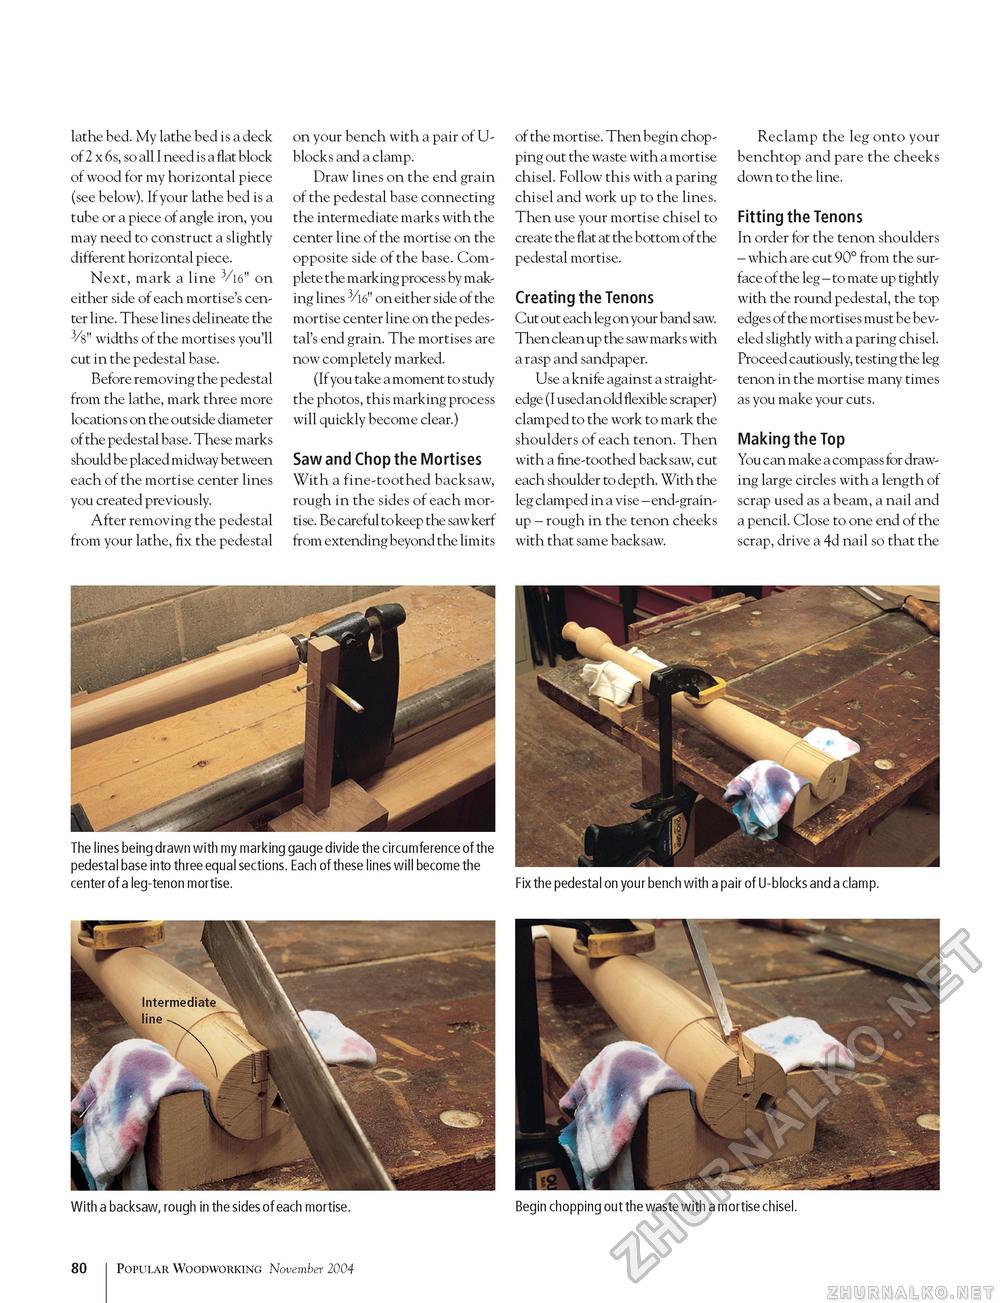
lathe bed. My lathe bed is a deck of 2 x 6s, so all I need is a flat block of wood for my horizontal piece (see below). If your lathe bed is a tube or a piece of angle iron, you may need to construct a slightly different horizontal piece. Next, mark a line 3/16" on either side of each mortise's center line. These lines delineate the 3/8" widths of the mortises you'll cut in the pedestal base. Before removing the pedestal from the lathe, mark three more locations on the outside diameter of the pedestal base. These marks should be placed midway between each of the mortise center lines you created previously. After removing the pedestal from your lathe, fix the pedestal on your bench with a pair of U-blocks and a clamp. Draw lines on the end grain of the pedestal base connecting the intermediate marks with the center line of the mortise on the opposite side of the base. Complete the marking process by making lines 3/16" on either side of the mortise center line on the pedestal's end grain. The mortises are now completely marked. (If you take a moment to study the photos, this marking process will quickly become clear.) Saw and Chop the Mortises With a fine-toothed backsaw, rough in the sides of each mortise. Be careful to keep the saw kerf from extending beyond the limits of the mortise. Then begin chopping out the waste with a mortise chisel. Follow this with a paring chisel and work up to the lines. Then use your mortise chisel to create the flat at the bottom of the pedestal mortise. Creating the Tenons Cut out each leg on your band saw. Then clean up the saw marks with a rasp and sandpaper. Use a knife against a straightedge (I used an old flexible scraper) clamped to the work to mark the shoulders of each tenon. Then with a fine-toothed backsaw, cut each shoulder to depth. With the leg clamped in a vise - end-grain-up - rough in the tenon cheeks with that same backsaw. Reclamp the leg onto your benchtop and pare the cheeks down to the line. Fitting the Tenons In order for the tenon shoulders - which are cut 90° from the surface of the leg - to mate up tightly with the round pedestal, the top edges of the mortises must be beveled slightly with a paring chisel. Proceed cautiously, testing the leg tenon in the mortise many times as you make your cuts. Making the Top You can make a compass for drawing large circles with a length of scrap used as a beam, a nail and a pencil. Close to one end of the scrap, drive a 4d nail so that the The lines being drawn with my marking gauge divide the circumference of the pedestal base into three equal sections. Each of these lines will become the center of a leg-tenon mortise. Fix the pedestal on your bench with a pair of U-blocks and a clamp. With a backsaw, rough in the sides of each mortise. Begin chopping out the waste with a mortise chisel. 80 Popular Woodworking November 2004 |


