Popular Woodworking 2004-11 № 144, страница 85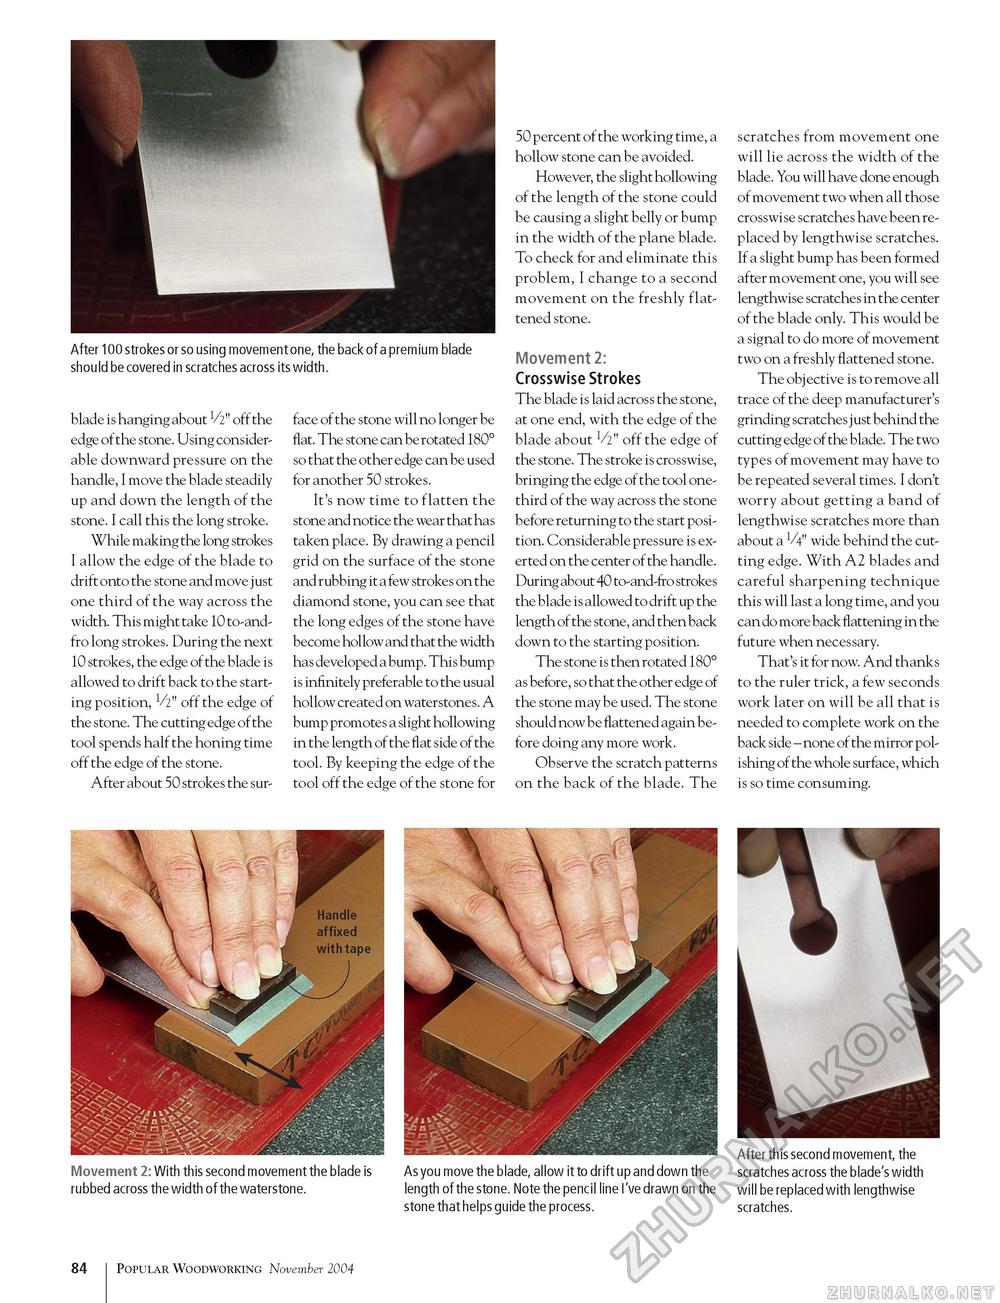
After 100 strokes or so using movement one, the back of a premium blade should be covered in scratches across its width. blade is hanging about V2" off the edge of the stone. Using considerable downward pressure on the handle, I move the blade steadily up and down the length of the stone. I call this the long stroke. While making the long strokes I allow the edge of the blade to drift onto the stone and move just one third of the way across the width. This might take 10 to-and-fro long strokes. During the next 10 strokes, the edge of the blade is allowed to drift back to the starting position, V2" off the edge of the stone. The cutting edge of the tool spends half the honing time off the edge of the stone. After about 50 strokes the sur face of the stone will no longer be flat. The stone can be rotated 180° so that the other edge can be used for another 50 strokes. It's now time to flatten the stone and notice the wear that has taken place. By drawing a pencil grid on the surface of the stone and rubbing it a few strokes on the diamond stone, you can see that the long edges of the stone have become hollow and that the width has developed a bump. This bump is infinitely preferable to the usual hollow created on waterstones. A bump promotes a slight hollowing in the length of the flat side of the tool. By keeping the edge of the tool off the edge of the stone for 50 percent of the working time, a hollow stone can be avoided. However, the slight hollowing of the length of the stone could be causing a slight belly or bump in the width of the plane blade. To check for and eliminate this problem, I change to a second movement on the freshly flattened stone. Movement 2: Crosswise Strokes The blade is laid across the stone, at one end, with the edge of the blade about 1/2" off the edge of the stone. The stroke is crosswise, bringing the edge of the tool one-third of the way across the stone before returning to the start position. Considerable pressure is exerted on the center of the handle. During about 40 to-and-fro strokes the blade is allowed to drift up the length of the stone, and then back down to the starting position. The stone is then rotated 180° as before, so that the other edge of the stone may be used. The stone should now be flattened again before doing any more work. Observe the scratch patterns on the back of the blade. The scratches from movement one will lie across the width of the blade. You will have done enough of movement two when all those crosswise scratches have been replaced by lengthwise scratches. If a slight bump has been formed after movement one, you will see lengthwise scratches in the center of the blade only. This would be a signal to do more of movement two on a freshly flattened stone. The objective is to remove all trace of the deep manufacturer's grinding scratches j ust behind the cutting edge of the blade. The two types of movement may have to be repeated several times. I don't worry about getting a band of lengthwise scratches more than about a V4" wide behind the cutting edge. With A2 blades and careful sharpening technique this will last a long time, and you can do more back flattening in the future when necessary. That's it for now. And thanks to the ruler trick, a few seconds work later on will be all that is needed to complete work on the back side - none of the mirror polishing of the whole surface, which is so time consuming. Movement 2: With this second movement the blade is rubbed across the width of the waterstone. As you move the blade, allow it to drift up and down the After this second movement, the scratches across the blade's width length of the stone. Note the pencil line I've drawn on the will be replaced with lengthwise stone that helps guide the process. scratches. 84 Popular Woodworking November 2004 |


