Popular Woodworking 2004-11 № 144, страница 95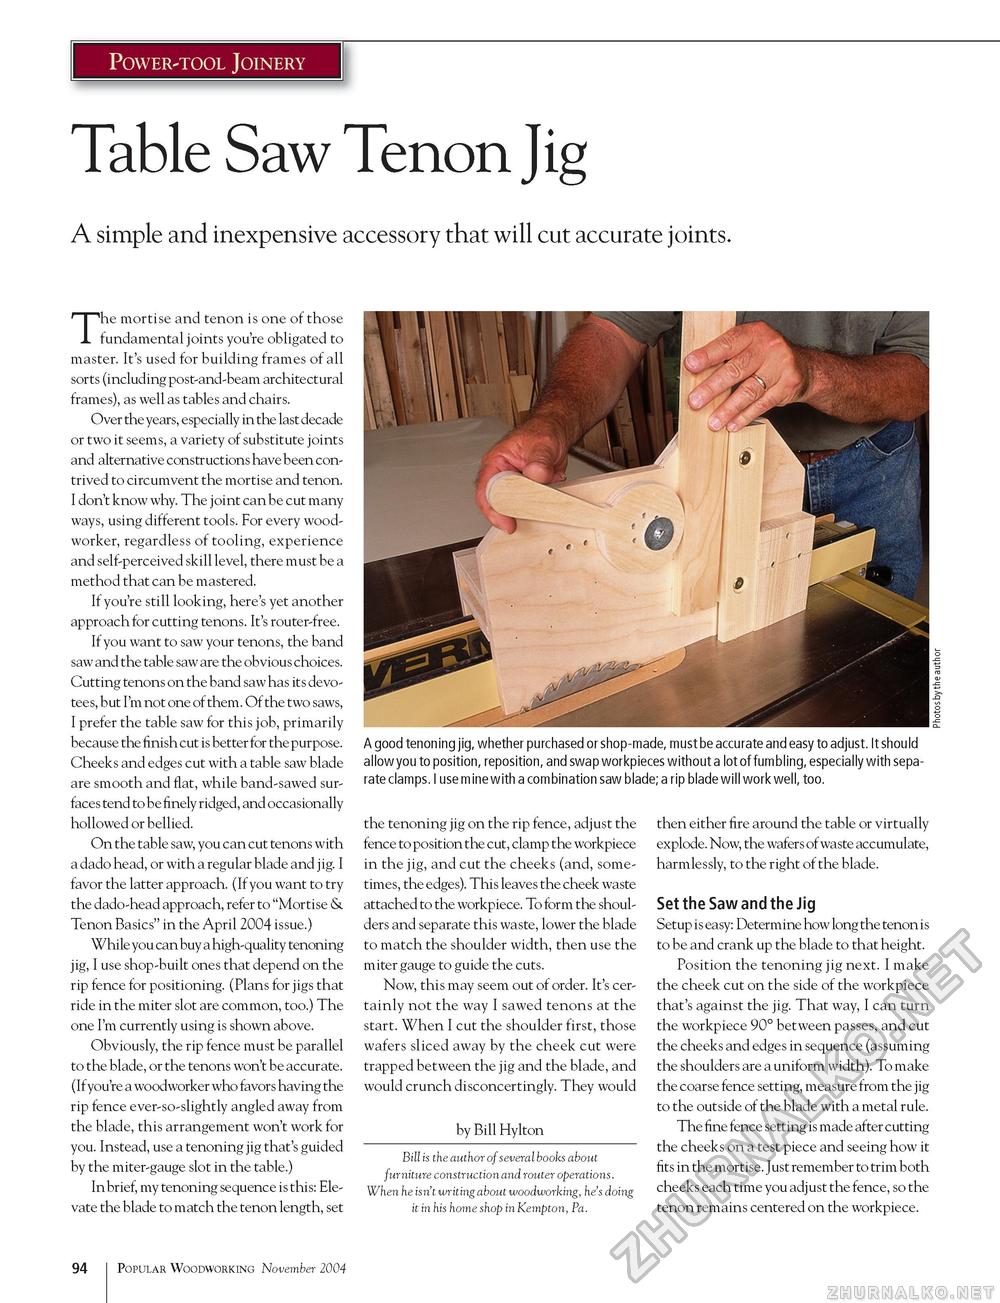
Power-tool Joinery Table Saw Tenon Jig A simple and inexpensive accessory that will cut accurate joints. The mortise and tenon is one of those fundamental joints you're obligated to master. It's used for building frames of all sorts (including post-and-beam architectural frames), as well as tables and chairs. Over the years, especially in the last decade or two it seems, a variety of substitute joints and alternative constructions have been contrived to circumvent the mortise and tenon. I don't know why. The joint can be cut many ways, using different tools. For every woodworker, regardless of tooling, experience and self-perceived skill level, there must be a method that can be mastered. If you're still looking, here's yet another approach for cutting tenons. It's router-free. If you want to saw your tenons, the band saw and the table saw are the obvious choices. Cutting tenons on the band saw has its devotees, but I'm not one of them. Of the two saws, I prefer the table saw for this job, primarily because the finish cut is better for the purpose. Cheeks and edges cut with a table saw blade are smooth and flat, while band-sawed surfaces tend to be finely ridged, and occasionally hollowed or bellied. On the table saw, you can cut tenons with a dado head, or with a regular blade and j ig. I favor the latter approach. (If you want to try the dado-head approach, refer to "Mortise & Tenon Basics" in the April 2004 issue.) While you can buy a high-quality tenoning jig, I use shop-built ones that depend on the rip fence for positioning. (Plans for jigs that ride in the miter slot are common, too.) The one I'm currently using is shown above. Obviously, the rip fence must be parallel to the blade, or the tenons won't be accurate. (If you're a woodworker who favors having the rip fence ever-so-slightly angled away from the blade, this arrangement won't work for you. Instead, use a tenoning jig that's guided by the miter-gauge slot in the table.) In brief, my tenoning sequence is this: Elevate the blade to match the tenon length, set A good tenoning jig, whether purchased or shop-made, must be accurate and easy to adjust. It should allow you to position, reposition, and swap workpieces without a lot of fumbling, especially with separate clamps. I use mine with a combination saw blade; a rip blade will work well, too. the tenoning jig on the rip fence, adjust the fence to position the cut, clamp the workpiece in the jig, and cut the cheeks (and, sometimes, the edges). This leaves the cheek waste attached to the workpiece. To form the shoulders and separate this waste, lower the blade to match the shoulder width, then use the miter gauge to guide the cuts. Now, this may seem out of order. It's certainly not the way I sawed tenons at the start. When I cut the shoulder first, those wafers sliced away by the cheek cut were trapped between the jig and the blade, and would crunch disconcertingly. They would by Bill Hylton Bill is the author of several books about furniture construction and router operations. When he isn't writing about woodworking, he's doing it in his home shop in Kempton, Pa. then either fire around the table or virtually explode. Now, the wafers of waste accumulate, harmlessly, to the right of the blade. Set the Saw and the Jig Setup is easy: Determine how long the tenon is to be and crank up the blade to that height. Position the tenoning jig next. I make the cheek cut on the side of the workpiece that's against the jig. That way, I can turn the workpiece 90° between passes, and cut the cheeks and edges in sequence (assuming the shoulders are a uniform width). To make the coarse fence setting, measure from the jig to the outside of the blade with a metal rule. The fine fence setting is made after cutting the cheeks on a test piece and seeing how it fits in the mortise. Just remember to trim both cheeks each time you adjust the fence, so the tenon remains centered on the workpiece. 94 Popular Woodworking November 2004 |


