Popular Woodworking 2004-12 № 145, страница 34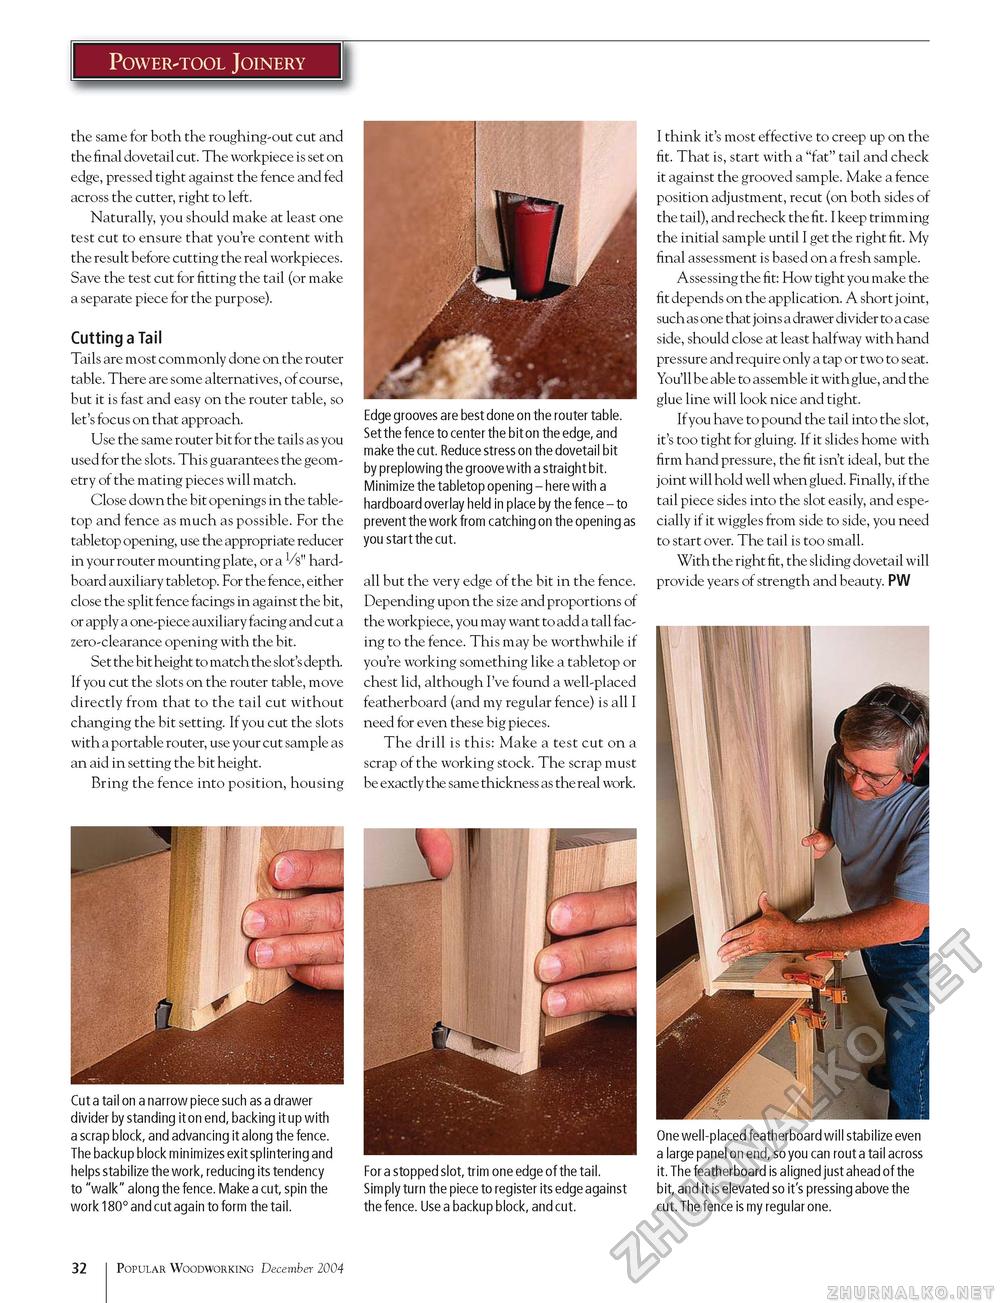
Power-tool Joinery the same for both the roughing-out cut and the final dovetail cut. The workpiece is set on edge, pressed tight against the fence and fed across the cutter, right to left. Naturally, you should make at least one test cut to ensure that you're content with the result before cutting the real workpieces. Save the test cut for fitting the tail (or make a separate piece for the purpose). Cutting a Tail Tails are most commonly done on the router table. There are some alternatives, of course, but it is fast and easy on the router table, so let's focus on that approach. Use the same router bit for the tails as you used for the slots. This guarantees the geometry of the mating pieces will match. Close down the bit openings in the table-top and fence as much as possible. For the tabletop opening, use the appropriate reducer in your router mounting plate, or a V8" hard-board auxiliary tabletop. For the fence, either close the split fence facings in against the bit, or apply a one-piece auxiliary facing and cut a zero-clearance opening with the bit. Set the bit height to match the slot's depth. If you cut the slots on the router table, move directly from that to the tail cut without changing the bit setting. If you cut the slots with a portable router, use your cut sample as an aid in setting the bit height. Bring the fence into position, housing helps stabilize the work, reducing its tendency For a stopped slot, trim one edge of the tail. to "walk" along the fence. Make a cut, spin the Simply turn the piece to register its edge against work 180° and cut again to form the tail. the fence. Use a backup block, and cut. Edge grooves are best done on the router table. Set the fence to center the bit on the edge, and make the cut. Reduce stress on the dovetail bit by preplowing the groove with a straight bit. Minimize the tabletop opening - here with a hardboard overlay held in place by the fence - to prevent the work from catching on the opening as you start the cut. all but the very edge of the bit in the fence. Depending upon the size and proportions of the workpiece, you may want to add a tall facing to the fence. This may be worthwhile if you're working something like a tabletop or chest lid, although I've found a well-placed featherboard (and my regular fence) is all I need for even these big pieces. The drill is this: Make a test cut on a scrap of the working stock. The scrap must be exactly the same thickness as the real work. I think it's most effective to creep up on the fit. That is, start with a "fat" tail and check it against the grooved sample. Make a fence position adjustment, recut (on both sides of the tail), and recheck the fit. I keep trimming the initial sample until I get the right fit. My final assessment is based on a fresh sample. Assessing the fit: How tight you make the fit depends on the application. A short j oint, such as one that joins a drawer divider to a case side, should close at least halfway with hand pressure and require only a tap or two to seat. You'll be able to assemble it with glue, and the glue line will look nice and tight. If you have to pound the tail into the slot, it's too tight for gluing. If it slides home with firm hand pressure, the fit isn't ideal, but the joint will hold well when glued. Finally, if the tail piece sides into the slot easily, and especially if it wiggles from side to side, you need to start over. The tail is too small. With the right fit, the sliding dovetail will provide years of strength and beauty. PW One well-placed featherboard will stabilize even a large panel on end, so you can rout a tail across it. The featherboard is aligned just ahead of the bit, and it is elevated so it's pressing above the cut. The fence is my regular one. 32 100 Popular Woodworking December 2004 |


