Popular Woodworking 2004-12 № 145, страница 42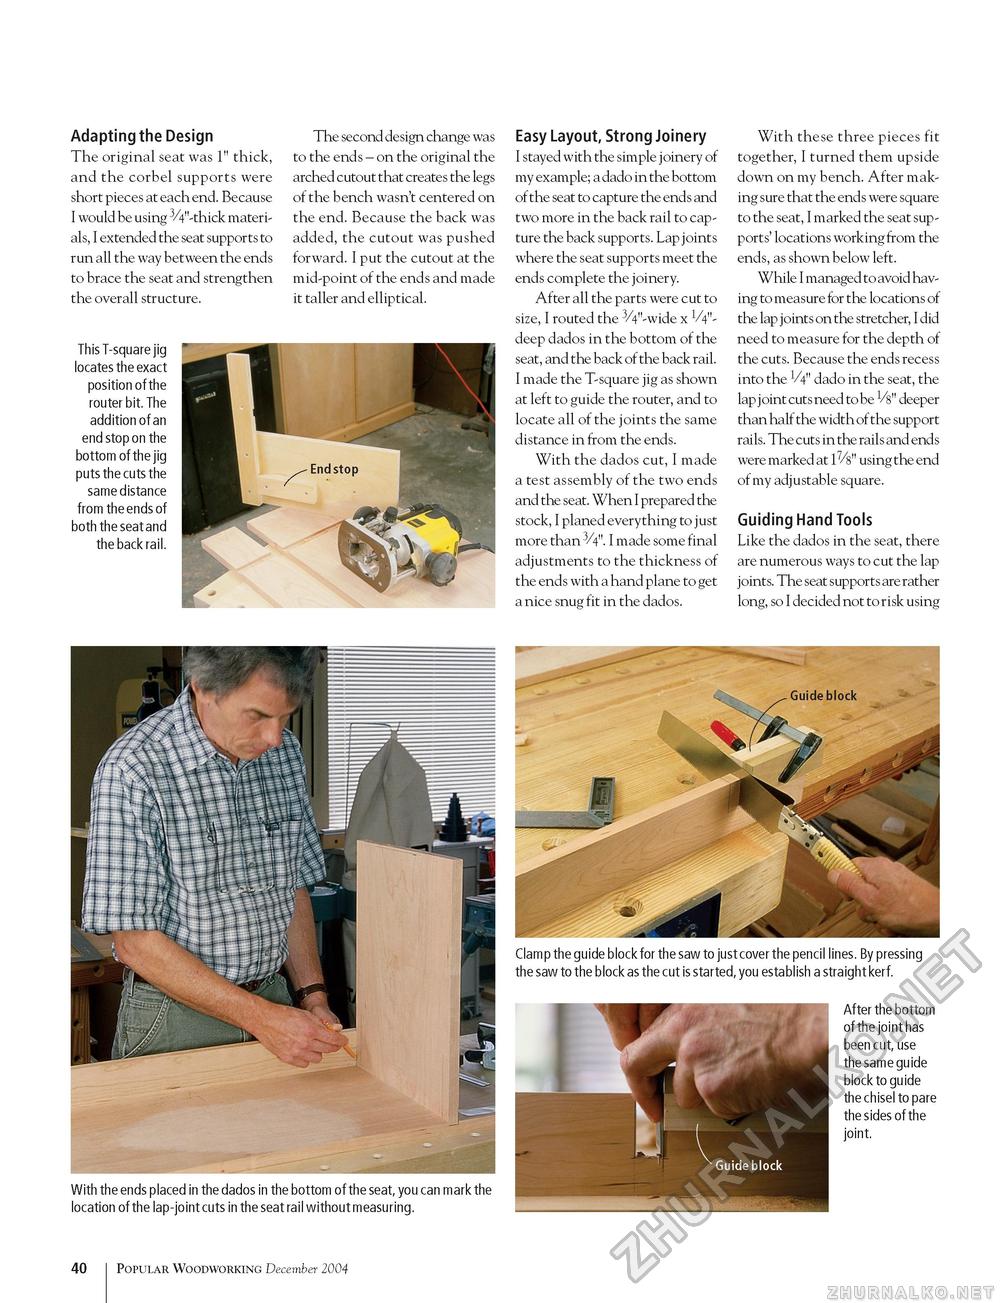
Adapting the Design The original seat was 1" thick, and the corbel supports were short pieces at each end. Because I would be using 3/4"-thick materials, I extended the seat supports to run all the way between the ends to brace the seat and strengthen the overall structure. This T-square jig locates the exact position of the router bit. The addition of an end stop on the bottom of the jig puts the cuts the same distance from the ends of both the seat and the back rail. The second design change was to the ends - on the original the arched cutout that creates the legs of the bench wasn't centered on the end. Because the back was added, the cutout was pushed forward. I put the cutout at the mid-point of the ends and made it taller and elliptical. Easy Layout, Strong Joinery I stayed with the simple joinery of my example; a dado in the bottom of the seat to capture the ends and two more in the back rail to capture the back supports. Lap joints where the seat supports meet the ends complete the joinery. After all the parts were cut to size, I routed the 3/4"-wide x V4"-deep dados in the bottom of the seat, and the back of the back rail. I made the T-square jig as shown at left to guide the router, and to locate all of the joints the same distance in from the ends. With the dados cut, I made a test assembly of the two ends and the seat. When I prepared the stock, I planed everything to just more than 3/4". I made some final adjustments to the thickness of the ends with a hand plane to get a nice snug fit in the dados. With these three pieces fit together, I turned them upside down on my bench. After making sure that the ends were square to the seat, I marked the seat supports' locations working from the ends, as shown below left. While I managed to avoid having to measure for the locations of the lap joints on the stretcher, I did need to measure for the depth of the cuts. Because the ends recess into the V4" dado in the seat, the lap joint cuts need to be Vs" deeper than half the width of the support rails. The cuts in the rails and ends were marked at 1%" using the end of my adjustable square. Guiding Hand Tools Like the dados in the seat, there are numerous ways to cut the lap joints. The seat supports are rather long, so I decided not to risk using Clamp the guide block for the saw to just cover the pencil lines. By pressing the saw to the block as the cut is started, you establish a straight kerf. V w After the bottom of the joint has been cut, use the same guide block to guide the chisel to pare the sides of the joint. * Guide block With the ends placed in the dados in the bottom of the seat, you can mark the location of the lap-joint cuts in the seat rail without measuring. 100 Popular Woodworking December 2004 |


