Popular Woodworking 2004-12 № 145, страница 65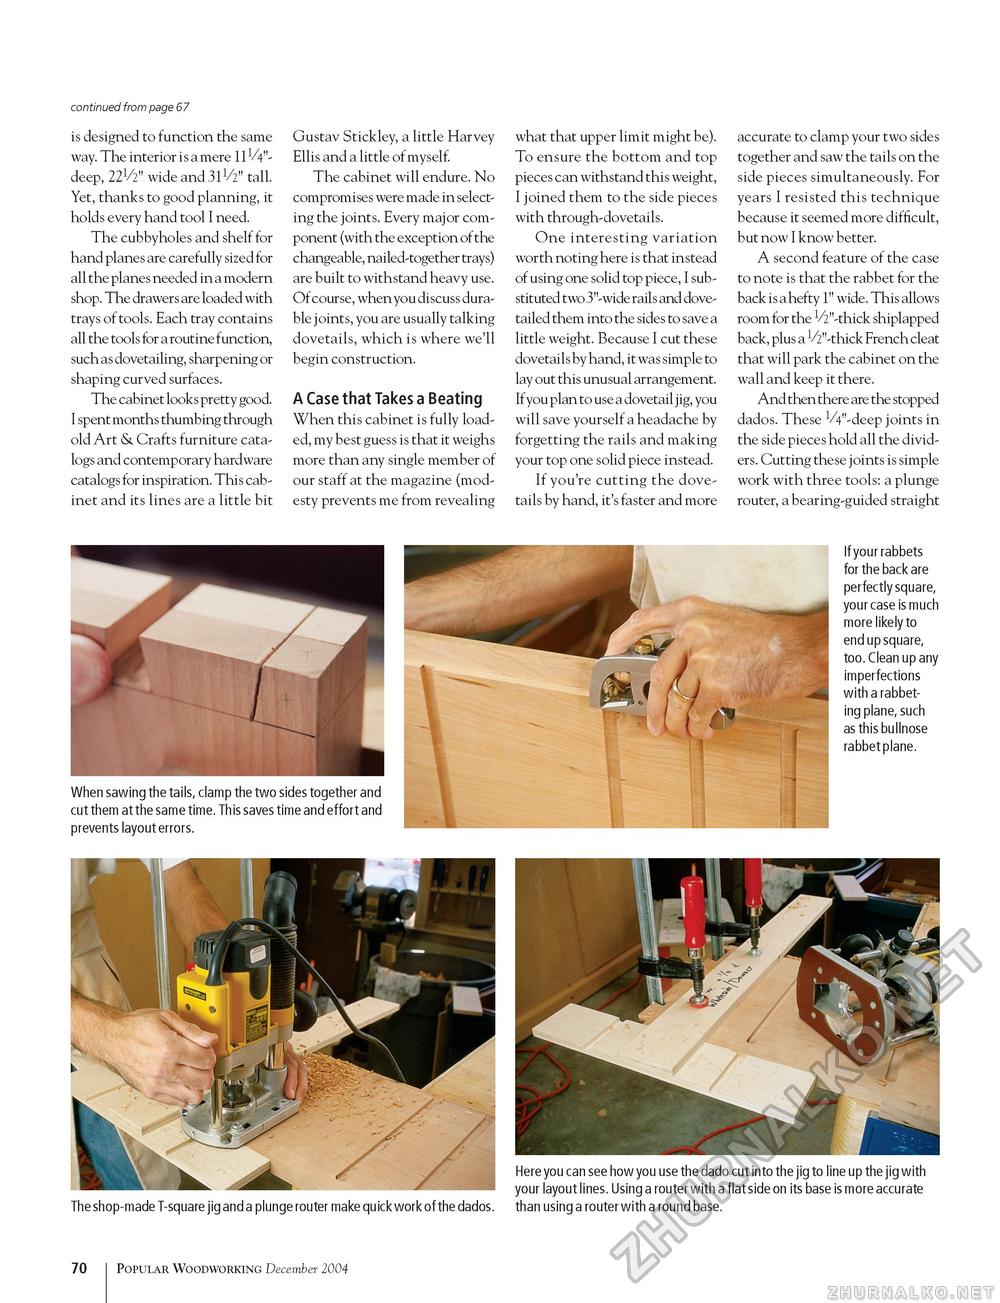
continued from page 67 is designed to function the same way. The interior is a mere nW-deep, 22V2" wide and 31V2" tall. Yet, thanks to good planning, it holds every hand tool I need. The cubbyholes and shelf for hand planes are carefully sized for all the planes needed in a modern shop. The drawers are loaded with trays of tools. Each tray contains all the tools for a routine function, such as dovetailing, sharpening or shaping curved surfaces. The cabinet looks pretty good. I spent months thumbing through old Art & Crafts furniture catalogs and contemporary hardware catalogs for inspiration. This cabinet and its lines are a little bit Gustav Stickley, a little Harvey Ellis and a little of myself. The cabinet will endure. No compromises were made in selecting the joints. Every major component (with the exception of the changeable, nailed-together trays) are built to withstand heavy use. Of course, when you discuss durable joints, you are usually talking dovetails, which is where we'll begin construction. A Case that Takes a Beating When this cabinet is fully loaded, my best guess is that it weighs more than any single member of our staff at the magazine (modesty prevents me from revealing what that upper limit might be). To ensure the bottom and top pieces can withstand this weight, I joined them to the side pieces with through-dovetails. One interesting variation worth noting here is that instead of using one solid top piece, I substituted two 3"-wide rails and dovetailed them into the sides to save a little weight. Because I cut these dovetails by hand, it was simple to lay out this unusual arrangement. If you plan to use a dovetail j ig, you will save yourself a headache by forgetting the rails and making your top one solid piece instead. If you're cutting the dovetails by hand, it's faster and more accurate to clamp your two sides together and saw the tails on the side pieces simultaneously. For years I resisted this technique because it seemed more difficult, but now I know better. A second feature of the case to note is that the rabbet for the back is a hefty 1" wide. This allows room for the V2"-thick shiplapped back, plus a V2"-thick French cleat that will park the cabinet on the wall and keep it there. And then there are the stopped dados. These VV-deep joints in the side pieces hold all the dividers. Cutting these joints is simple work with three tools: a plunge router, a bearing-guided straight If your rabbets for the back are perfectly square, your case is much more likely to end up square, too. Clean up any imperfections with a rabbeting plane, such as this bullnose rabbet plane. The shop-made T-square jig and a plunge router make quick work of the dados. Here you can see how you use the dado cut into the jig to line up the jig with your layout lines. Using a router with a flat side on its base is more accurate than using a router with a round base. 100 Popular Woodworking December 2004 |


