Popular Woodworking 2004-12 № 145, страница 66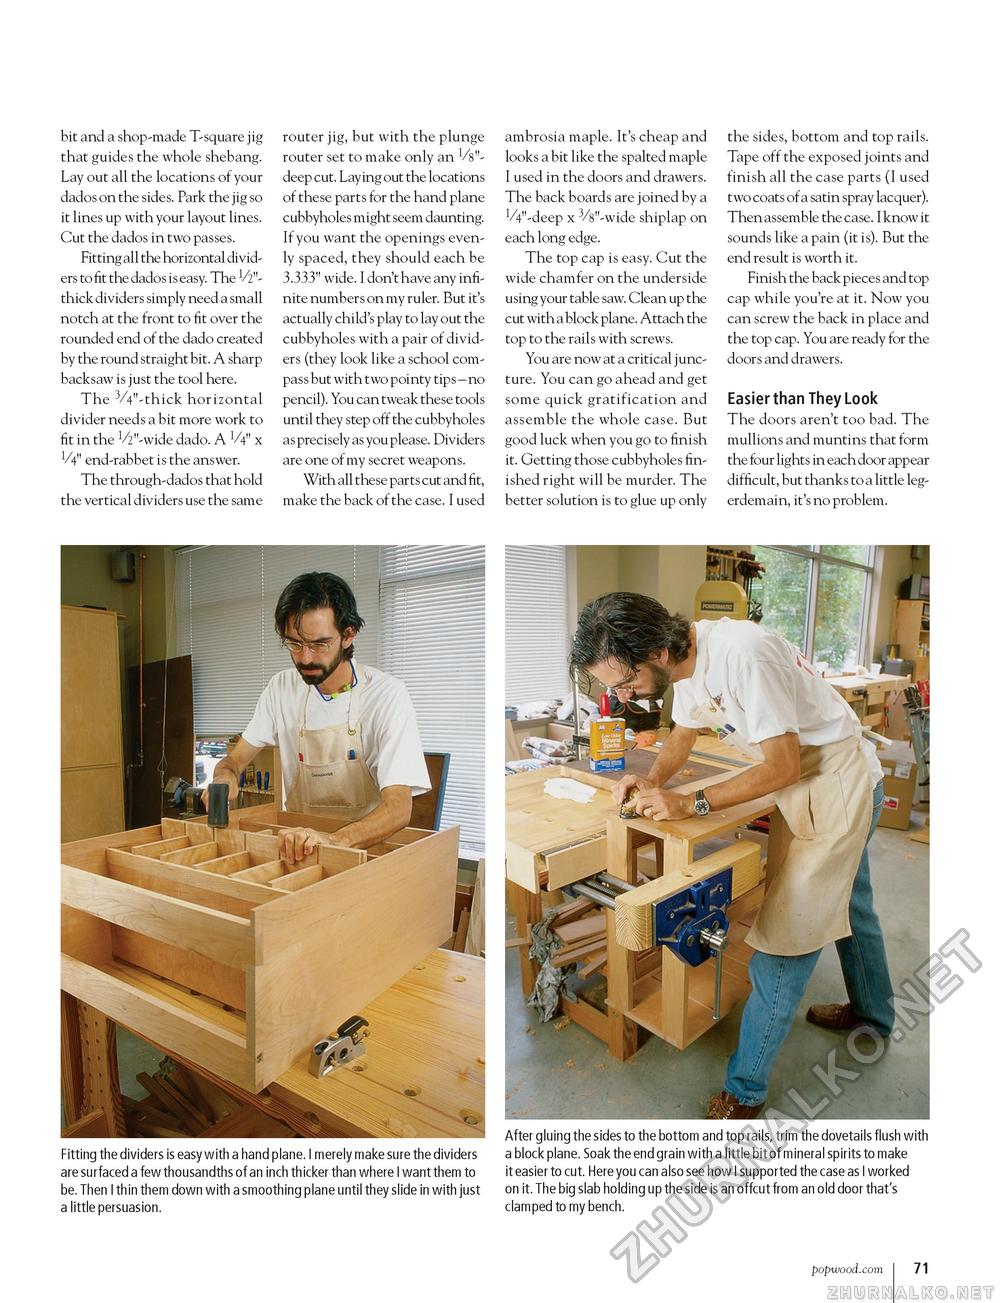
bit and a shop-made T-square jig that guides the whole shebang. Lay out all the locations of your dados on the sides. Park the jig so it lines up with your layout lines. Cut the dados in two passes. Fitting all the horizontal dividers to fit the dados is easy. The V2"-thick dividers simply need a small notch at the front to fit over the rounded end of the dado created by the round straight bit. A sharp backsaw is just the tool here. The 3/4"-thick horizontal divider needs a bit more work to fit in the ^"-wide dado. A V4" x V4" end-rabbet is the answer. The through-dados that hold the vertical dividers use the same router jig, but with the plunge router set to make only an Vs"-deep cut. Laying out the locations of these parts for the hand plane cubbyholes might seem daunting. If you want the openings evenly spaced, they should each be 3.333" wide. I don't have any infinite numbers on my ruler. But it's actually child's play to lay out the cubbyholes with a pair of dividers (they look like a school compass but with two pointy tips - no pencil). You can tweak these tools until they step off the cubbyholes as precisely as you please. Dividers are one of my secret weapons. With all these parts cut and fit, make the back of the case. I used ambrosia maple. It's cheap and looks a bit like the spalted maple I used in the doors and drawers. The back boards are joined by a VV-deep x 3/s"-wide shiplap on each long edge. The top cap is easy. Cut the wide chamfer on the underside using your table saw. Clean up the cut with a block plane. Attach the top to the rails with screws. You are now at a critical juncture. You can go ahead and get some quick gratification and assemble the whole case. But good luck when you go to finish it. Getting those cubbyholes finished right will be murder. The better solution is to glue up only the sides, bottom and top rails. Tape off the exposed joints and finish all the case parts (I used two coats of a satin spray lacquer). Then assemble the case. I know it sounds like a pain (it is). But the end result is worth it. Finish the back pieces and top cap while you're at it. Now you can screw the back in place and the top cap. You are ready for the doors and drawers. Easier than They Look The doors aren't too bad. The mullions and muntins that form the four lights in each door appear difficult, but thanks to a little legerdemain, it's no problem. Fitting the dividers is easy with a hand plane. I merely make sure the dividers are surfaced a few thousandths of an inch th icker than where I want them to be. Then I thin them down with a smoothing plane until they slide in with just a little persuasion. After gluing the sides to the bottom and top rails, trim the dovetails flush with a block plane. Soak the end grain with a little bit of mineral spirits to make it easier to cut. Here you can also see how I supported the case as I worked on it. The big slab holding up the side is an offcut from an old door that's clamped to my bench. popwood.com 101 |


