Popular Woodworking 2004-12 № 145, страница 68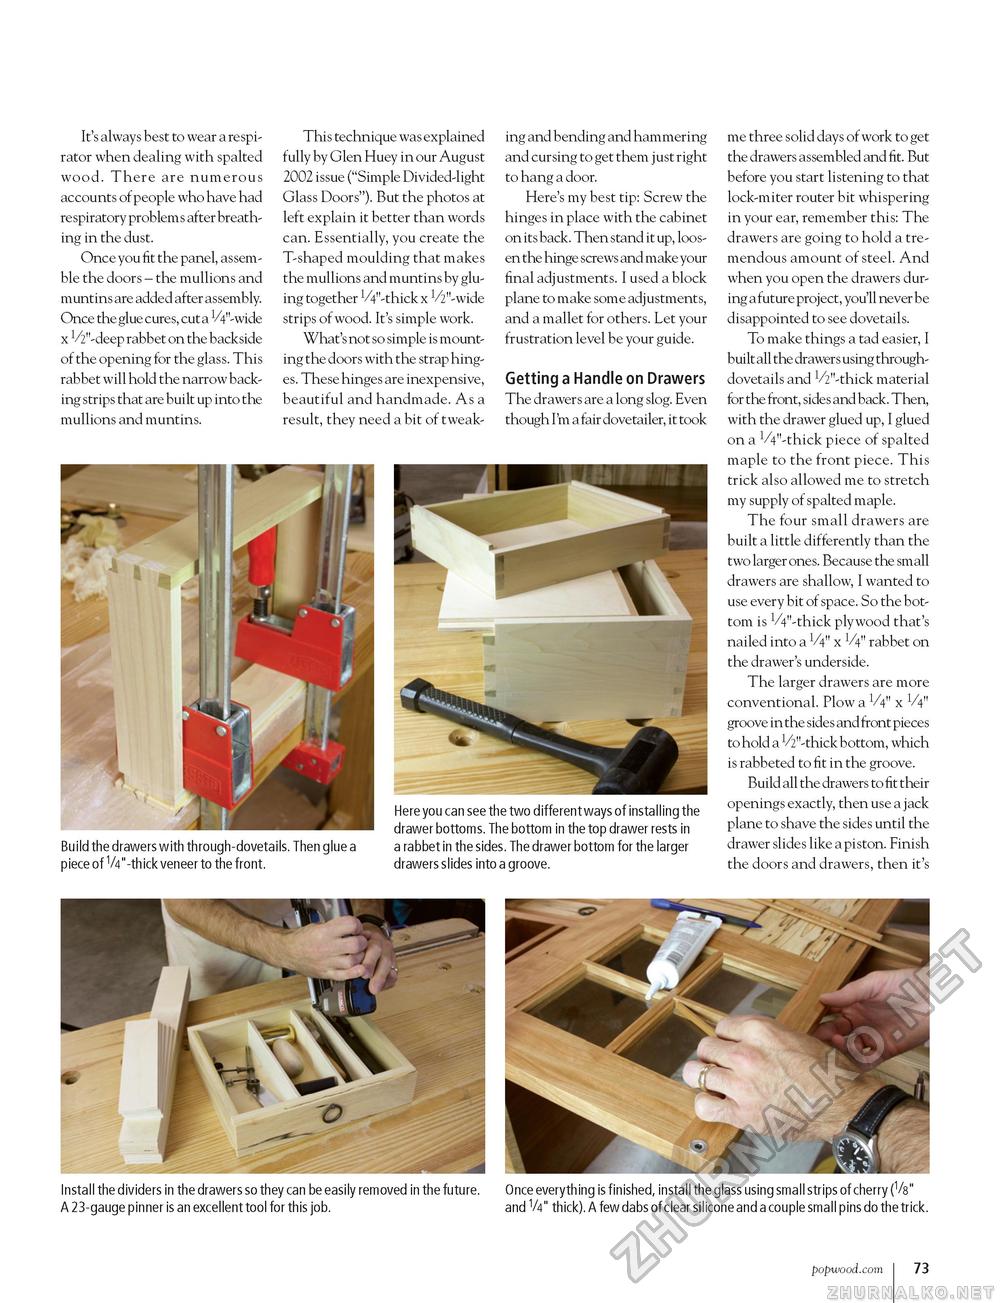
It's always best to wear a respirator when dealing with spalted wood. There are numerous accounts of people who have had re spiratory problem s after breathing in the dust. Once you fit the panel, assemble the doors - the mullions and muntins are added after assembly. Once the glue cures, cut a V4"-wide x V2"-deep rabbet on the backside of the opening for the glass. This rabbet will hold the narrow backing strips that are built up into the mullions and muntins. This technique was explained fully by Glen Huey in our August 2002 issue ("Simple Divided-light Glass Doors"). But the photos at left explain it better than words can. Essentially, you create the T-shaped moulding that makes the mullions and muntins by gluing together VV-thick x V2"-wide strips of wood. It's simple work. What's not so simple is mounting the doors with the strap hinges. These hinges are inexpensive, beautiful and handmade. As a result, they need a bit of tweak ing and bending and hammering and cursing to get them just right to hang a door. Here's my best tip: Screw the hinges in place with the cabinet on its back. Then stand it up, loosen the hinge screws and make your final adjustments. I used a block plane to make some adjustments, and a mallet for others. Let your frustration level be your guide. Getting a Handle on Drawers The drawers are a long slog. Even though I'm a fair dovetailer, it took Build the drawers with through-dovetails. Then glue a piece of 1/4"-thick veneer to the front. Here you can see the two different ways of installing the drawer bottoms. The bottom in the top drawer rests in a rabbet in the sides. The drawer bottom for the larger drawers slides into a groove. me three solid days of work to get the drawers assembled and fit. But before you start listening to that lock-miter router bit whispering in your ear, remember this: The drawers are going to hold a tremendous amount of steel. And when you open the drawers during a future project, you'll never be disappointed to see dovetails. To make things a tad easier, I built all the drawers using through-dovetails and V2"-thick material for the front, sides and back. Then, with the drawer glued up, I glued on a VV-thick piece of spalted maple to the front piece. This trick also allowed me to stretch my supply of spalted maple. The four small drawers are built a little differently than the two larger ones. Because the small drawers are shallow, I wanted to use every bit of space. So the bottom is VV-thick plywood that's nailed into a V4" x V4" rabbet on the drawer's underside. The larger drawers are more conventional. Plow a x V4" groove in the sides and front pieces to hold a V2"-thick bottom, which is rabbeted to fit in the groove. Build all the drawers to fit their openings exactly, then use a jack plane to shave the sides until the drawer slides like a piston. Finish the doors and drawers, then it's Install the dividers in the drawers so they can be easily removed in the future. Once everything is finished, install the glass using small strips of cherry (Vs" A 23-gauge pinner is an excellent tool for this job. and V4" thick). A few dabs of clear silicone and a couple small pins do the trick. popwood.com 101 |


