Popular Woodworking 2005-02 № 146, страница 20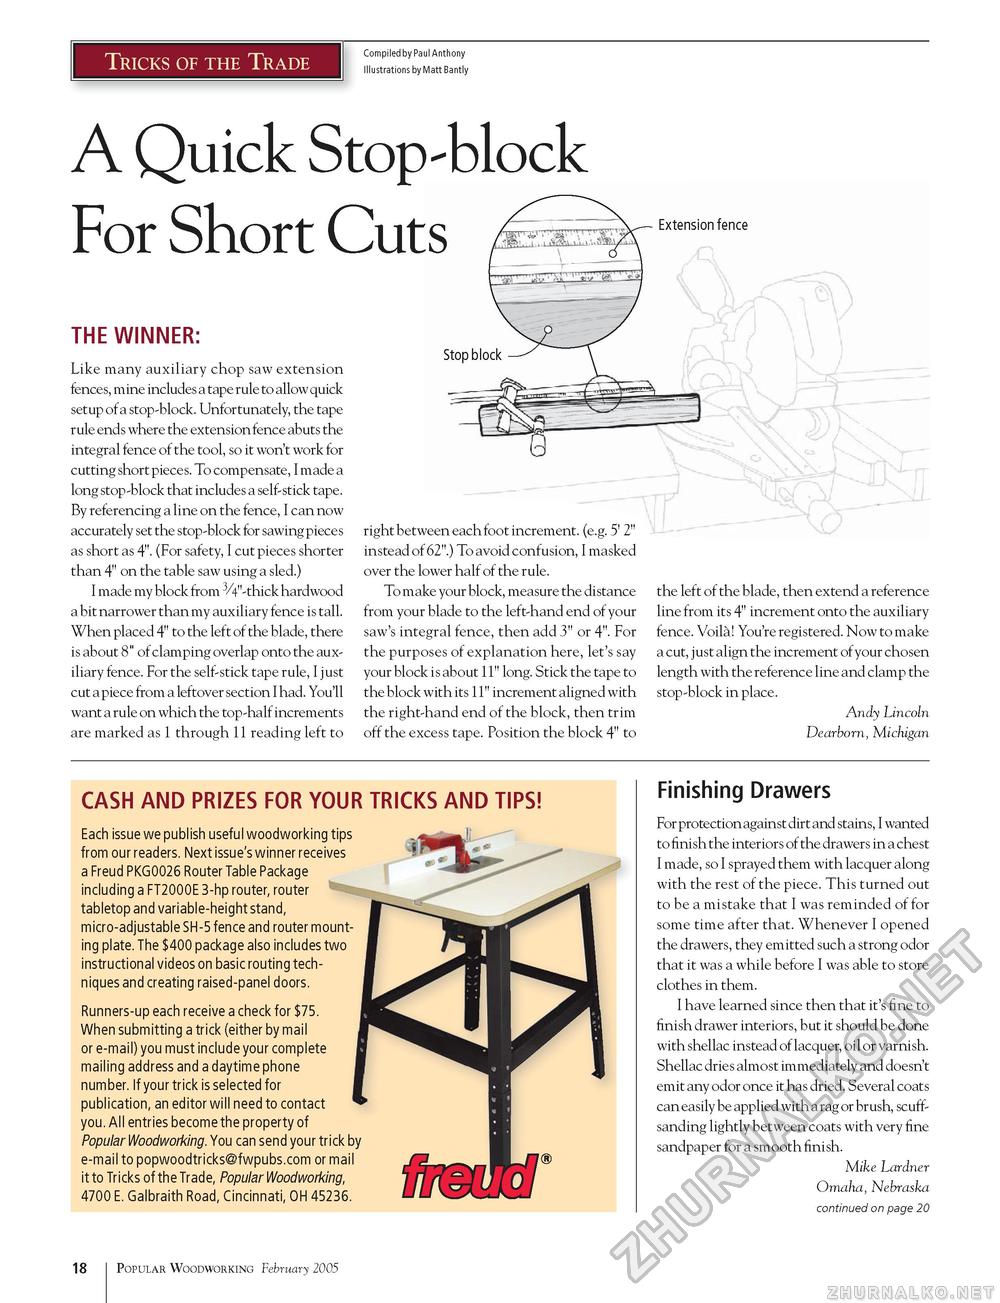
Tricks of the Trade Compiled by Paul Anthony Illustrations by Matt Bantly A Quick Stop-block For Short Cuts THE WINNER: Like many auxiliary chop saw extension fences, mine includes a tape rule to allow quick setup of a stop-block. Unfortunately, the tape rule ends where the extension fence abuts the integral fence of the tool, so it won't work for cutting short pieces. To compensate, I made a long stop-block that includes a self-stick tape. By referencing a line on the fence, I can now accurately set the stop-block for sawing pieces as short as 4". (For safety, I cut pieces shorter than 4" on the table saw using a sled.) I made my block from 3/4"-thick hardwood a bit narrower than my auxiliary fence is tall. When placed 4" to the left of the blade, there is about 8" of clamping overlap onto the auxiliary fence. For the self-stick tape rule, I just cut a piece from a leftover section I had. You'll want a rule on which the top-half increments are marked as 1 through 11 reading left to Extension fence Stop block right between each foot increment, (e.g. 5' 2" instead of 62".) To avoid confusion, I masked over the lower half of the rule. To make your block, measure the distance from your blade to the left-hand end of your saw's integral fence, then add 3" or 4". For the purposes of explanation here, let's say your block is about 11" long. Stick the tape to the block with its 11" increment aligned with the right-hand end of the block, then trim off the excess tape. Position the block 4" to the left of the blade, then extend a reference line from its 4" increment onto the auxiliary fence. Voila! You're registered. Now to make a cut, just align the increment of your chosen length with the reference line and clamp the stop-block in place. Andy Lincoln Dearborn, Michigan CASH AND PRIZES FOR YOUR TRICKS AND TIPS! Each issue we publish useful woodworking tips from our readers. Next issue's winner receives a Freud PKG0026 Router Table Package including a FT2000E 3-hp router, router tabletop and variable-height stand, micro-adjustable SH-5 fence and router mounting plate. The $400 package also includes two instructional videos on basic routing techniques and creating raised-panel doors. Runners-up each receive a check for $75. When submitting a trick (either by mail or e-mail) you must include your complete mailing address and a daytime phone number. If your trick is selected for publication, an editor will need to contact you. All entries become the property of Popular Woodworking. You can send your trick by e-mail to popwoodtricks@fwpubs.com or mail it to Tricks of the Trade, Popular Woodworking, 4700 E. Galbraith Road, Cincinnati, OH 45236. Finishing Drawers For protection against dirt and stains, I wanted to finish the interiors of the drawers in a chest I made, so I sprayed them with lacquer along with the rest of the piece. This turned out to be a mistake that I was reminded of for some time after that. Whenever I opened the drawers, they emitted such a strong odor that it was a while before I was able to store clothes in them. I have learned since then that it's fine to finish drawer interiors, but it should be done with shellac instead of lacquer, oil or varnish. Shellac dries almost immediately and doesn't emit any odor once it has dried. Several coats can easily be applied with a rag or brush, scuff-sanding lightly between coats with very fine sandpaper for a smooth finish. Mike Lardner Omaha, Nebraska continued on page 20 18 Popular Woodworking February 2005 |


