Popular Woodworking 2005-04 № 147, страница 68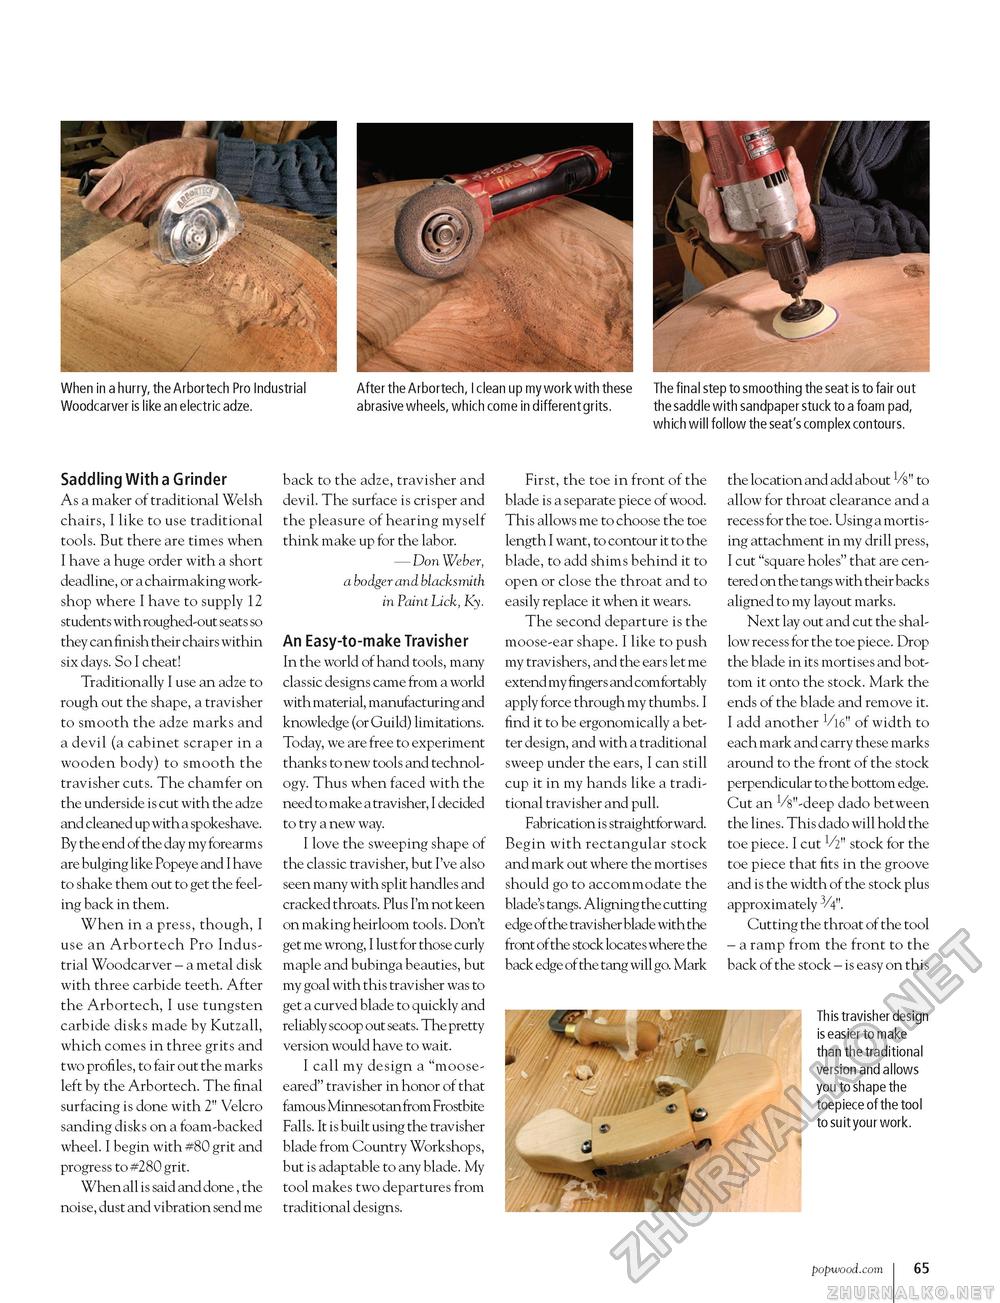
When in a hurry, the Arbortech Pro Industrial After the Arbortech, I clean up my work with these Woodcarver is like an electric adze. abrasive wheels, which come in different grits. The final step to smoothing the seat is to fair out the saddle with sandpaper stuck to a foam pad, which will follow the seat's complex contours. Saddling With a Grinder As a maker of traditional Welsh chairs, I like to use traditional tools. But there are times when I have a huge order with a short deadline, or a chairmaking workshop where I have to supply 12 students with roughed-out seats so they can finish their chairs within six days. So I cheat! Traditionally I use an adze to rough out the shape, a travisher to smooth the adze marks and a devil (a cabinet scraper in a wooden body) to smooth the travisher cuts. The chamfer on the underside is cut with the adze and cleaned up with a spokeshave. By the end of the day my forearms are bulging like Popeye and I have to shake them out to get the feeling back in them. When in a press, though, I use an Arbortech Pro Industrial Woodcarver - a metal disk with three carbide teeth. After the Arbortech, I use tungsten carbide disks made by Kutzall, which comes in three grits and two profiles, to fair out the marks left by the Arbortech. The final surfacing is done with 2" Velcro sanding disks on a foam-backed wheel. I begin with #80 grit and progress to #280 grit. When all is said and done , the noise, dust and vibration send me back to the adze, travisher and devil. The surface is crisper and the pleasure of hearing myself think make up for the labor. — Don Weber, a bodger and blacksmith in Paint Lick, Ky. An Easy-to-make Travisher In the world of hand tools, many classic designs came from a world with material, manufacturing and knowledge (or Guild) limitations. Today, we are free to experiment thanks to new tools and technology. Thus when faced with the need to make a travisher, I decided to try a new way. I love the sweeping shape of the classic travisher, but I've also seen many with split handles and cracked throats. Plus I'm not keen on making heirloom tools. Don't get me wrong, I lust for those curly maple and bubinga beauties, but my goal with this travisher was to get a curved blade to quickly and reliably scoop out seats. The pretty version would have to wait. I call my design a "moose-eared" travisher in honor of that famous Minnesotan from Frostbite Falls. It is built using the travisher blade from Country Workshops, but is adaptable to any blade. My tool makes two departures from traditional designs. First, the toe in front of the blade is a separate piece of wood. This allows me to choose the toe length I want, to contour it to the blade, to add shims behind it to open or close the throat and to easily replace it when it wears. The second departure is the moose-ear shape. I like to push my travishers, and the ears let me extend my fingers and comfortably apply force through my thumbs. I find it to be ergonomically a better design, and with a traditional sweep under the ears, I can still cup it in my hands like a traditional travisher and pull. Fabrication is straightforward. Begin with rectangular stock and mark out where the mortises should go to accommodate the blade's tangs. Aligning the cutting edge of the travisher blade with the front of the stock locates where the back edge of the tang will go. Mark the location and add about V8" to allow for throat clearance and a recess for the toe. Using a mortising attachment in my drill press, I cut "square holes" that are centered on the tangs with their backs aligned to my layout marks. Next lay out and cut the shallow recess for the toe piece. Drop the blade in its mortises and bottom it onto the stock. Mark the ends of the blade and remove it. I add another ^//16" of width to each mark and carry these marks around to the front of the stock perpendicular to the bottom edge. Cut an ^"-deep dado between the lines. This dado will hold the toe piece. I cut V2" stock for the toe piece that fits in the groove and is the width of the stock plus approximately 3/4". Cutting the throat of the tool - a ramp from the front to the back of the stock - is easy on this This travisher design is easier to make than the traditional version and allows you to shape the toepiece of the tool to suit your work. popwood.com 65 |


