Popular Woodworking 2005-04 № 147, страница 69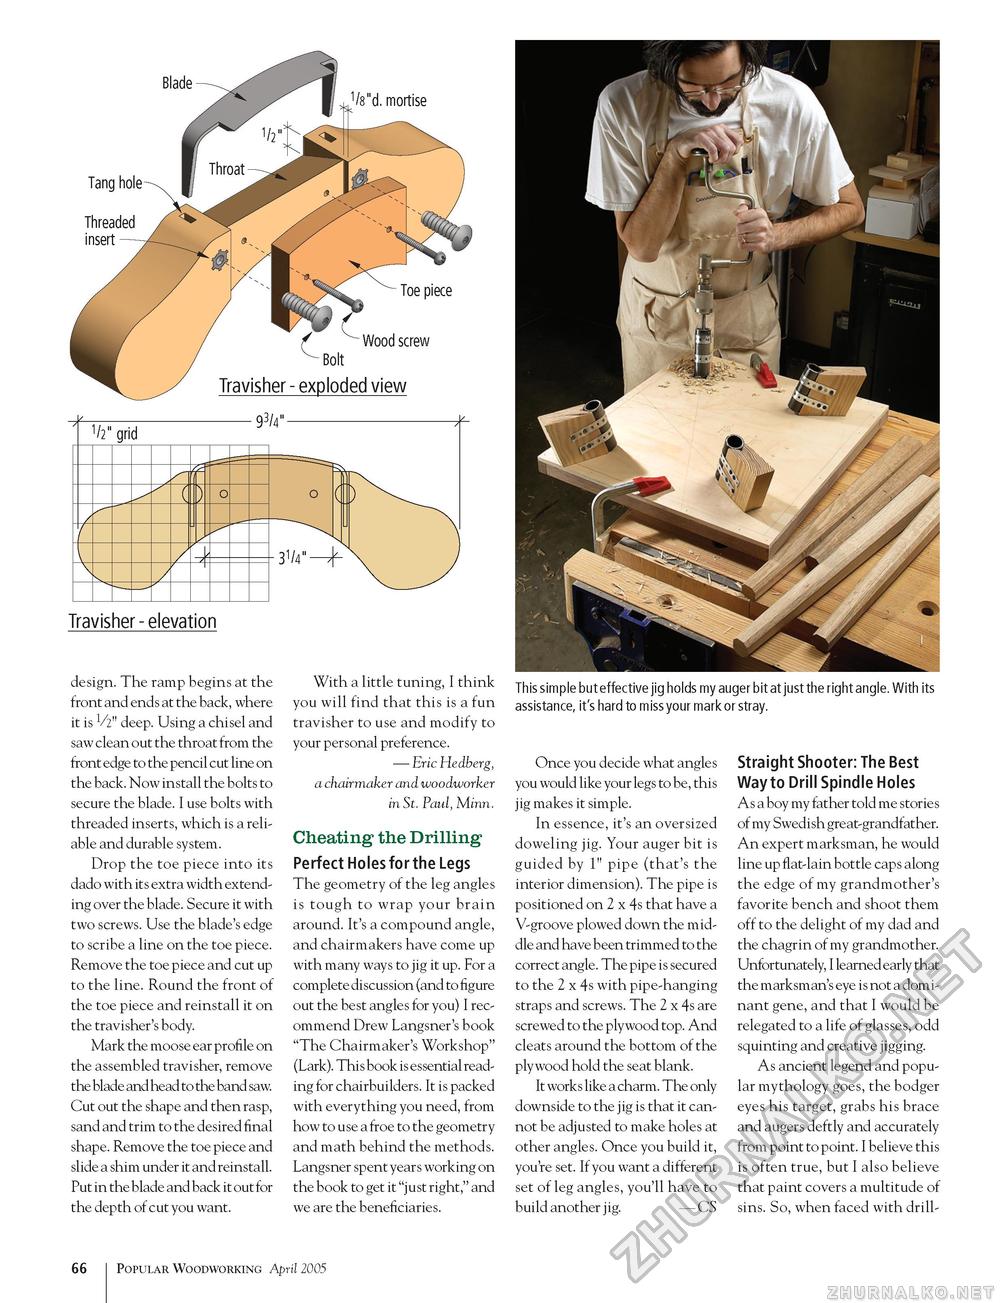
Tang hole- Threaded insert Blade 1/8"d. mortise Toe piece 1/2" grid / Wood screw Bolt Travisher - exploded view -93/4"-
Travisher - elevation This simple but effective jig holds my auger bit at just the right angle. With its assistance, it's hard to miss your mark or stray. design. The ramp begins at the front and ends at the back, where it is V2" deep. Using a chisel and saw clean out the throat from the front edge to the pencil cut line on the back. Now install the bolts to secure the blade. I use bolts with threaded inserts, which is a reliable and durable system. Drop the toe piece into its dado with its extra width extending over the blade. Secure it with two screws. Use the blade's edge to scribe a line on the toe piece. Remove the toe piece and cut up to the line. Round the front of the toe piece and reinstall it on the travisher's body. Mark the moose ear profile on the assembled travisher, remove the blade and head to the band saw. Cut out the shape and then rasp, sand and trim to the desired final shape. Remove the toe piece and slide a shim under it and reinstall. Put in the blade and back it out for the depth of cut you want. With a little tuning, I think you will find that this is a fun travisher to use and modify to your personal preference. — Eric Hedberg, a chairmaker and woodworker in St. Paul, Minn. Cheating the Drilling Perfect Holes for the Legs The geometry of the leg angles is tough to wrap your brain around. It's a compound angle, and chairmakers have come up with many ways to jig it up. For a complete discussion (and to figure out the best angles for you) I recommend Drew Langsner's book "The Chairmaker's Workshop" (Lark). This book is essential reading for chairbuilders. It is packed with everything you need, from how to use a froe to the geometry and math behind the methods. Langsner spent years working on the book to get it "just right," and we are the beneficiaries. Once you decide what angles you would like your legs to be, this jig makes it simple. In essence, it's an oversized doweling jig. Your auger bit is guided by 1" pipe (that's the interior dimension). The pipe is positioned on 2 x 4s that have a V-groove plowed down the middle and have been trimmed to the correct angle. The pipe is secured to the 2 x 4s with pipe-hanging straps and screws. The 2 x 4s are screwed to the plywood top. And cleats around the bottom of the plywood hold the seat blank. It works like a charm. The only downside to the jig is that it cannot be adjusted to make holes at other angles. Once you build it, you're set. If you want a different set of leg angles, you'll have to build another j ig. — CS Straight Shooter: The Best Way to Drill Spindle Holes As a boy my father told me stories of my Swedish great-grandfather. An expert marksman, he would line up flat-lain bottle caps along the edge of my grandmother's favorite bench and shoot them off to the delight of my dad and the chagrin of my grandmother. Unfortunately, I learned early that the marksman's eye is not a dominant gene, and that I would be relegated to a life of glasses, odd squinting and creative jigging. As ancient legend and popular mythology goes, the bodger eyes his target, grabs his brace and augers deftly and accurately from point to point. I believe this is often true, but I also believe that paint covers a multitude of sins. So, when faced with drill- 66 1 Popular Woodworking April 2005 |


