Popular Woodworking 2005-04 № 147, страница 70
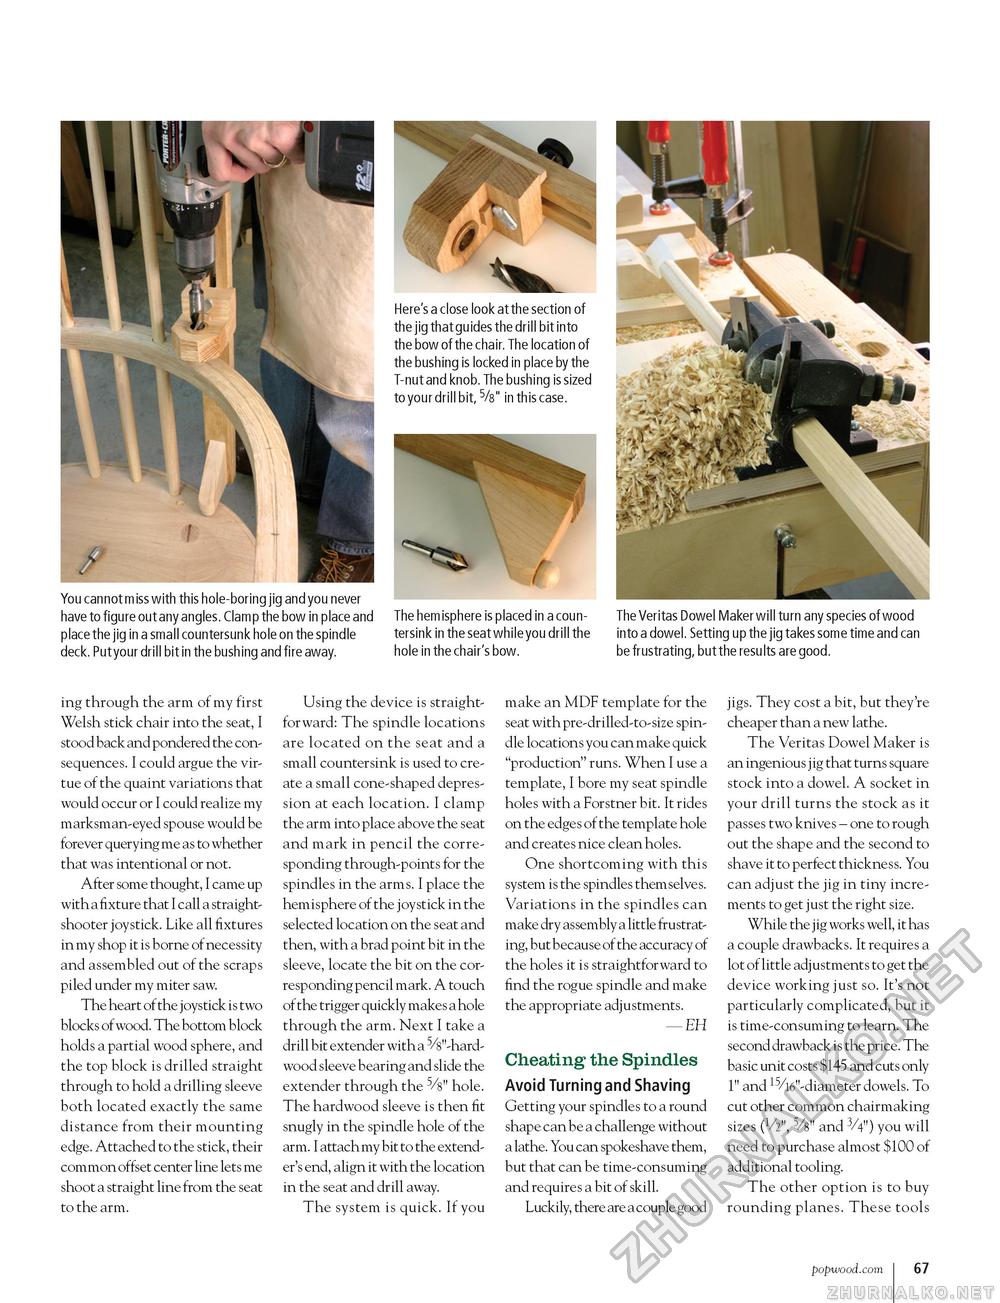
You cannot miss with this hole-boring jig and you never have to figure out any angles. Clamp the bow in place and place the jig in a small countersunk hole on the spindle deck. Put your drill bit in the bushing and fire away. Here's a close look at the section of the jig that guides the drill bit into the bow of the chair. The location of the bushing is locked in place by the T-nut and knob. The bushing is sized to your drill bit, 5/s" in this case. The hem isphere is placed in a countersink in the seat while you drill the hole in the chair's bow. The Veritas Dowel Maker will turn any species of wood into a dowel. Setting up the jig takes some time and can be frustrating, but the results are good. ing through the arm of my first Welsh stick chair into the seat, I stood back and pondered the consequences. I could argue the virtue of the quaint variations that would occur or I could realize my marksman-eyed spouse would be forever querying me as to whether that was intentional or not. After some thought, I came up with a fixture that I call a straight-shooter joystick. Like all fixtures in my shop it is borne of necessity and assembled out of the scraps piled under my miter saw. The heart of the joystick is two blocks of wood. The bottom block holds a partial wood sphere, and the top block is drilled straight through to hold a drilling sleeve both located exactly the same distance from their mounting edge. Attached to the stick, their common offset center line lets me shoot a straight line from the seat to the arm. Using the device is straightforward: The spindle locations are located on the seat and a small countersink is used to create a small cone-shaped depression at each location. I clamp the arm into place above the seat and mark in pencil the corresponding through-points for the spindles in the arms. I place the hemisphere of the joystick in the selected location on the seat and then, with a brad point bit in the sleeve, locate the bit on the corresponding pencil mark. A touch of the trigger quickly makes a hole through the arm. Next I take a drill bit extender with a -hardwood sleeve bearing and slide the extender through the 5/8" hole. The hardwood sleeve is then fit snugly in the spindle hole of the arm. I attach my bit to the extender's end, align it with the location in the seat and drill away. The system is quick. If you make an MDF template for the seat with pre-drilled-to-size spindle locations you can make quick "production" runs. When I use a template, I bore my seat spindle holes with a Forstner bit. It rides on the edges of the template hole and creates nice clean holes. One shortcoming with this system is the spindles themselves. Variations in the spindles can make dry assembly a little frustrating, but because of the accuracy of the holes it is straightforward to find the rogue spindle and make the appropriate adjustments. — EH Cheating the Spindles Avoid Turning and Shaving Getting your spindles to a round shape can be a challenge without a lathe. You can spokeshave them, but that can be time-consuming and requires a bit of skill. Luckily, there are a couple good jigs. They cost a bit, but they're cheaper than a new lathe. The Veritas Dowel Maker is an ingenious j ig that turns square stock into a dowel. A socket in your drill turns the stock as it passes two knives - one to rough out the shape and the second to shave it to perfect thickness. You can adjust the jig in tiny increments to get just the right size. While the j ig works well, it has a couple drawbacks. It requires a lot of little adjustments to get the device working just so. It's not particularly complicated, but it is time-consuming to learn. The second drawback is the price. The basic unit costs $145 and cuts only 1" and 15/16" -diameter dowels. To cut other common chairmaking sizes (V2", 5/8" and 3/4") you will need to purchase almost $100 of additional tooling. The other option is to buy rounding planes. These tools popwood.com 67 |


