Popular Woodworking 2005-06 № 148, страница 53
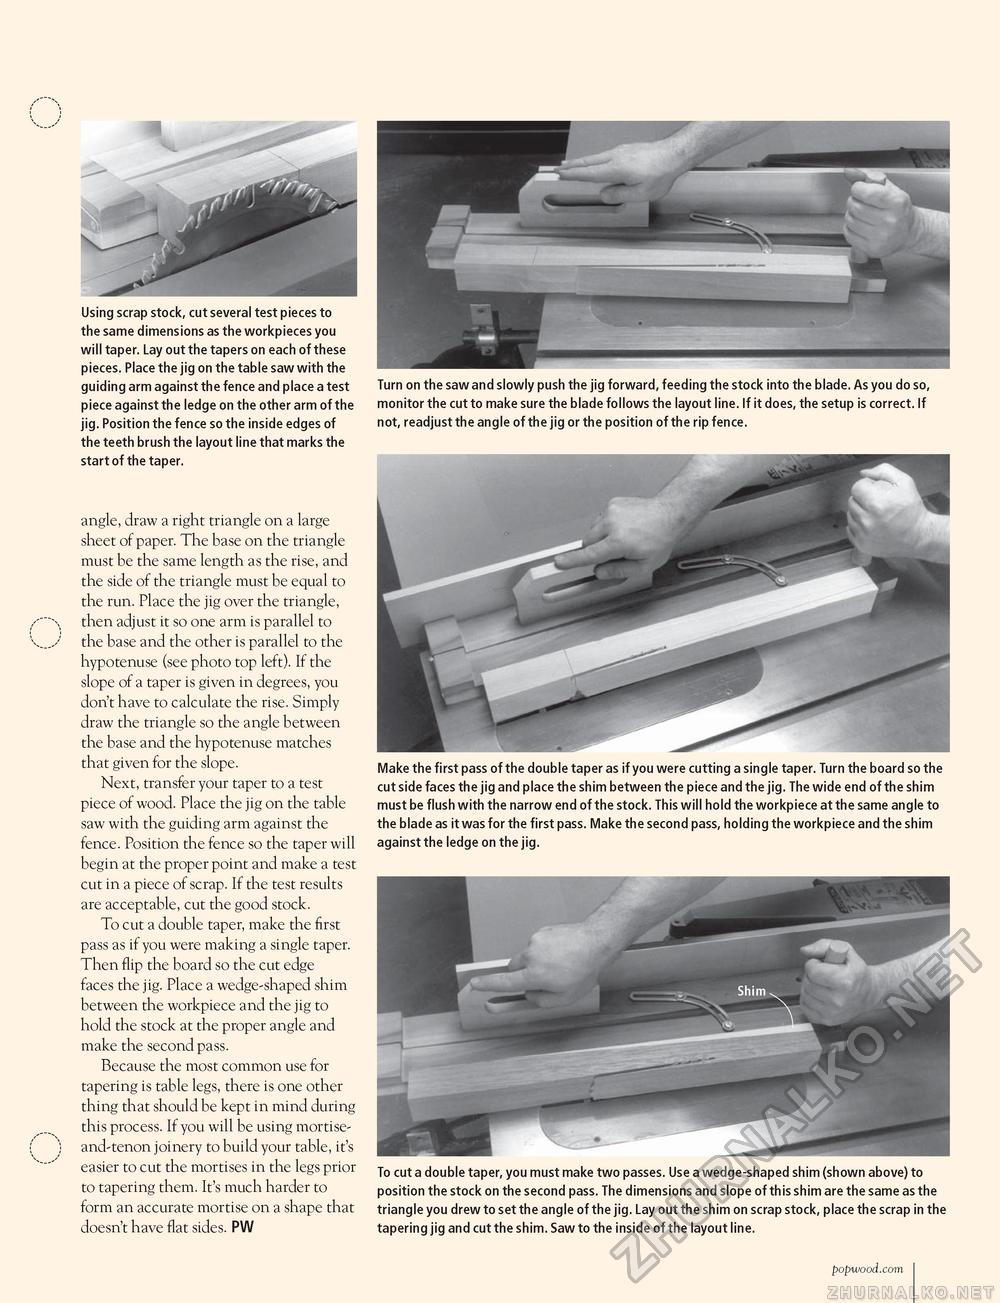
Using scrap stock, cut several test pieces to the same dimensions as the workpieces you will taper. Lay out the tapers on each of these pieces. Place the jig on the table saw with the guiding arm against the fence and place a test piece against the ledge on the other arm of the jig. Position the fence so the inside edges of the teeth brush the layout line that marks the start of the taper. angle, draw a right triangle on a large sheet of paper. The base on the triangle must be the same length as the rise, and the side of the triangle must be equal to the run. Place the jig over the triangle, then adjust it so one arm is parallel to the base and the other is parallel to the hypotenuse (see photo top left). If the slope of a taper is given in degrees, you don't have to calculate the rise. Simply draw the triangle so the angle between the base and the hypotenuse matches that given for the slope. Next, transfer your taper to a test piece of wood. Place the jig on the table saw with the guiding arm against the fence. Position the fence so the taper will begin at the proper point and make a test cut in a piece of scrap. If the test results are acceptable, cut the good stock. To cut a double taper, make the first pass as if you were making a single taper. Then flip the board so the cut edge faces the jig. Place a wedge-shaped shim between the workpiece and the jig to hold the stock at the proper angle and make the second pass. Because the most common use for tapering is table legs, there is one other thing that should be kept in mind during this process. If you will be using mortise-and-tenon joinery to build your table, it's easier to cut the mortises in the legs prior to tapering them. It's much harder to form an accurate mortise on a shape that doesn't have flat sides. PW Turn on the saw and slowly push the jig forward, feeding the stock into the blade. As you do so, monitor the cut to make sure the blade follows the layout line. If it does, the setup is correct. If not, readjust the angle of the jig or the position of the rip fence. Make the first pass of the double taper as if you were cutting a single taper. Turn the board so the cut side faces the jig and place the shim between the piece and the jig. The wide end of the shim must be flush with the narrow end of the stock. This will hold the workpiece at the same angle to the blade as it was for the first pass. Make the second pass, holding the workpiece and the shim against the ledge on the jig. To cut a double taper, you must make two passes. Use a wedge-shaped shim (shown above) to position the stock on the second pass. The dimensions and slope of this shim are the same as the triangle you drew to set the angle of the jig. Lay out the shim on scrap stock, place the scrap in the tapering jig and cut the shim. Saw to the inside of the layout line. popwood.com 53 |


