Popular Woodworking 2005-06 № 148, страница 80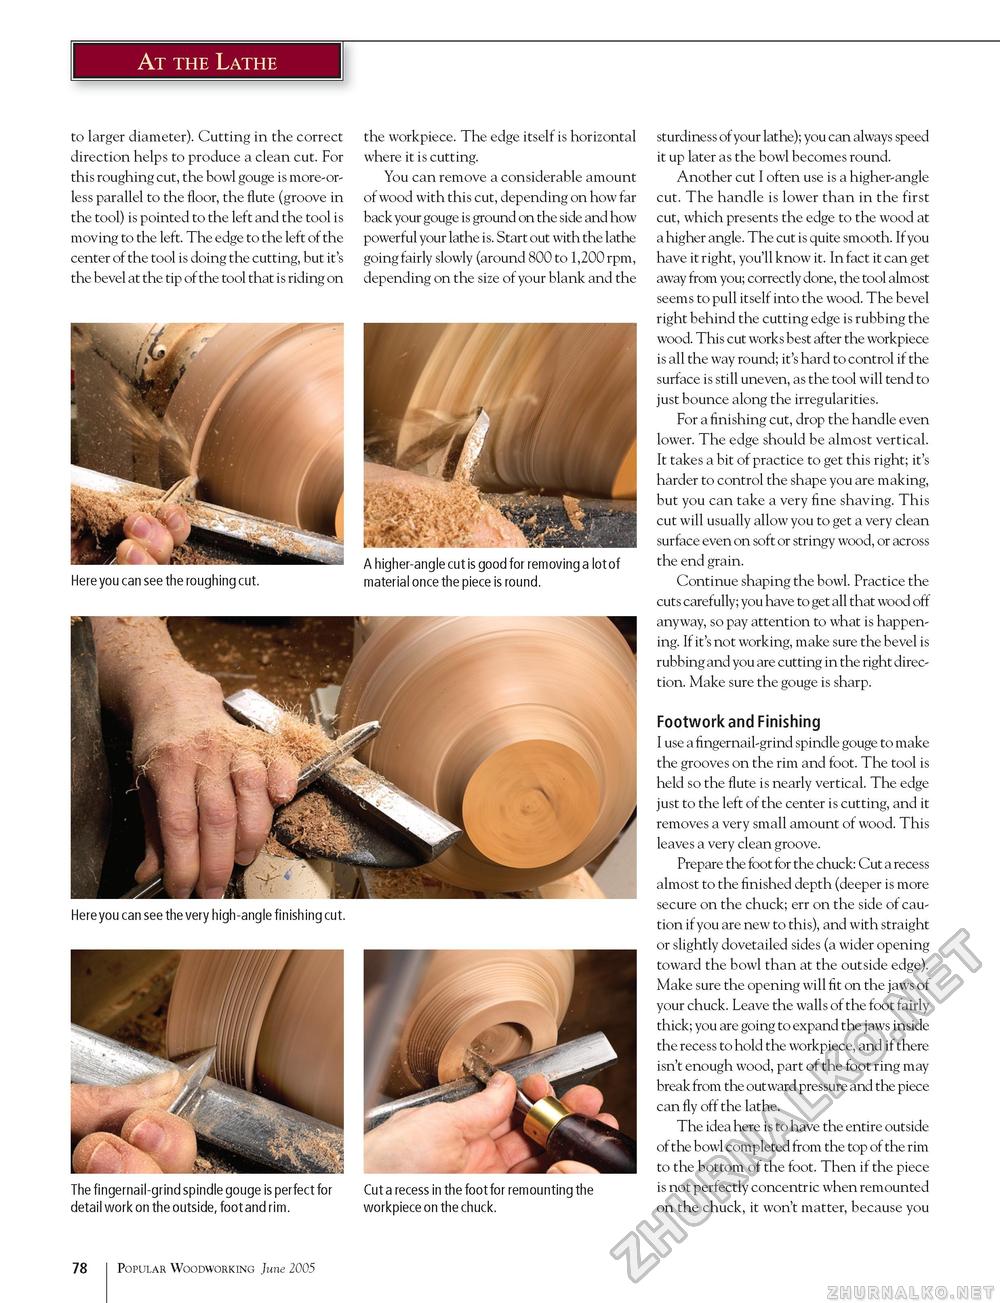
At the Lathe to larger diameter). Cutting in the correct direction helps to produce a clean cut. For this roughing cut, the bowl gouge is more-or-less parallel to the floor, the flute (groove in the tool) is pointed to the left and the tool is moving to the left. The edge to the left of the center of the tool is doing the cutting, but it's the bevel at the tip of the tool that is riding on the workpiece. The edge itself is horizontal where it is cutting. You can remove a considerable amount of wood with this cut, depending on how far back your gouge is ground on the side and how powerful your lathe is. Start out with the lathe going fairly slowly (around 800 to 1,200 rpm, depending on the size of your blank and the Here you can see the roughing cut. A higher-angle cut is good for removing a lot of material once the piece is round. Here you can see the very high-angle finishing cut. The fingernail-grind spindle gouge is perfect for detail work on the outside, foot and rim. Cut a recess in the foot for remounting the workpiece on the chuck. 78 Popular Woodworking June 2005 sturdiness of your lathe); you can always speed it up later as the bowl becomes round. Another cut I often use is a higher-angle cut. The handle is lower than in the first cut, which presents the edge to the wood at a higher angle. The cut is quite smooth. If you have it right, you'll know it. In fact it can get away from you; correctly done, the tool almost seems to pull itself into the wood. The bevel right behind the cutting edge is rubbing the wood. This cut works best after the workpiece is all the way round; it's hard to control if the surface is still uneven, as the tool will tend to just bounce along the irregularities. For a finishing cut, drop the handle even lower. The edge should be almost vertical. It takes a bit of practice to get this right; it's harder to control the shape you are making, but you can take a very fine shaving. This cut will usually allow you to get a very clean surface even on soft or stringy wood, or across the end grain. Continue shaping the bowl. Practice the cuts carefully; you have to get all that wood off anyway, so pay attention to what is happening. If it's not working, make sure the bevel is rubbing and you are cutting in the right direction. Make sure the gouge is sharp. Footwork and Finishing I use a fingernail-grind spindle gouge to make the grooves on the rim and foot. The tool is held so the flute is nearly vertical. The edge just to the left of the center is cutting, and it removes a very small amount of wood. This leaves a very clean groove. Prepare the foot for the chuck: Cut a recess almost to the finished depth (deeper is more secure on the chuck; err on the side of caution if you are new to this), and with straight or slightly dovetailed sides (a wider opening toward the bowl than at the outside edge). Make sure the opening will fit on the jaws of your chuck. Leave the walls of the foot fairly thick; you are going to expand the jaws inside the recess to hold the workpiece, and if there isn't enough wood, part of the foot ring may break from the outward pressure and the piece can fly off the lathe. The idea here is to have the entire outside of the bowl completed from the top of the rim to the bottom of the foot. Then if the piece is not perfectly concentric when remounted on the chuck, it won't matter, because you |


