Popular Woodworking 2005-06 № 148, страница 81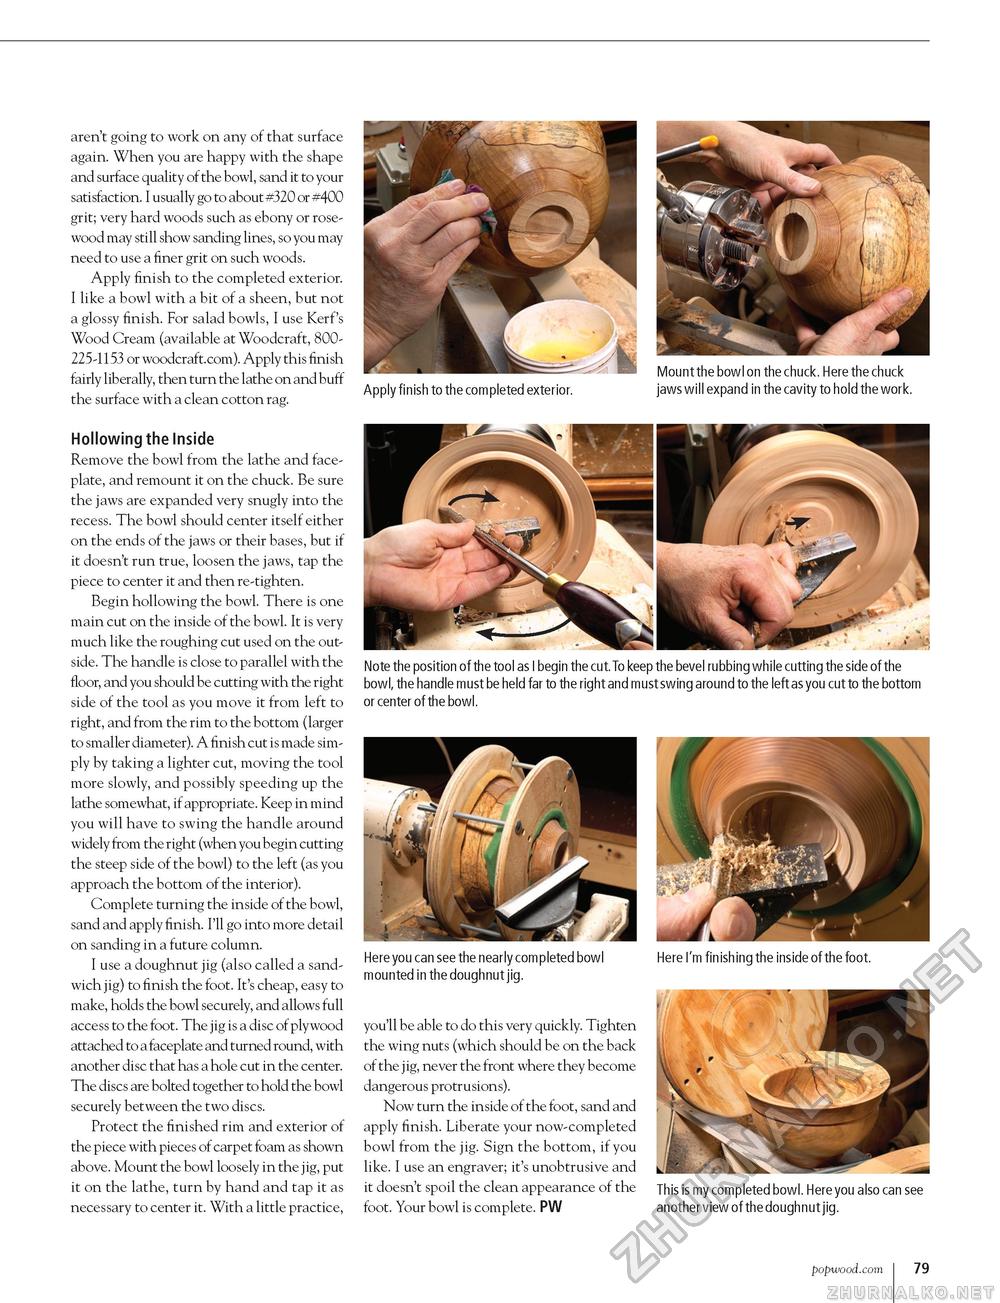
aren't going to work on any of that surface again. When you are happy with the shape and surface quality of the bowl, sand it to your satisfaction. I usually go to about #320 or #400 grit; very hard woods such as ebony or rosewood may still show sanding lines, so you may need to use a finer grit on such woods. Apply finish to the completed exterior. I like a bowl with a bit of a sheen, but not a glossy finish. For salad bowls, I use Kerf's Wood Cream (available at Woodcraft, 800225-1153 or woodcraft.com). Apply this finish fairly liberally, then turn the lathe on and buff the surface with a clean cotton rag. Hollowing the Inside Remove the bowl from the lathe and faceplate, and remount it on the chuck. Be sure the jaws are expanded very snugly into the recess. The bowl should center itself either on the ends of the jaws or their bases, but if it doesn't run true, loosen the jaws, tap the piece to center it and then re-tighten. Begin hollowing the bowl. There is one main cut on the inside of the bowl. It is very much like the roughing cut used on the outside. The handle is close to parallel with the floor, and you should be cutting with the right side of the tool as you move it from left to right, and from the rim to the bottom (larger to smaller diameter). A finish cut is made simply by taking a lighter cut, moving the tool more slowly, and possibly speeding up the lathe somewhat, if appropriate. Keep in mind you will have to swing the handle around widely from the right (when you begin cutting the steep side of the bowl) to the left (as you approach the bottom of the interior). Complete turning the inside of the bowl, sand and apply finish. I'll go into more detail on sanding in a future column. I use a doughnut jig (also called a sandwich jig) to finish the foot. It's cheap, easy to make, holds the bowl securely, and allows full access to the foot. The jig is a disc of plywood attached to a faceplate and turned round, with another disc that has a hole cut in the center. The discs are bolted together to hold the bowl securely between the two discs. Protect the finished rim and exterior of the piece with pieces of carpet foam as shown above. Mount the bowl loosely in the jig, put it on the lathe, turn by hand and tap it as necessary to center it. With a little practice, Apply finish to the completed exterior. Mount the bowl on the chuck. Here the chuck jaws will expand in the cavity to hold the work. Note the position of the tool as I begin the cut. To keep the bevel rubbing while cutting the side of the bowl, the handle must be held far to the right and must swing around to the left as you cut to the bottom or center of the bowl. Here you can see the nearly completed bowl mounted in the doughnut jig. you'll be able to do this very quickly. Tighten the wing nuts (which should be on the back of the j ig, never the front where they become dangerous protrusions). Now turn the inside of the foot, sand and apply finish. Liberate your now-completed bowl from the jig. Sign the bottom, if you like. I use an engraver; it's unobtrusive and it doesn't spoil the clean appearance of the foot. Your bowl is complete. PW Here I'm finishing the inside of the foot. This is my completed bowl. Here you also can see another view of the doughnut jig. popwood.com 79 |


