Popular Woodworking 2005-06 № 148, страница 87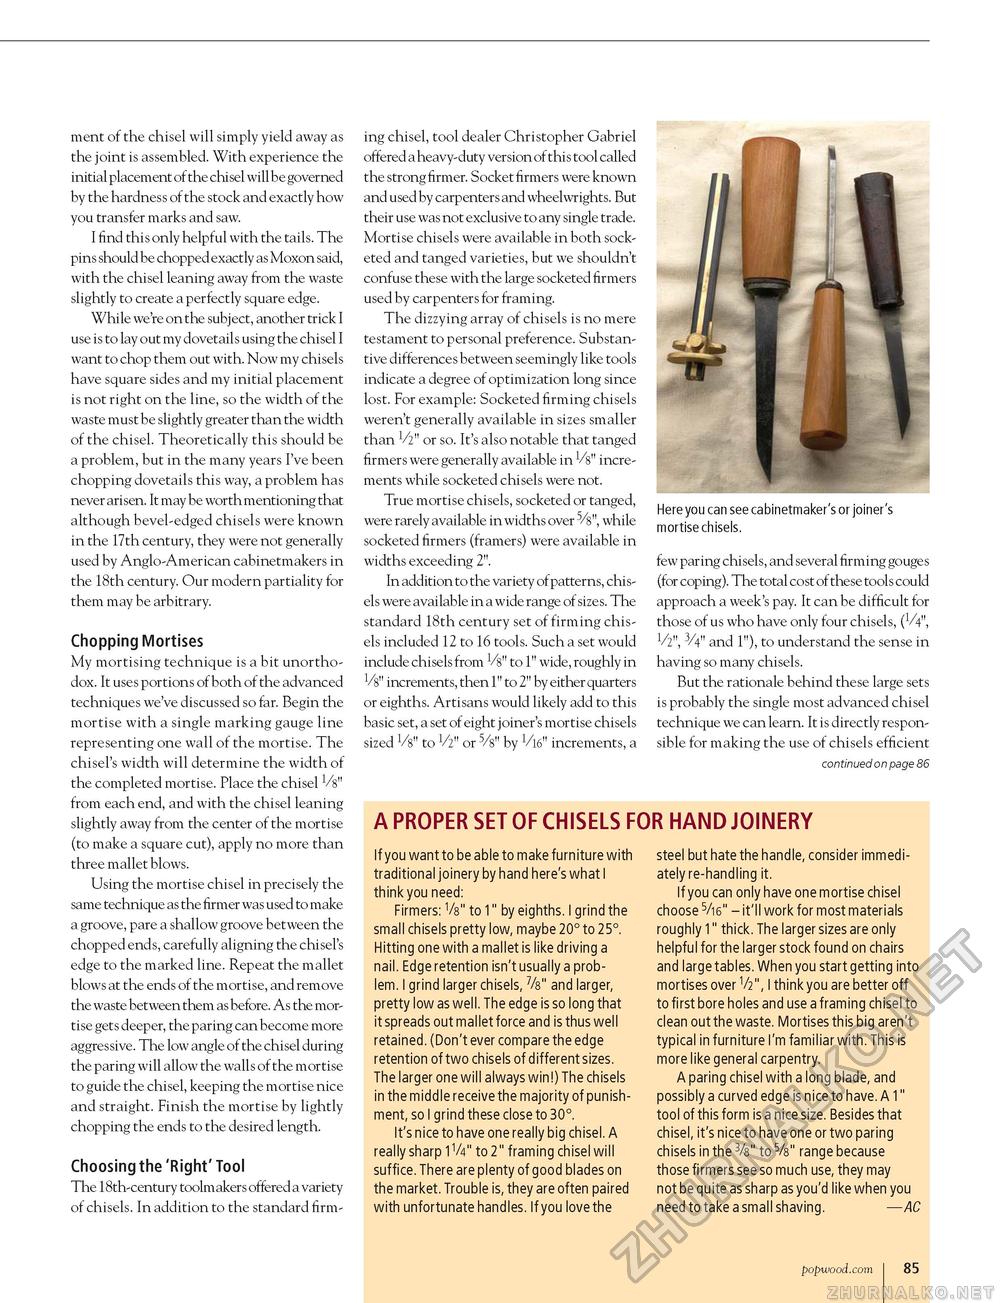
ment of the chisel will simply yield away as the joint is assembled. With experience the initial placement of the chisel will be governed by the hardness of the stock and exactly how you transfer marks and saw. I find this only helpful with the tails. The pins should be chopped exactly as Moxon said, with the chisel leaning away from the waste slightly to create a perfectly square edge. While we're on the subject, another trick I use is to lay out my dovetails using the chisel I want to chop them out with. Now my chisels have square sides and my initial placement is not right on the line, so the width of the waste must be slightly greater than the width of the chisel. Theoretically this should be a problem, but in the many years I've been chopping dovetails this way, a problem has never arisen. It may be worth mentioning that although bevel-edged chisels were known in the 17th century, they were not generally used by Anglo-American cabinetmakers in the 18th century. Our modern partiality for them may be arbitrary. Chopping Mortises My mortising technique is a bit unorthodox. It uses portions of both of the advanced techniques we've discussed so far. Begin the mortise with a single marking gauge line representing one wall of the mortise. The chisel's width will determine the width of the completed mortise. Place the chisel V8" from each end, and with the chisel leaning slightly away from the center of the mortise (to make a square cut), apply no more than three mallet blows. Using the mortise chisel in precisely the same technique as the firmer was used to make a groove, pare a shallow groove between the chopped ends, carefully aligning the chisel's edge to the marked line. Repeat the mallet blows at the ends of the mortise, and remove the waste between them as before. As the mortise gets deeper, the paring can become more aggressive. The low angle of the chisel during the paring will allow the walls of the mortise to guide the chisel, keeping the mortise nice and straight. Finish the mortise by lightly chopping the ends to the desired length. Choosing the 'Right' Tool The 18th-century toolmakers offered a variety of chisels. In addition to the standard firm ing chisel, tool dealer Christopher Gabriel offered a heavy-duty version of this tool called the strong firmer. Socket firmers were known and used by carpenters and wheelwrights. But their use was not exclusive to any single trade. Mortise chisels were available in both socketed and tanged varieties, but we shouldn't confuse these with the large socketed firmers used by carpenters for framing. The dizzying array of chisels is no mere testament to personal preference. Substantive differences between seemingly like tools indicate a degree of optimization long since lost. For example: Socketed firming chisels weren't generally available in sizes smaller than V2" or so. It's also notable that tanged firmers were generally available in Vs" increments while socketed chisels were not. True mortise chisels, socketed or tanged, were rarely available in widths over , while socketed firmers (framers) were available in widths exceeding 2". In addition to the variety of patterns, chisels were available in a wide range of sizes. The standard 18th century set of firming chisels included 12 to 16 tools. Such a set would include chisels from V8" to 1" wide, roughly in Vs" increments, then 1" to 2" by either quarters or eighths. Artisans would likely add to this basic set, a set of eight joiner's mortise chisels sized V8" to V2" or 5/8" by V16" increments, a If you want to be able to make furniture with traditional joinery by hand here's what I think you need: Firmers: V8" to 1" by eighths. I grind the small chisels pretty low, maybe 20° to 25°. Hitting one with a mallet is like driving a nail. Edge retention isn't usually a problem. I grind larger chisels, 7/8" and larger, pretty low as well. The edge is so long that it spreads out mallet force and is thus well retained. (Don't ever compare the edge retention of two chisels of different sizes. The larger one will always win!) The chisels in the middle receive the majority of punishment, so I grind these close to 30°. It's nice to have one really big chisel. A really sharp 1V4" to 2" framing chisel will suffice. There are plenty of good blades on the market. Trouble is, they are often paired with unfortunate handles. If you love the fi Here you can see cabinetmaker's or joiner's mortise chisels. few paring chisels, and several firming gouges (for coping). The total cost of these tools could approach a week's pay. It can be difficult for those of us who have only four chisels, (v/4", V2", 3/4" and 1"), to understand the sense in having so many chisels. But the rationale behind these large sets is probably the single most advanced chisel technique we can learn. It is directly responsible for making the use of chisels efficient continued on page 86 steel but hate the handle, consider immediately re-handling it. If you can only have one mortise chisel choose 5/i6" - it'll work for most materials roughly 1" thick. The larger sizes are only helpful for the larger stock found on chairs and large tables. When you start getting into mortises over V2", I think you are better off to first bore holes and use a framing chisel to clean out the waste. Mortises this big aren't typical in furniture I'm familiar with. This is more like general carpentry. A paring chisel with a long blade, and possibly a curved edge is nice to have. A 1" tool of this form is a nice size. Besides that chisel, it's nice to have one or two paring chisels in the 3/8" to 5/8" range because those firmers see so much use, they may not be quite as sharp as you'd like when you need to take a small shaving. — AC A PROPER SET OF CHISELS FOR HAND JOINERY popwood.com 85 |


