Popular Woodworking 2005-08 № 149, страница 23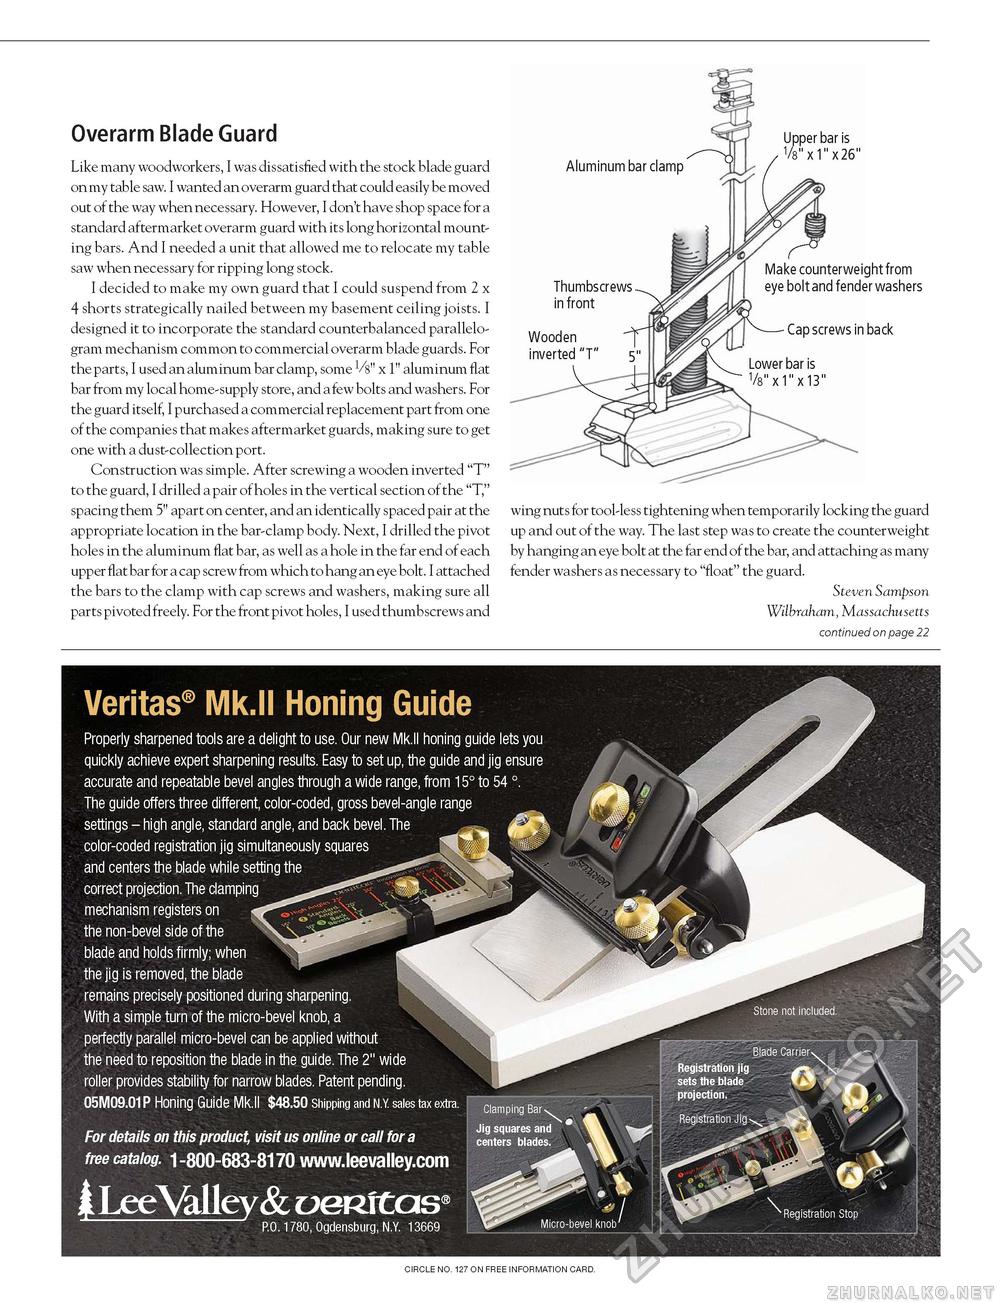
Overarm Blade Guard Like many woodworkers, I was dissatisfied with the stock blade guard on my table saw. I wanted an overarm guard that could easily be moved out of the way when necessary. However, I don't have shop space for a standard aftermarket overarm guard with its long horizontal mounting bars. And I needed a unit that allowed me to relocate my table saw when necessary for ripping long stock. I decided to make my own guard that I could suspend from 2 x 4 shorts strategically nailed between my basement ceiling joists. I designed it to incorporate the standard counterbalanced parallelogram mechanism common to commercial overarm blade guards. For the parts, I used an aluminum bar clamp, some Vs" x 1" aluminum flat bar from my local home-supply store, and a few bolts and washers. For the guard itself, I purchased a commercial replacement part from one of the companies that makes aftermarket guards, making sure to get one with a dust-collection port. Construction was simple. After screwing a wooden inverted "T" to the guard, I drilled a pair of holes in the vertical section of the "T," spacing them 5" apart on center, and an identically spaced pair at the appropriate location in the bar-clamp body. Next, I drilled the pivot holes in the aluminum flat bar, as well as a hole in the far end of each upper flat bar for a cap screw from which to hang an eye bolt. I attached the bars to the clamp with cap screws and washers, making sure all parts pivoted freely. For the front pivot holes, I used thumbscrews and Aluminum bar clamp Thumbscrews in front Wooden inverted "T" 5" Make counterweight from eye bolt and fender washers Cap screws in back wing nuts for tool-less tightening when temporarily locking the guard up and out of the way. The last step was to create the counterweight by hanging an eye bolt at the far end of the bar, and attaching as many fender washers as necessary to "float" the guard. Steven Sampson Wilbraham, Massachusetts continued on page 22 Veritas® Mk.II Honing Guide Properly sharpened tools are a delight to use. Our new Mk.II honing guide lets you quickly achieve expert sharpening results. Easy to set up, the guide and jig ensure accurate and repeatable bevel angles through a wide range, from 15° to 54 °. The guide offers three different, color-coded, gross bevel-angle range settings - high angle, standard angle, and back bevel. The color-coded registration jig simultaneously squares and centers the blade while setting the correct projection. The clamping mechanism registers on the non-bevel side of the blade and holds firmly; when the jig is removed, the blade remains precisely positioned during sharpening. With a simple turn of the micro-bevel knob, a perfectly parallel micro-bevel can be applied without the need to reposition the blade in the guide. The 2" wide roller provides stability for narrow blades. Patent pending. 05M09.01P Honing Guide Mk.II $48.50 Shipping and N.Y sales tax extra. For details on this product, visit us online or call for a free catalog. 1-800-683-8170 www.leevalley.com j Lee Valley & u&mtas P.O. 1780, Ogdensburg, N.Y. 13669 CIRCLE NO. 119 ON FREE INFORMATION CARD. |


