Popular Woodworking 2005-08 № 149, страница 24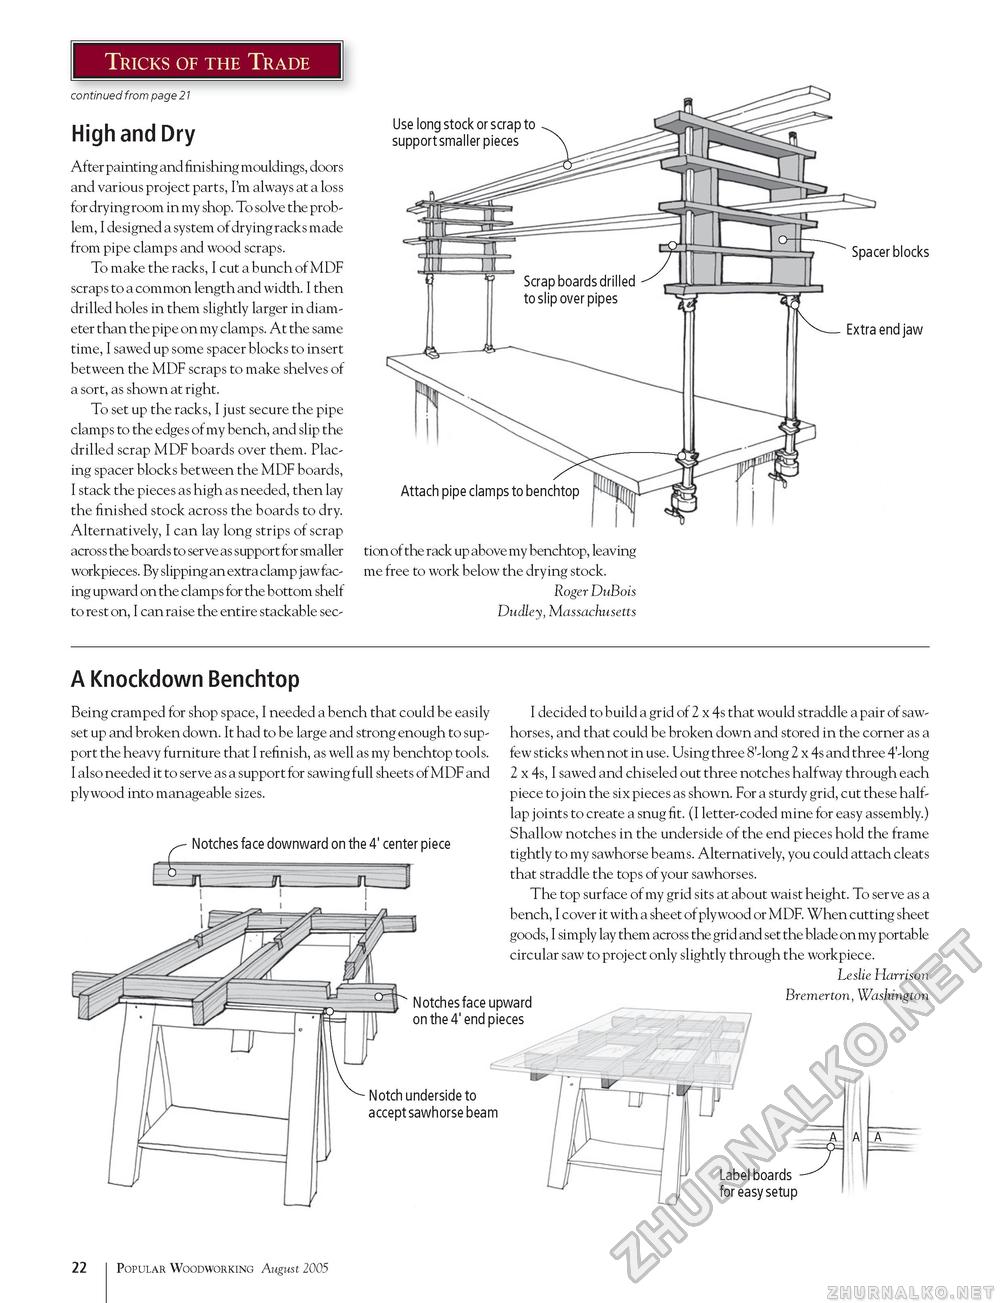
Tricks of the Trade continued from page 21 High and Dry After painting and finishing mouldings, doors and various project parts, I'm always at a loss for drying room in my shop. To solve the problem, I designed a system of drying racks made from pipe clamps and wood scraps. To make the racks, I cut a bunch of MDF scraps to a common length and width. I then drilled holes in them slightly larger in diameter than the pipe on my clamps. At the same time, I sawed up some spacer blocks to insert between the MDF scraps to make shelves of a sort, as shown at right. To set up the racks, I just secure the pipe clamps to the edges of my bench, and slip the drilled scrap MDF boards over them. Placing spacer blocks between the MDF boards, I stack the pieces as high as needed, then lay the finished stock across the boards to dry. Alternatively, I can lay long strips of scrap across the boards to serve as support for smaller workpieces. By slipping an extra clamp jaw facing upward on the clamps for the bottom shelf to rest on, I can raise the entire stackable sec Use long stock or scrap to support smaller pieces Spacer blocks Extra end jaw Attach pipe clamps to benchtop tion of the rack up above my benchtop, leaving me free to work below the drying stock. Roger DuBois Dudley, Massachusetts A Knockdown Benchtop Being cramped for shop space, I needed a bench that could be easily set up and broken down. It had to be large and strong enough to support the heavy furniture that I refinish, as well as my benchtop tools. I also needed it to serve as a support for sawing full sheets of MDF and plywood into manageable sizes. Notches face downward on the 4' center piece JL J1___ JL I decided to build a grid of 2 x 4s that would straddle a pair of saw-horses, and that could be broken down and stored in the corner as a few sticks when not in use. Using three 8'-long 2 x 4s and three 4'-long 2 x 4s, I sawed and chiseled out three notches halfway through each piece to join the six pieces as shown. For a sturdy grid, cut these half-lap joints to create a snug fit. (I letter-coded mine for easy assembly.) Shallow notches in the underside of the end pieces hold the frame tightly to my sawhorse beams. Alternatively, you could attach cleats that straddle the tops of your sawhorses. The top surface of my grid sits at about waist height. To serve as a bench, I cover it with a sheet of plywood or MDF. When cutting sheet goods, I simply lay them across the grid and set the blade on my portable circular saw to project only slightly through the workpiece. Leslie Harrison Notches face upward on the 4' end pieces Bremerton, Washington Notch underside to accept sawhorse beam A Label boards for easy setup 22 Popular Woodworking August 2005 |


