Popular Woodworking 2005-08 № 149, страница 71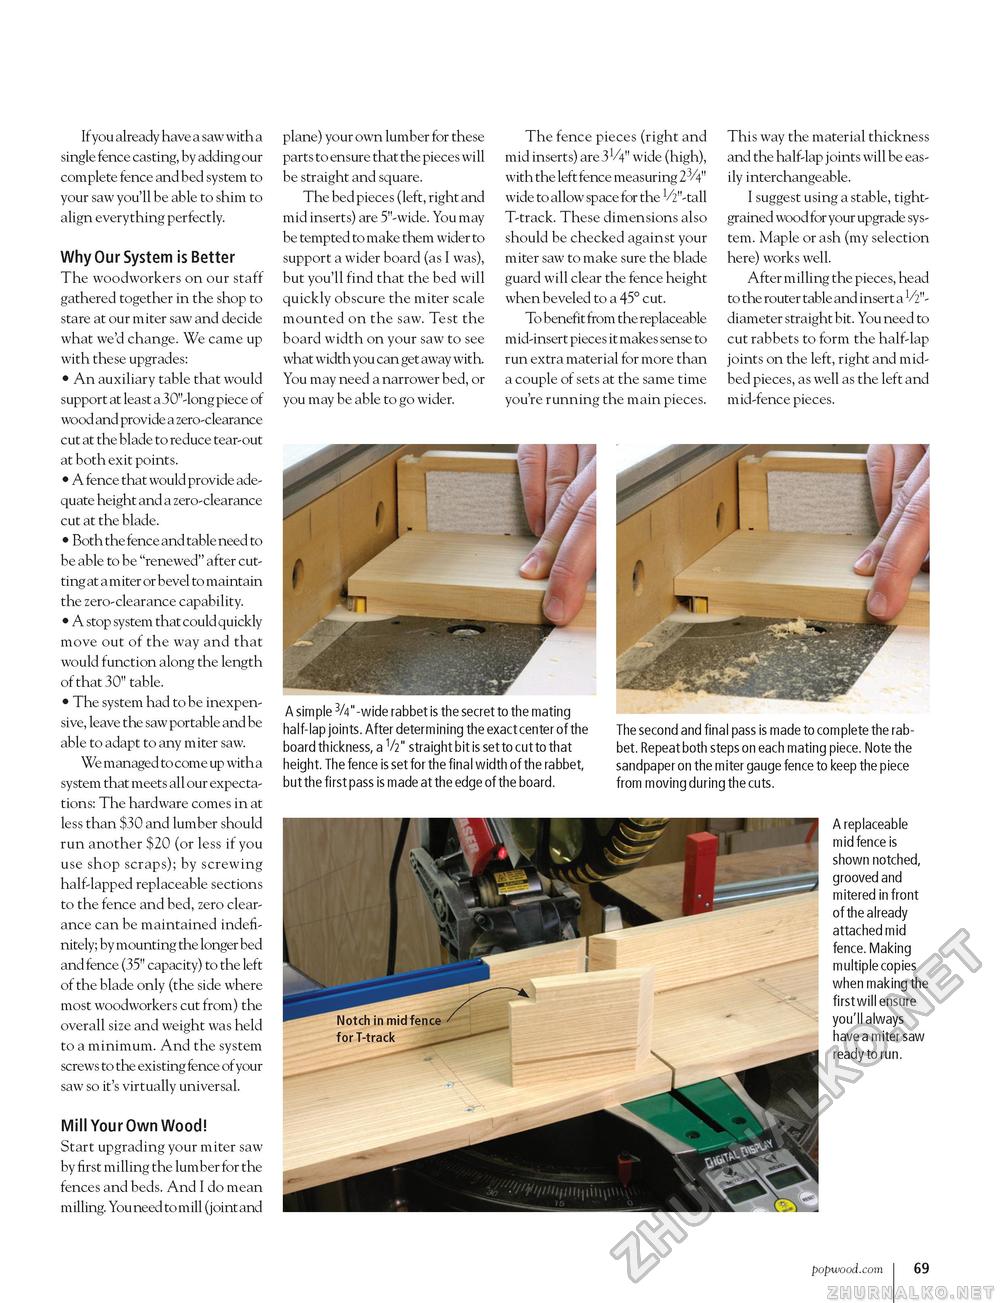
If you already have a saw with a single fence casting, by adding our complete fence and bed system to your saw you'll be able to shim to align everything perfectly. Why Our System is Better The woodworkers on our staff gathered together in the shop to stare at our miter saw and decide what we'd change. We came up with these upgrades: • An auxiliary table that would support at least a 30"-long piece of wood and provide a zero-clearance cut at the blade to reduce tear-out at both exit points. • A fence that would provide adequate height and a zero-clearance cut at the blade. • Both the fence and table need to be able to be "renewed" after cutting at a miter or bevel to maintain the zero-clearance capability. • A stop system that could quickly move out of the way and that would function along the length of that 30" table. • The system had to be inexpensive, leave the saw portable and be able to adapt to any miter saw. We managed to come up with a system that meets all our expectations: The hardware comes in at less than $30 and lumber should run another $20 (or less if you use shop scraps); by screwing half-lapped replaceable sections to the fence and bed, zero clearance can be maintained indefinitely; by mounting the longer bed and fence (35" capacity) to the left of the blade only (the side where most woodworkers cut from) the overall size and weight was held to a minimum. And the system screws to the existing fence of your saw so it's virtually universal. Mill Your Own Wood! Start upgrading your miter saw by first milling the lumber for the fences and beds. And I do mean milling. You need to mill (joint and plane) your own lumber for these parts to ensure that the pieces will be straight and square. The bed pieces (left, right and mid inserts) are 5"-wide. You may be tempted to make them wider to support a wider board (as I was), but you'll find that the bed will quickly obscure the miter scale mounted on the saw. Test the board width on your saw to see what width you can get away with. You may need a narrower bed, or you may be able to go wider. The fence pieces (right and mid inserts) are 31/4" wide (high), with the left fence measuring 23/4" wide to allow space for the V2"-tall T-track. These dimensions also should be checked against your miter saw to make sure the blade guard will clear the fence height when beveled to a 45° cut. To benefit from the replaceable mid-insert pieces it makes sense to run extra material for more than a couple of sets at the same time you're running the main pieces. This way the material thickness and the half-lap joints will be easily interchangeable. I suggest using a stable, tight-grained wood for your upgrade system. Maple or ash (my selection here) works well. After milling the pieces, head to the router table and insert a V2"-diameter straight bit. You need to cut rabbets to form the half-lap joints on the left, right and mid-bed pieces, as well as the left and mid-fence pieces. A replaceable mid fence is shown notched, grooved and mitered in front of the already attached mid fence. Making multiple copies when making the fi rst will ensure you'll always have a miter saw ready to run. A simple 3/4"-wide rabbet is the secret to the mating half-lap joints. After determining the exact center of the board thickness, a V2" straight bit is set to cut to that height. The fence is set for the final width of the rabbet, but the first pass is made at the edge of the board. The second and final pass is made to complete the rabbet. Repeat both steps on each mating piece. Note the sandpaper on the miter gauge fence to keep the piece from moving during the cuts. popwood.com I 69 |


