Popular Woodworking 2005-08 № 149, страница 73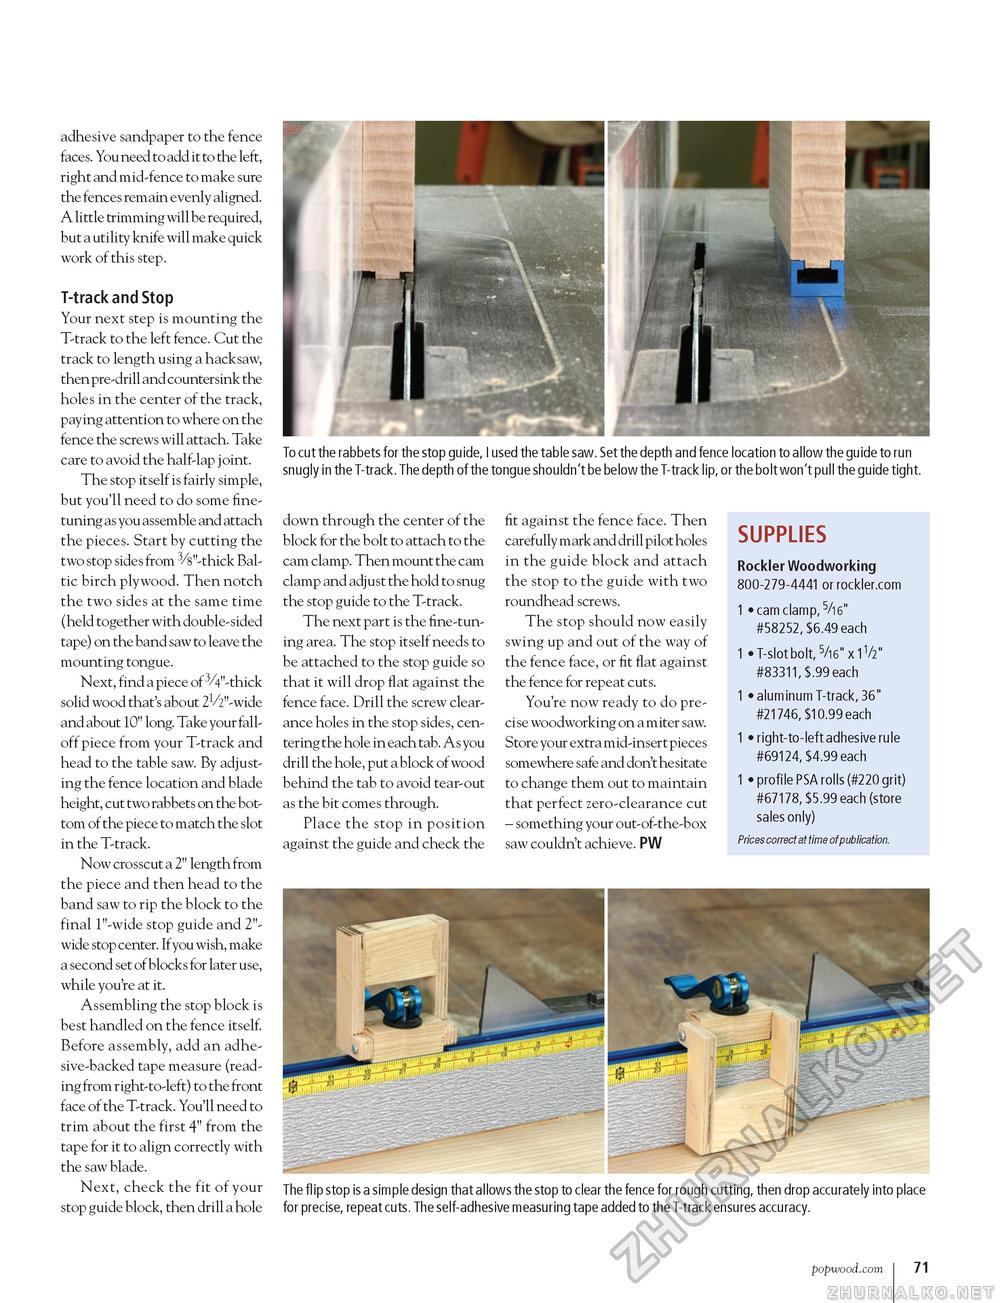
adhesive sandpaper to the fence faces. You need to add it to the left, right and mid-fence to make sure the fences remain evenly aligned. A little trimming will be required, but a utility knife will make quick work of this step. T-track and Stop Your next step is mounting the T-track to the left fence. Cut the track to length using a hacksaw, then pre-drill and countersink the holes in the center of the track, paying attention to where on the fence the screws will attach. Take care to avoid the half-lap joint. The stop itself is fairly simple, but you'll need to do some fine-tuning as you assemble and attach the pieces. Start by cutting the two stop sides from 3/8"-thick Baltic birch plywood. Then notch the two sides at the same time (held together with double-sided tape) on the band saw to leave the mounting tongue. Next, find a piece of 3/4"-thick solid wood that's about 21/2"-wide and about 10" long. Take your fall-off piece from your T-track and head to the table saw. By adjusting the fence location and blade height, cut two rabbets on the bottom of the piece to match the slot in the T-track. Now crosscut a 2" length from the piece and then head to the band saw to rip the block to the final 1"-wide stop guide and 2"-wide stop center. If you wish, make a second set of blocks for later use, while you're at it. Assembling the stop block is best handled on the fence itself. Before assembly, add an adhesive-backed tape measure (reading from right-to-left) to the front face of the T-track. You'll need to trim about the first 4" from the tape for it to align correctly with the saw blade. Next, check the fit of your stop guide block, then drill a hole To cut the rabbets for the stop guide, I used the table saw. Set the depth and fence location to allow the guide to run snugly in the T-track. The depth of the tongue shouldn't be below the T-track lip, or the bolt won't pull the guide tight. down through the center of the block for the bolt to attach to the cam clamp. Then mount the cam clamp and adjust the hold to snug the stop guide to the T-track. The next part is the fine-tuning area. The stop itself needs to be attached to the stop guide so that it will drop flat against the fence face. Drill the screw clearance holes in the stop sides, centering the hole in each tab. As you drill the hole, put a block of wood behind the tab to avoid tear-out as the bit comes through. Place the stop in position against the guide and check the fit against the fence face. Then carefully mark and drill pilot holes in the guide block and attach the stop to the guide with two roundhead screws. The stop should now easily swing up and out of the way of the fence face, or fit flat against the fence for repeat cuts. You're now ready to do precise woodworking on a miter saw. Store your extra mid-insert pieces somewhere safe and don't hesitate to change them out to maintain that perfect zero-clearance cut - something your out-of-the-box saw couldn't achieve. PW SUPPLIES Rockier Woodworking 800-279-4441 or rockler.com 1 • cam clamp, 5/i6" #58252, $6.49 each 1 • T-slot bolt, 5/i6" x 1V2" #83311, $.99 each 1 • aluminum T-track, 36" #21746, $10.99 each 1 • right-to-left adhesive rule #69124, $4.99 each 1 • profile PSA rolls (#220 grit) #67178, $5.99 each (store sales only) Prices correct at time of publication. The flip stop is a simple design that allows the stop to clear the fence for rough cutting, then drop accurately into place for precise, repeat cuts. The self-adhesive measuring tape added to the T-track ensures accuracy. popwood.com I 71 |


