Popular Woodworking 2005-10 № 150, страница 105
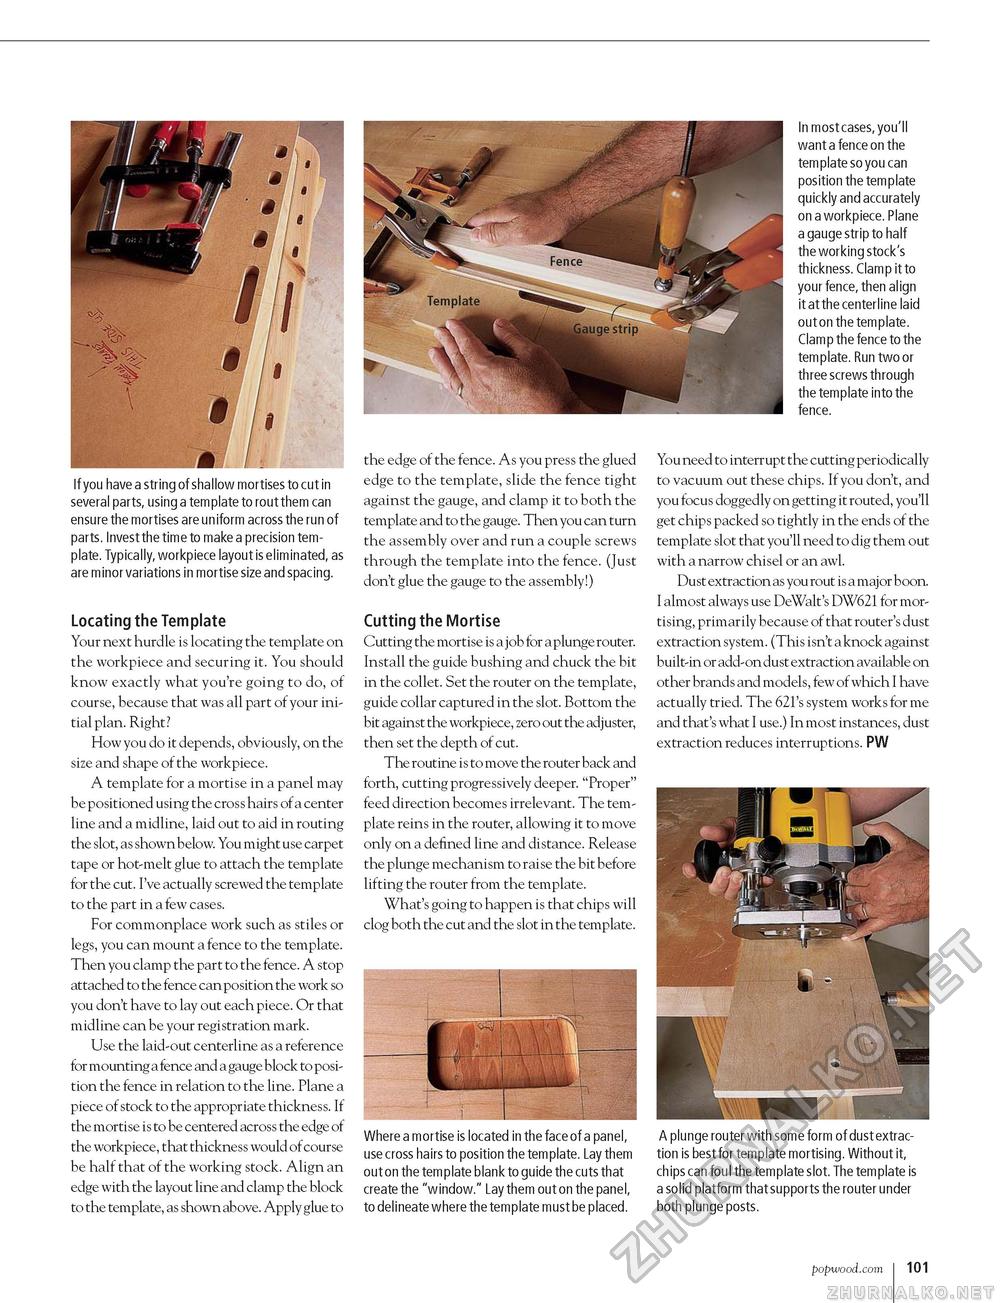
In most cases, you'll want a fence on the template so you can position the template quickly and accurately on a workpiece. Plane a gauge strip to half the working stock's thickness. Clamp it to your fence, then align it at the centerline laid out on the template. Clamp the fence to the template. Run two or three screws through the template into the fence. If you have a string of shallow mortises to cut in several parts, using a template to rout them can ensure the mortises are uniform across the run of parts. Invest the time to make a precision template. Typically, workpiece layout is eliminated, as are minor variations in mortise size and spacing. Locating the Template Your next hurdle is locating the template on the workpiece and securing it. You should know exactly what you're going to do, of course, because that was all part of your initial plan. Right? How you do it depends, obviously, on the size and shape of the workpiece. A template for a mortise in a panel may be positioned using the cross hairs of a center line and a midline, laid out to aid in routing the slot, as shown below. You might use carpet tape or hot-melt glue to attach the template for the cut. I've actually screwed the template to the part in a few cases. For commonplace work such as stiles or legs, you can mount a fence to the template. Then you clamp the part to the fence. A stop attached to the fence can position the work so you don't have to lay out each piece. Or that midline can be your registration mark. Use the laid-out centerline as a reference for mounting a fence and a gauge block to position the fence in relation to the line. Plane a piece of stock to the appropriate thickness. If the mortise is to be centered across the edge of the workpiece, that thickness would of course be half that of the working stock. Align an edge with the layout line and clamp the block to the template, as shown above. Apply glue to the edge of the fence. As you press the glued edge to the template, slide the fence tight against the gauge, and clamp it to both the template and to the gauge. Then you can turn the assembly over and run a couple screws through the template into the fence. (Just don't glue the gauge to the assembly!) Cutting the Mortise Cutting the mortise is a job for a plunge router. Install the guide bushing and chuck the bit in the collet. Set the router on the template, guide collar captured in the slot. Bottom the bit against the workpiece, zero out the adjuster, then set the depth of cut. The routine is to move the router back and forth, cutting progressively deeper. "Proper" feed direction becomes irrelevant. The template reins in the router, allowing it to move only on a defined line and distance. Release the plunge mechanism to raise the bit before lifting the router from the template. What's going to happen is that chips will clog both the cut and the slot in the template. Where a mortise is located in the face of a panel, use cross hairs to position the template. Lay them out on the template blank to guide the cuts that create the "window." Lay them out on the panel, to delineate where the template must be placed. You need to interrupt the cutting periodically to vacuum out these chips. If you don't, and you focus doggedly on getting it routed, you'll get chips packed so tightly in the ends of the template slot that you'll need to dig them out with a narrow chisel or an awl. Dust extraction as you rout is a major boon. I almost always use DeWalt's DW621 for mortising, primarily because of that router's dust extraction system. (This isn't a knock against built-in or add-on dust extraction available on other brands and models, few of which I have actually tried. The 621's system works for me and that's what I use.) In most instances, dust extraction reduces interruptions. PW A plunge router with some form of dust extraction is best for template mortising. Without it, chips can foul the template slot. The template is a solid platform that supports the router under both plunge posts. popwood.com i 101 |


