Popular Woodworking 2005-10 № 150, страница 94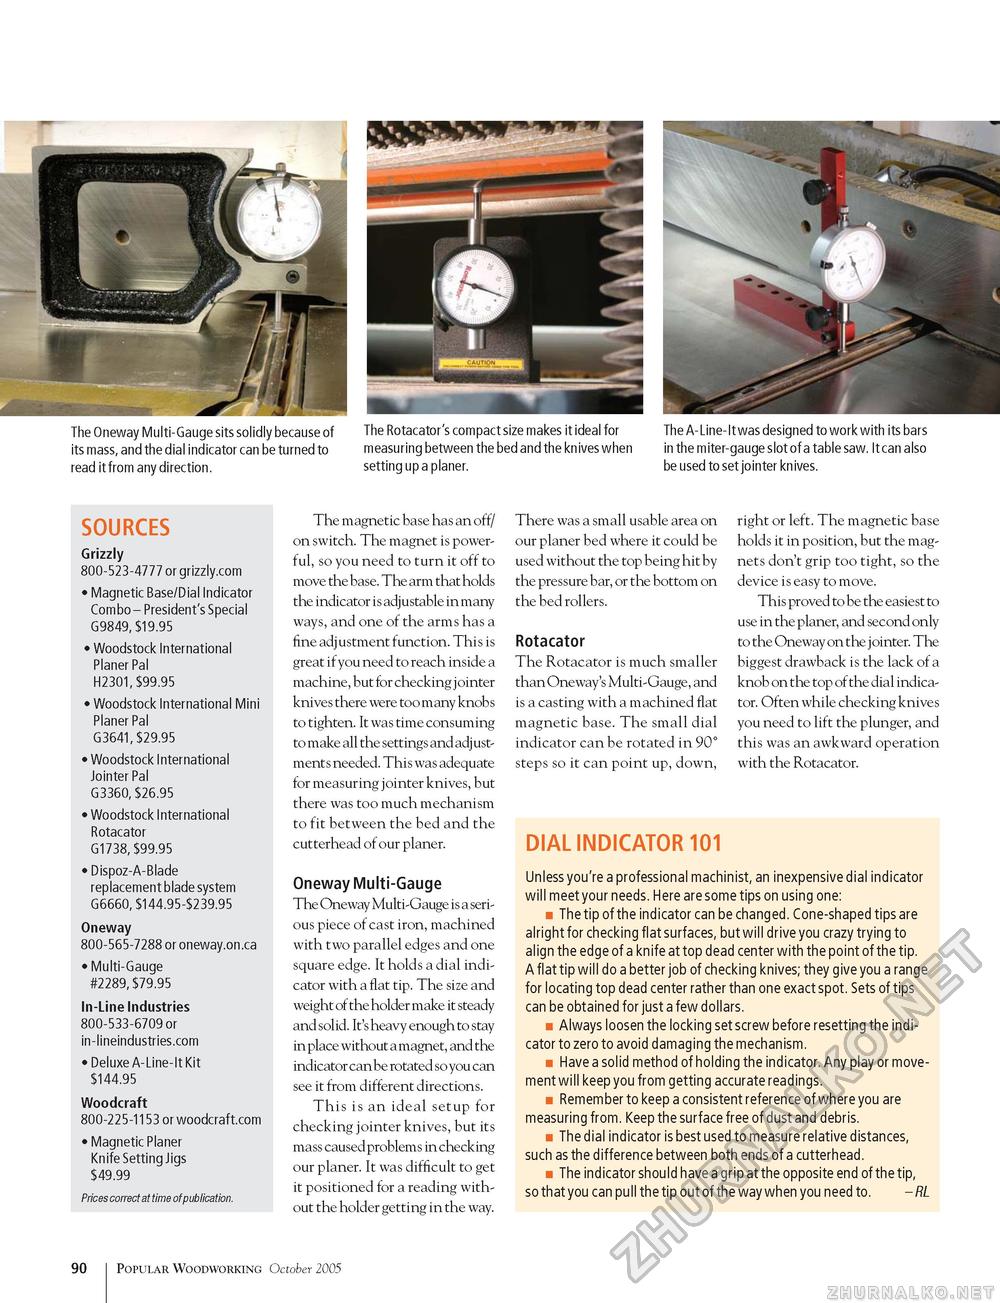
The Oneway Multi-Gauge sits solidly because of its mass, and the dial indicator can be turned to read it from any direction. The Rotacator's compact size makes it ideal for measuring between the bed and the knives when setting up a planer. The A-Line-It was designed to work with its bars in the miter-gauge slot of a table saw. It can also be used to set jointer knives. SOURCES Grizzly 800-523-4777 or grizzly.com • Magnetic Base/Dial Indicator Combo - President's Special G9849, $19.95 • Woodstock International Planer Pal H2301, $99.95 • Woodstock International Mini Planer Pal G3641, $29.95 • Woodstock International Jointer Pal G3360, $26.95 • Woodstock International Rotacator G1738, $99.95 • Dispoz-A-Blade replacement blade system G6660, $144.95-$239.95 Oneway 800-565-7288 or oneway.on.ca • Multi-Gauge #2289, $79.95 In-Line Industries 800-533-6709 or in-lineindustries.com • Deluxe A-Line-It Kit $144.95 Woodcraft 800-225-1153 or woodcraft.com • Magnetic Planer Knife Setting Jigs $49.99 Prices correct at time of publication. The magnetic base has an off/ on switch. The magnet is powerful, so you need to turn it off to move the base. The arm that holds the indicator is adjustable in many ways, and one of the arms has a fine adjustment function. This is great if you need to reach inside a machine, but for checking jointer knives there were too many knobs to tighten. It was time consuming to make all the settings and adj ust-ments needed. This was adequate for measuring jointer knives, but there was too much mechanism to fit between the bed and the cutterhead of our planer. Oneway Multi-Gauge The Oneway Multi-Gauge is a serious piece of cast iron, machined with two parallel edges and one square edge. It holds a dial indicator with a flat tip. The size and weight of the holder make it steady and solid. It's heavy enough to stay in place without a magnet, and the indicator can be rotated so you can see it from different directions. This is an ideal setup for checking jointer knives, but its mass caused problems in checking our planer. It was difficult to get it positioned for a reading without the holder getting in the way. There was a small usable area on our planer bed where it could be used without the top being hit by the pressure bar, or the bottom on the bed rollers. Rotacator The Rotacator is much smaller than Oneway's Multi-Gauge, and is a casting with a machined flat magnetic base. The small dial indicator can be rotated in 90° steps so it can point up, down, right or left. The magnetic base holds it in position, but the magnets don't grip too tight, so the device is easy to move. This proved to be the easiest to use in the planer, and second only to the Oneway on the j ointer. The biggest drawback is the lack of a knob on the top of the dial indicator. Often while checking knives you need to lift the plunger, and this was an awkward operation with the Rotacator. DIAL INDICATOR 101 Unless you're a professional machinist, an inexpensive dial indicator will meet your needs. Here are some tips on using one: ■ The tip of the indicator can be changed. Cone-shaped tips are alright for checking flat surfaces, but will drive you crazy trying to align the edge of a knife at top dead center with the point of the tip. A flat tip will do a better job of checking knives; they give you a range for locating top dead center rather than one exact spot. Sets of tips can be obtained for just a few dollars. ■ Always loosen the locking set screw before resetting the indicator to zero to avoid damaging the mechanism. ■ Have a solid method of holding the indicator. Any play or movement will keep you from getting accurate readings. ■ Remember to keep a consistent reference of where you are measuring from. Keep the surface free of dust and debris. ■ The dial indicator is best used to measure relative distances, such as the difference between both ends of a cutterhead. ■ The indicator should have a grip at the opposite end of the tip, so that you can pull the tip out of the way when you need to. - RL 90 Popular Woodworking October 2005 |


