Popular Woodworking 2005-11 № 151, страница 104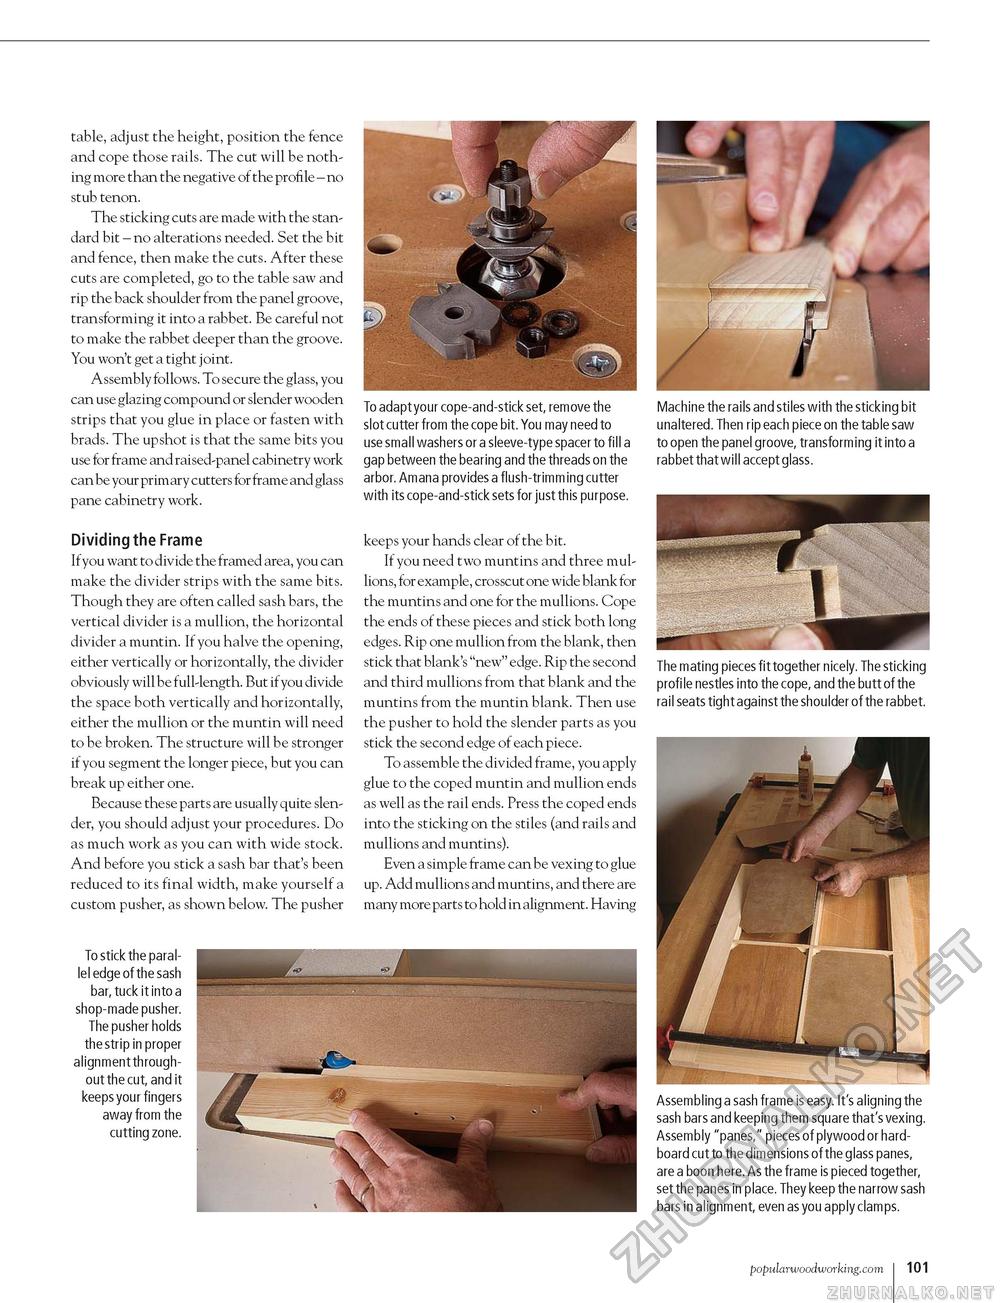
table, adjust the height, position the fence and cope those rails. The cut will be nothing more than the negative of the profile - no stub tenon. The sticking cuts are made with the standard bit - no alterations needed. Set the bit and fence, then make the cuts. After these cuts are completed, go to the table saw and rip the back shoulder from the panel groove, transforming it into a rabbet. Be careful not to make the rabbet deeper than the groove. You won't get a tight joint. Assembly follows. To secure the glass, you can use glazing compound or slender wooden strips that you glue in place or fasten with brads. The upshot is that the same bits you use for frame and raised-panel cabinetry work can be your primary cutters for frame and glass pane cabinetry work. Dividing the Frame Ifyou want to divide the framed area, you can make the divider strips with the same bits. Though they are often called sash bars, the vertical divider is a mullion, the horizontal divider a muntin. If you halve the opening, either vertically or horizontally, the divider obviously will be full-length. But if you divide the space both vertically and horizontally, either the mullion or the muntin will need to be broken. The structure will be stronger if you segment the longer piece, but you can break up either one. Because these parts are usually quite slender, you should adjust your procedures. Do as much work as you can with wide stock. And before you stick a sash bar that's been reduced to its final width, make yourself a custom pusher, as shown below. The pusher To stick the parallel edge of the sash bar, tuck it into a shop-made pusher. The pusher holds the strip in proper alignment throughout the cut, and it keeps your fingers away from the cutting zone. To adapt your cope-and-stick set, remove the slot cutter from the cope bit. You may need to use small washers or a sleeve-type spacer to fill a gap between the bearing and the threads on the arbor. Amana provides a flush-trimming cutter with its cope-and-stick sets for just this purpose. keeps your hands clear of the bit. If you need two muntins and three mul-lions, for example, crosscut one wide blank for the muntins and one for the mullions. Cope the ends of these pieces and stick both long edges. Rip one mullion from the blank, then stick that blank's "new" edge. Rip the second and third mullions from that blank and the muntins from the muntin blank. Then use the pusher to hold the slender parts as you stick the second edge of each piece. To assemble the divided frame, you apply glue to the coped muntin and mullion ends as well as the rail ends. Press the coped ends into the sticking on the stiles (and rails and mullions and muntins). Even a simple frame can be vexing to glue up. Add mullions and muntins, and there are many more parts to hold in alignment. Having Machine the rails and stiles with the sticking bit unaltered. Then rip each piece on the table saw to open the panel groove, transforming it into a rabbet that will accept glass. The mating pieces fit together nicely. The sticking profi le nestles into the cope, and the butt of the rail seats tight against the shoulder of the rabbet. Assembling a sash frame is easy. It's aligning the sash bars and keeping them square that's vexing. Assembly "panes," pieces of plywood or hard-board cut to the dimensions of the glass panes, are a boon here. As the frame is pieced together, set the panes in place. They keep the narrow sash bars in alignment, even as you apply clamps. popularwoodworking.com i 101 |


