Popular Woodworking 2005-11 № 151, страница 28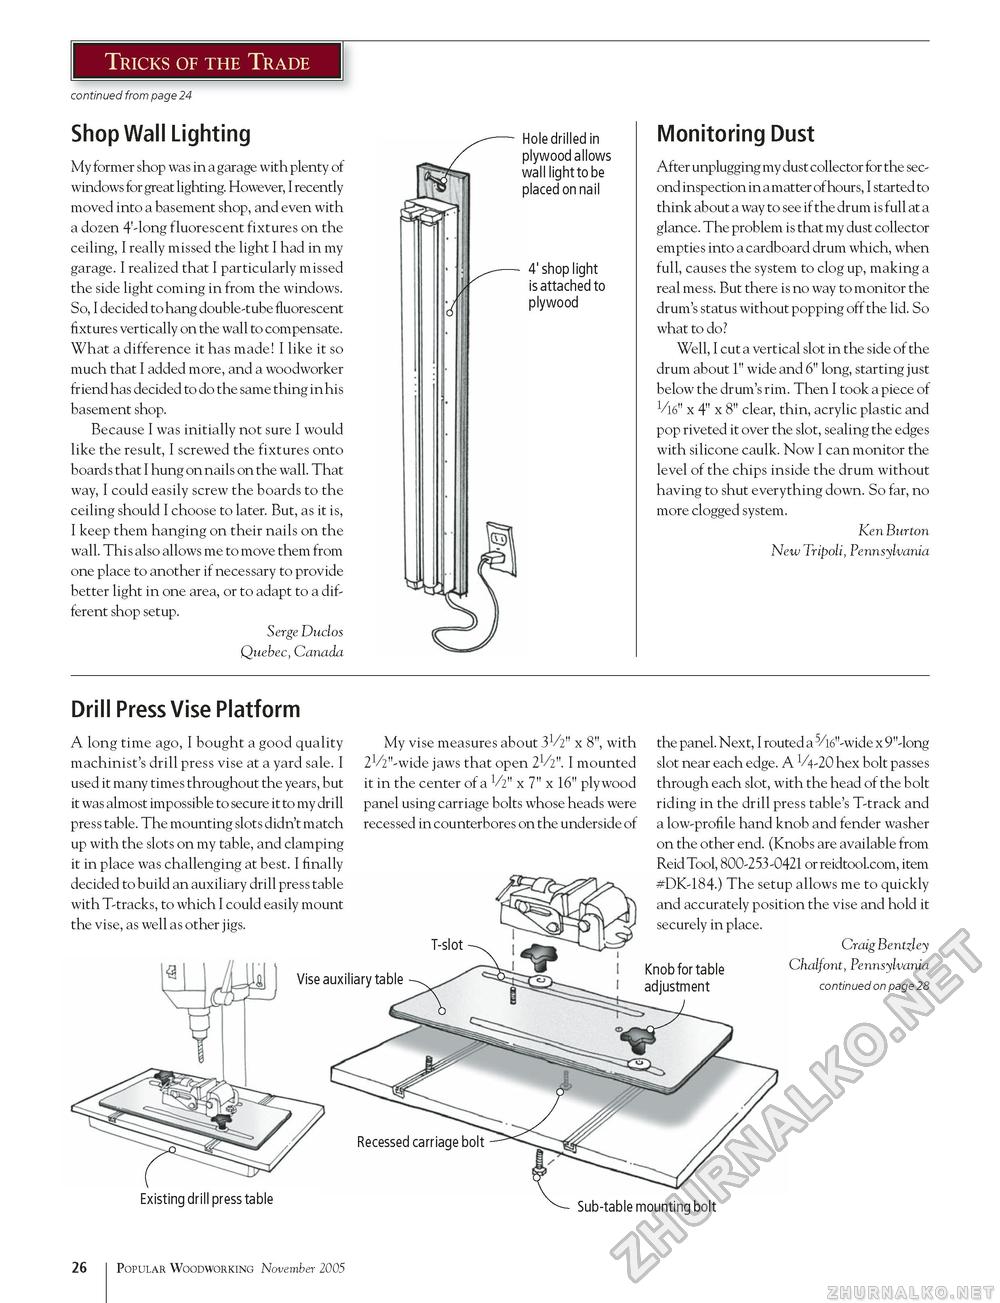
Tricks of the Trade continued from page 24 Shop Wall Lighting My former shop was in a garage with plenty of windows for great lighting. However, I recently moved into a basement shop, and even with a dozen 4'-long fluorescent fixtures on the ceiling, I really missed the light I had in my garage. I realized that I particularly missed the side light coming in from the windows. So, I decided to hang double-tube fluorescent fixtures vertically on the wall to compensate. What a difference it has made! I like it so much that I added more, and a woodworker friend has decided to do the same thing in his basement shop. Because I was initially not sure I would like the result, I screwed the fixtures onto boards that I hung on nails on the wall. That way, I could easily screw the boards to the ceiling should I choose to later. But, as it is, I keep them hanging on their nails on the wall. This also allows me to move them from one place to another if necessary to provide better light in one area, or to adapt to a different shop setup. Serge Duclos Quebec, Canada Hole drilled in plywood allows wall light to be placed on nail 4' shop light is attached to plywood Monitoring Dust After unplugging my dust collector for the second inspection in a matter of hours, I started to think about a way to see if the drum is full at a glance. The problem is that my dust collector empties into a cardboard drum which, when full, causes the system to clog up, making a real mess. But there is no way to monitor the drum's status without popping off the lid. So what to do? Well, I cut a vertical slot in the side of the drum about 1" wide and 6" long, starting just below the drum's rim. Then I took a piece of VW x 4" x 8" clear, thin, acrylic plastic and pop riveted it over the slot, sealing the edges with silicone caulk. Now I can monitor the level of the chips inside the drum without having to shut everything down. So far, no more clogged system. Ken Burton New Tripoli, Pennsylvania Drill Press Vise Platform A long time ago, I bought a good quality machinist's drill press vise at a yard sale. I used it many times throughout the years, but it was almost impossible to secure it to my drill press table. The mounting slots didn't match up with the slots on my table, and clamping it in place was challenging at best. I finally decided to build an auxiliary drill press table with T-tracks, to which I could easily mount the vise, as well as other jigs. My vise measures about 31/2" x 8", with 21/2"-wide jaws that open 21/2". I mounted it in the center of a V2" x 7" x 16" plywood panel using carriage bolts whose heads were recessed in counterbores on the underside of the panel. Next, I routed a 5/16"-wide x 9"-long slot near each edge. A 1/4-20 hex bolt passes through each slot, with the head of the bolt riding in the drill press table's T-track and a low-profile hand knob and fender washer on the other end. (Knobs are available from Reid Tool, 800-253-0421 or reidtool.com, item #DK-184.) The setup allows me to quickly and accurately position the vise and hold it securely in place. Craig Bentzley Knob for table Chalfont, Pennsylvania adjustment continued on page 28 Existing drill press table Sub-table mounting bolt 26 Popular Woodworking November 2005 |


