Popular Woodworking 2005-11 № 151, страница 30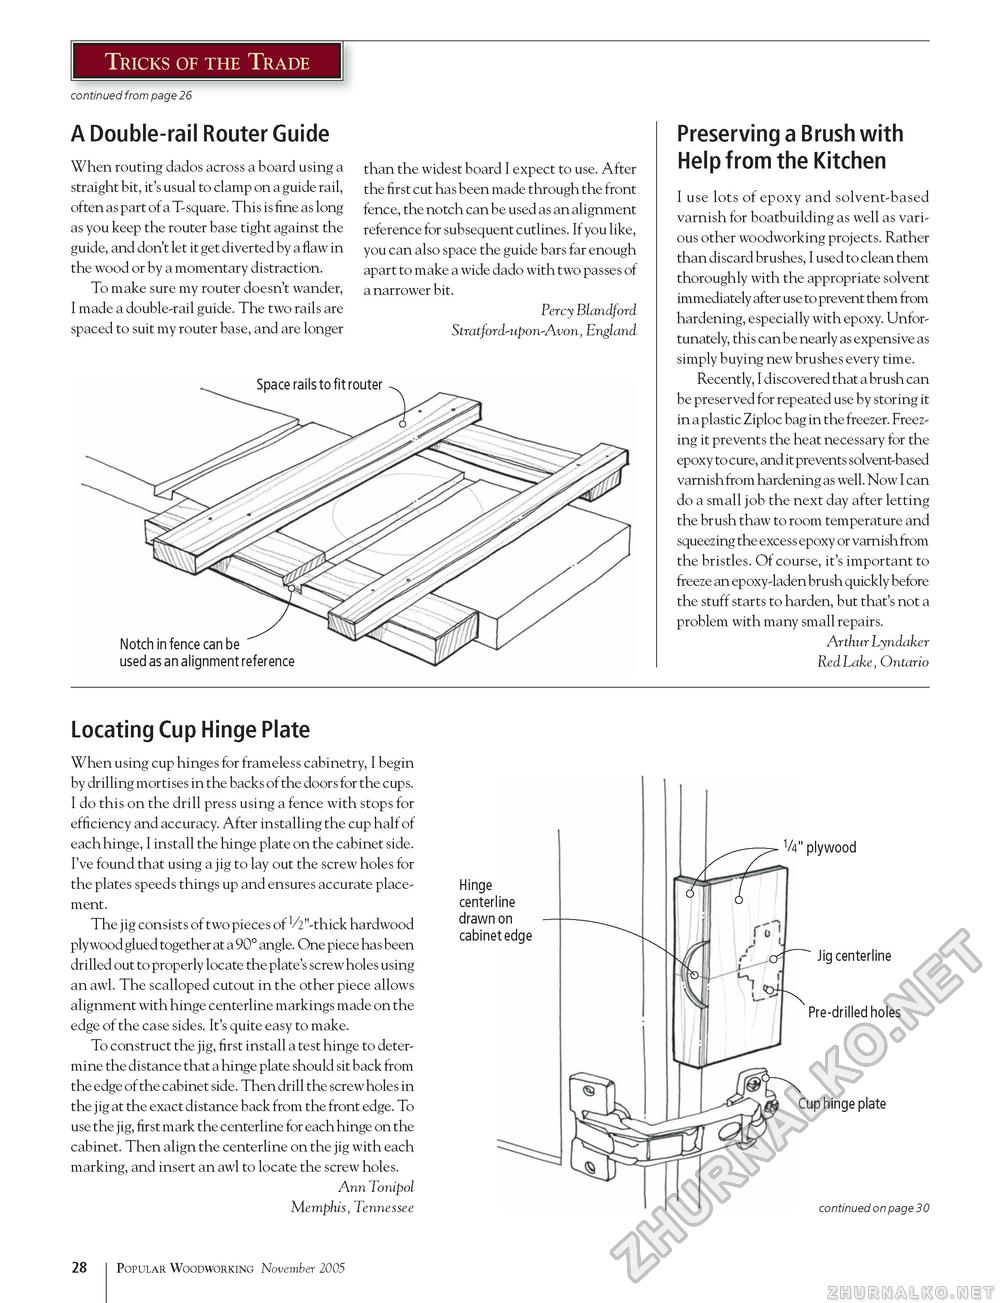
Tricks of the Trade continued from page 26 Preserving a Brush with Help from the Kitchen I use lots of epoxy and solvent-based varnish for boatbuilding as well as various other woodworking projects. Rather than discard brushes, I used to clean them thoroughly with the appropriate solvent immediately after use to prevent them from hardening, especially with epoxy. Unfortunately, this can be nearly as expensive as simply buying new brushes every time. Recently, I discovered that a brush can be preserved for repeated use by storing it in a plastic Ziploc bag in the freezer. Freezing it prevents the heat necessary for the epoxy to cure, and it prevents solvent-based varnish from hardening as well. Now I can do a small job the next day after letting the brush thaw to room temperature and squeezing the excess epoxy or varnish from the bristles. Of course, it's important to freeze an epoxy-laden brush quickly before the stuff starts to harden, but that's not a problem with many small repairs. Arthur Lyndaker Red Lake, Ontario Locating Cup Hinge Plate When using cup hinges for frameless cabinetry, I begin by drilling mortises in the backs of the doors for the cups. I do this on the drill press using a fence with stops for efficiency and accuracy. After installing the cup half of each hinge, I install the hinge plate on the cabinet side. I've found that using a jig to lay out the screw holes for the plates speeds things up and ensures accurate placement. The jig consists of two pieces of V2"-thick hardwood plywood glued together at a 90° angle. One piece has been drilled out to properly locate the plate's screw holes using an awl. The scalloped cutout in the other piece allows alignment with hinge centerline markings made on the edge of the case sides. It's quite easy to make. To construct the jig, first install a test hinge to determine the distance that a hinge plate should sit back from the edge of the cabinet side. Then drill the screw holes in the j ig at the exact distance back from the front edge. To use the jig, first mark the centerline for each hinge on the cabinet. Then align the centerline on the jig with each marking, and insert an awl to locate the screw holes. Ann Tonipol Memphis, Tennessee A Double-rail Router Guide When routing dados across a board using a straight bit, it's usual to clamp on a guide rail, often as part of a T-square. This is fine as long as you keep the router base tight against the guide, and don't let it get diverted by a flaw in the wood or by a momentary distraction. To make sure my router doesn't wander, I made a double-rail guide. The two rails are spaced to suit my router base, and are longer than the widest board I expect to use. After the first cut has been made through the front fence, the notch can be used as an alignment reference for subsequent cutlines. If you like, you can also space the guide bars far enough apart to make a wide dado with two passes of a narrower bit. Percy Blandford Stratford-upon-Avon, England Space rails to fit router Notch in fence can be used as an alignment reference 28 Popular Woodworking November 2005 |


