Popular Woodworking 2005-11 № 151, страница 65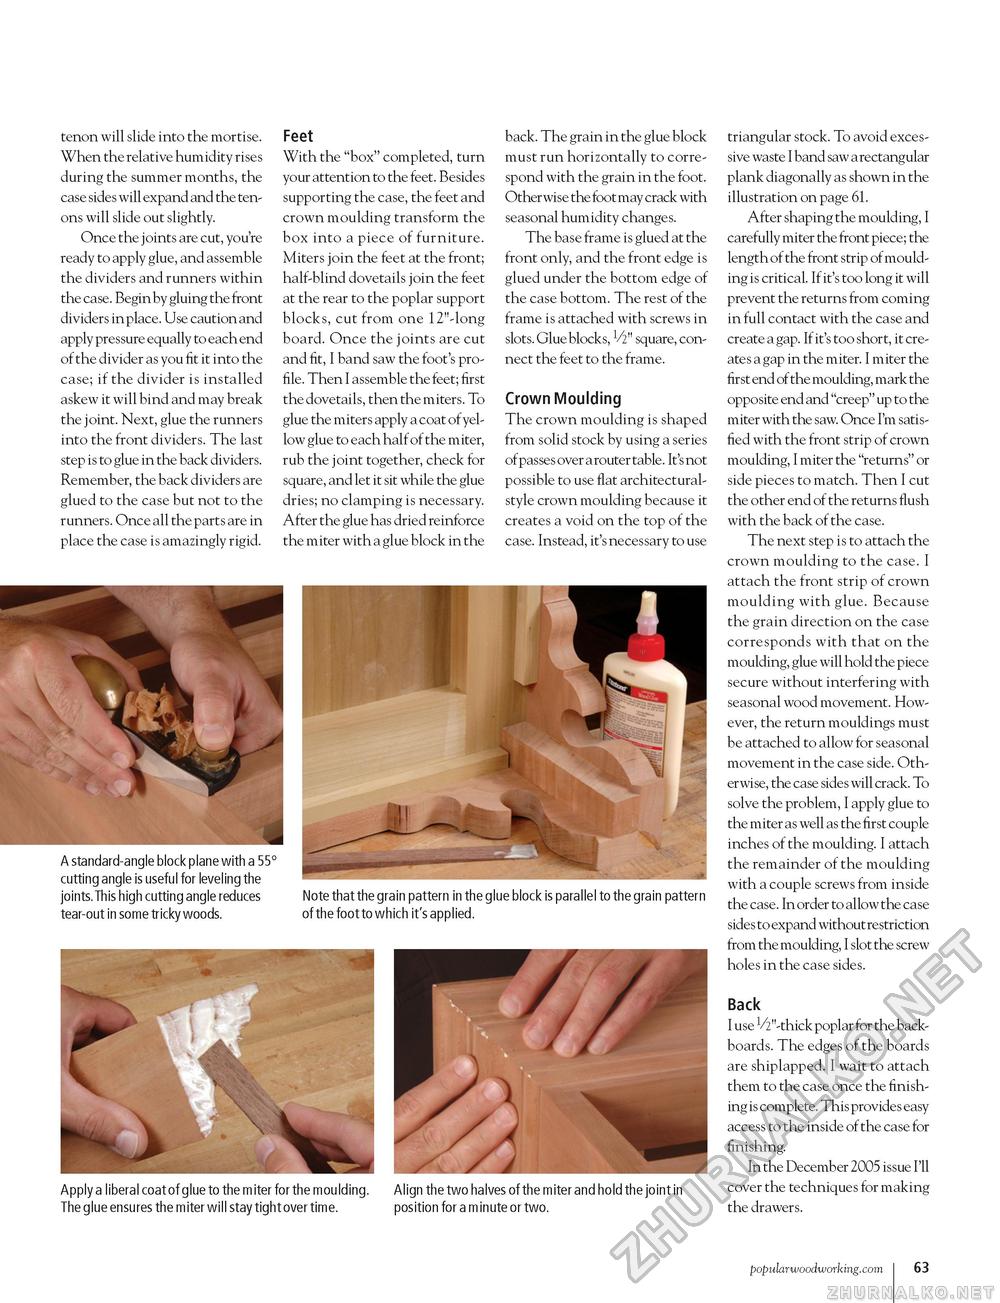
tenon will slide into the mortise. When the relative humidity rises during the summer months, the case sides will expand and the tenons will slide out slightly. Once the joints are cut, you're ready to apply glue, and assemble the dividers and runners within the case. Begin by gluing the front dividers in place. Use caution and apply pressure equally to each end of the divider as you fit it into the case; if the divider is installed askew it will bind and may break the joint. Next, glue the runners into the front dividers. The last step is to glue in the back dividers. Remember, the back dividers are glued to the case but not to the runners. Once all the parts are in place the case is amazingly rigid. Feet With the "box" completed, turn your attention to the feet. Besides supporting the case, the feet and crown moulding transform the box into a piece of furniture. Miters join the feet at the front; half-blind dovetails join the feet at the rear to the poplar support blocks, cut from one 12"-long board. Once the joints are cut and fit, I band saw the foot's profile. Then I assemble the feet; first the dovetails, then the miters. To glue the miters apply a coat of yellow glue to each half of the miter, rub the joint together, check for square, and let it sit while the glue dries; no clamping is necessary. After the glue has dried reinforce the miter with a glue block in the back. The grain in the glue block must run horizontally to correspond with the grain in the foot. Otherwise the foot may crack with seasonal humidity changes. The base frame is glued at the front only, and the front edge is glued under the bottom edge of the case bottom. The rest of the frame is attached with screws in slots. Glue blocks, V2" square, connect the feet to the frame. Crown Moulding The crown moulding is shaped from solid stock by using a series of passes over a router table. It's not possible to use flat architectural-style crown moulding because it creates a void on the top of the case. Instead, it's necessary to use A standard-angle block plane with a 55 cutting angle is useful for leveling the joints. This high cutting angle reduces tear-out in some tricky woods. Note that the grain pattern in the glue block is parallel to the grain pattern of the foot to which it's applied. ff. Apply a liberal coat of glue to the miter for the moulding. Align the two halves of the miter and hold the joint in The glue ensures the miter will stay tight over time. position for a minute or two. triangular stock. To avoid excessive waste I band saw a rectangular plank diagonally as shown in the illustration on page 61. After shaping the moulding, I carefully miter the front piece; the length of the front strip of moulding is critical. If it's too long it will prevent the returns from coming in full contact with the case and create a gap. If it's too short, it creates a gap in the miter. I miter the first end of the moulding, mark the opposite end and "creep" up to the miter with the saw. Once I'm satisfied with the front strip of crown moulding, I miter the "returns" or side pieces to match. Then I cut the other end of the returns flush with the back of the case. The next step is to attach the crown moulding to the case. I attach the front strip of crown moulding with glue. Because the grain direction on the case corresponds with that on the moulding, glue will hold the piece secure without interfering with seasonal wood movement. However, the return mouldings must be attached to allow for seasonal movement in the case side. Otherwise, the case sides will crack. To solve the problem, I apply glue to the miter as well as the first couple inches of the moulding. I attach the remainder of the moulding with a couple screws from inside the case. In order to allow the case sides to expand without restriction from the moulding, I slot the screw holes in the case sides. Back I use V2"-thick poplar for the backboards. The edges of the boards are shiplapped. I wait to attach them to the case once the finishing is complete. This provides easy access to the inside of the case for finishing. In the December 2005 issue I'll cover the techniques for making the drawers. popularwoodworking.com 63 |


