Popular Woodworking 2005-12 № 152, страница 90
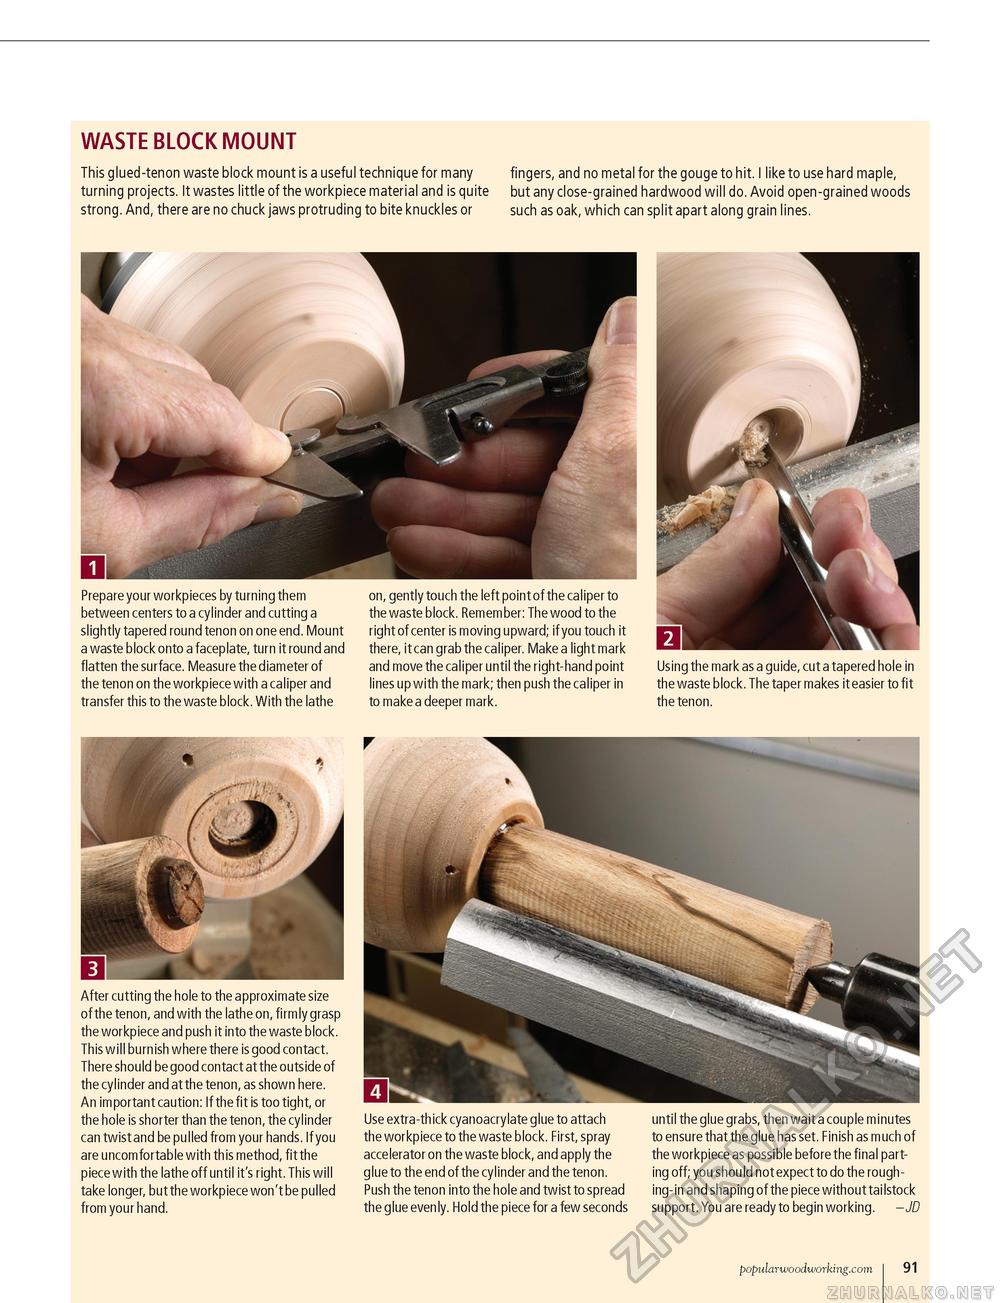
WASTE BLOCK MOUNT This glued-tenon waste block mount is a useful technique for many turning projects. It wastes little of the workpiece material and is quite strong. And, there are no chuck jaws protruding to bite knuckles or fingers, and no metal for the gouge to hit. I like to use hard maple, but any close-grained hardwood will do. Avoid open-grained woods such as oak, which can split apart along grain lines. t L Prepare your workpieces by turning them between centers to a cylinder and cutting a slightly tapered round tenon on one end. Mount a waste block onto a faceplate, turn it round and flatten the surface. Measure the diameter of the tenon on the workpiece with a caliper and transfer this to the waste block. With the lathe on, gently touch the left point of the caliper to the waste block. Remember: The wood to the right of center is moving upward; if you touch it there, it can grab the caliper. Make a light mark and move the caliper until the right-hand point lines up with the mark; then push the caliper in to make a deeper mark. Using the mark as a guide, cut a tapered hole in the waste block. The taper makes it easier to fit the tenon. After cutting the hole to the approximate size of the tenon, and with the lathe on, firmly grasp the workpiece and push it into the waste block. This will burnish where there is good contact. There should be good contact at the outside of the cylinder and at the tenon, as shown here. An important caution: If the fit is too tight, or the hole is shorter than the tenon, the cylinder can twist and be pulled from your hands. If you are uncomfortable with this method, fit the piece with the lathe off until it's right. This will take longer, but the workpiece won't be pulled from your hand. Use extra-thick cyanoacrylate glue to attach the workpiece to the waste block. First, spray accelerator on the waste block, and apply the glue to the end of the cylinder and the tenon. Push the tenon into the hole and twist to spread the glue evenly. Hold the piece for a few seconds until the glue grabs, then wait a couple minutes to ensure that the glue has set. Finish as much of the workpiece as possible before the final parting off; you should not expect to do the rough-ing-in and shaping of the piece without tailstock support. You are ready to begin working. - JD popularwoodworking.com 33 |


