Popular Woodworking 2006-04 № 154, страница 32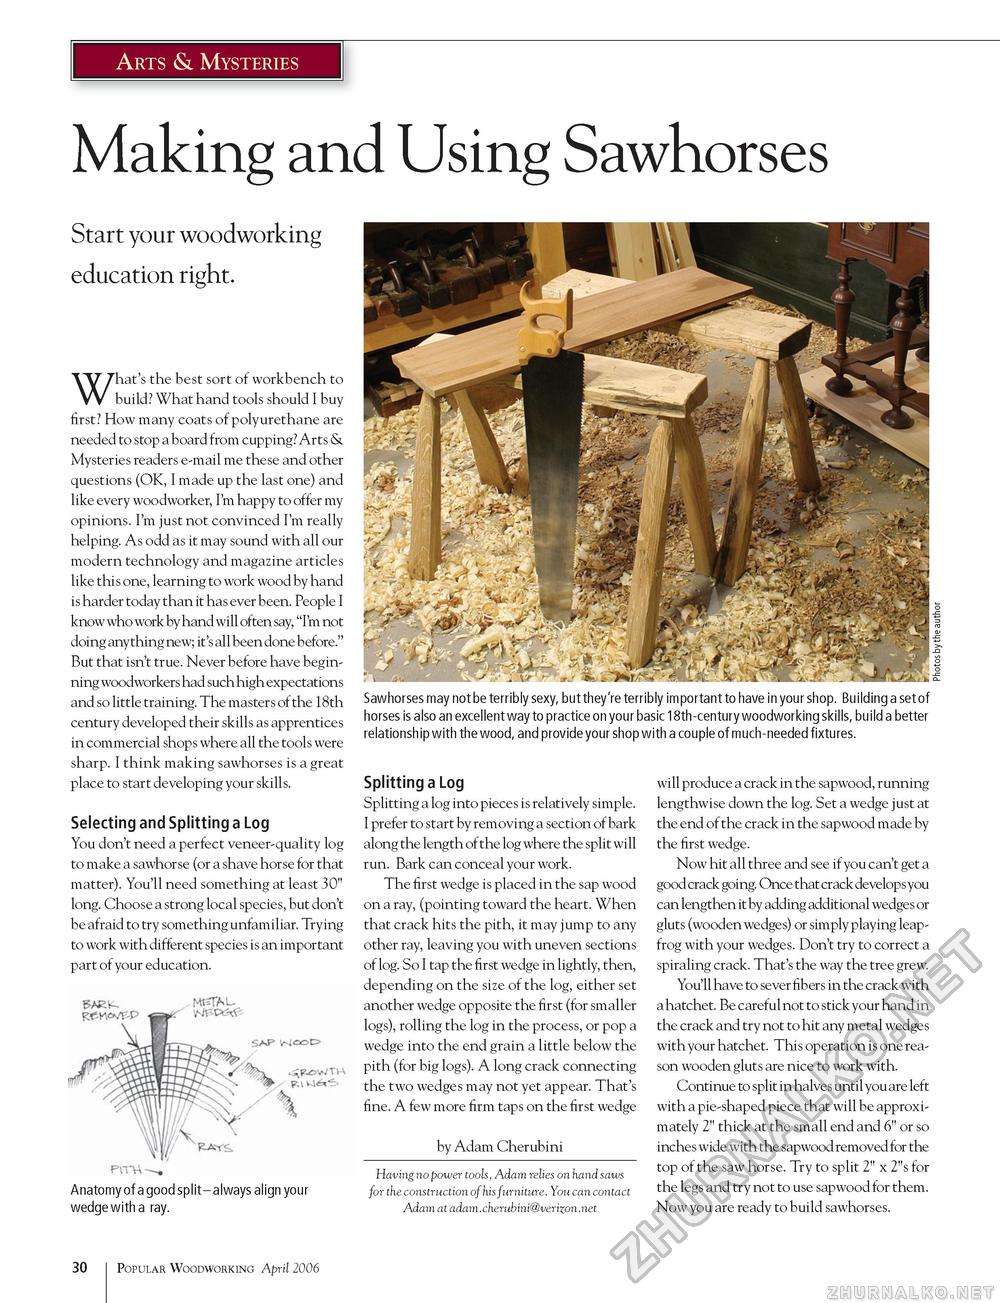
Arts & Mysteries Making and Using SawhorsesStart your woodworking education right. What's the best sort of workbench to build? What hand tools should I buy first? How many coats of polyurethane are needed to stop a board from cupping? Arts & Mysteries readers e-mail me these and other questions (OK, I made up the last one) and like every woodworker, I'm happy to offer my opinions. I'm just not convinced I'm really helping. As odd as it may sound with all our modern technology and magazine articles like this one, learning to work wood by hand is harder today than it has ever been. People I know who work by hand will often say, "I'm not doing anything new; it's all been done before." But that isn't true. Never before have beginning woodworkers had such high expectations and so little training. The masters of the 18th century developed their skills as apprentices in commercial shops where all the tools were sharp. I think making sawhorses is a great place to start developing your skills. Selecting and Splitting a Log You don't need a perfect veneer-quality log to make a sawhorse (or a shave horse for that matter). You'll need something at least 30" long. Choose a strong local species, but don't be afraid to try something unfamiliar. Trying to work with different species is an important part of your education. mm&mm ~ s - MP-fr Sawhorses may not be terribly sexy, but they're terribly important to have in your shop. Building a set of horses is also an excellent way to practice on your basic 18th-century woodworking skills, build a better relationship with the wood, and provide your shop with a couple of much-needed fixtures. Anatomy of a good split - always align your wedge with a ray. Splitting a Log Splitting a log into pieces is relatively simple. I prefer to start by removing a section of bark along the length of the log where the split will run. Bark can conceal your work. The first wedge is placed in the sap wood on a ray, (pointing toward the heart. When that crack hits the pith, it may jump to any other ray, leaving you with uneven sections of log. So I tap the first wedge in lightly, then, depending on the size of the log, either set another wedge opposite the first (for smaller logs), rolling the log in the process, or pop a wedge into the end grain a little below the pith (for big logs). A long crack connecting the two wedges may not yet appear. That's fine. A few more firm taps on the first wedge by Adam Cherubini Having no power tools, Adam relies on hand saws for the construction of his furniture. You can contact Adam at adam.cherubini@verizon.net will produce a crack in the sapwood, running lengthwise down the log. Set a wedge just at the end of the crack in the sapwood made by the first wedge. Now hit all three and see if you can't get a good crack going. Once that crack develop s you can lengthen it by adding additional wedges or gluts (wooden wedges) or simply playing leapfrog with your wedges. Don't try to correct a spiraling crack. That's the way the tree grew. You'll have to sever fibers in the crack with a hatchet. Be careful not to stick your hand in the crack and try not to hit any metal wedges with your hatchet. This operation is one reason wooden gluts are nice to work with. Continue to split in halves until you are left with a pie-shaped piece that will be approximately 2" thick at the small end and 6" or so inches wide with the sapwood removed for the top of the saw horse. Try to split 2" x 2"s for the legs and try not to use sapwood for them. Now you are ready to build sawhorses. 30 Popular Woodworking April 2006 |


