Popular Woodworking 2006-04 № 154, страница 33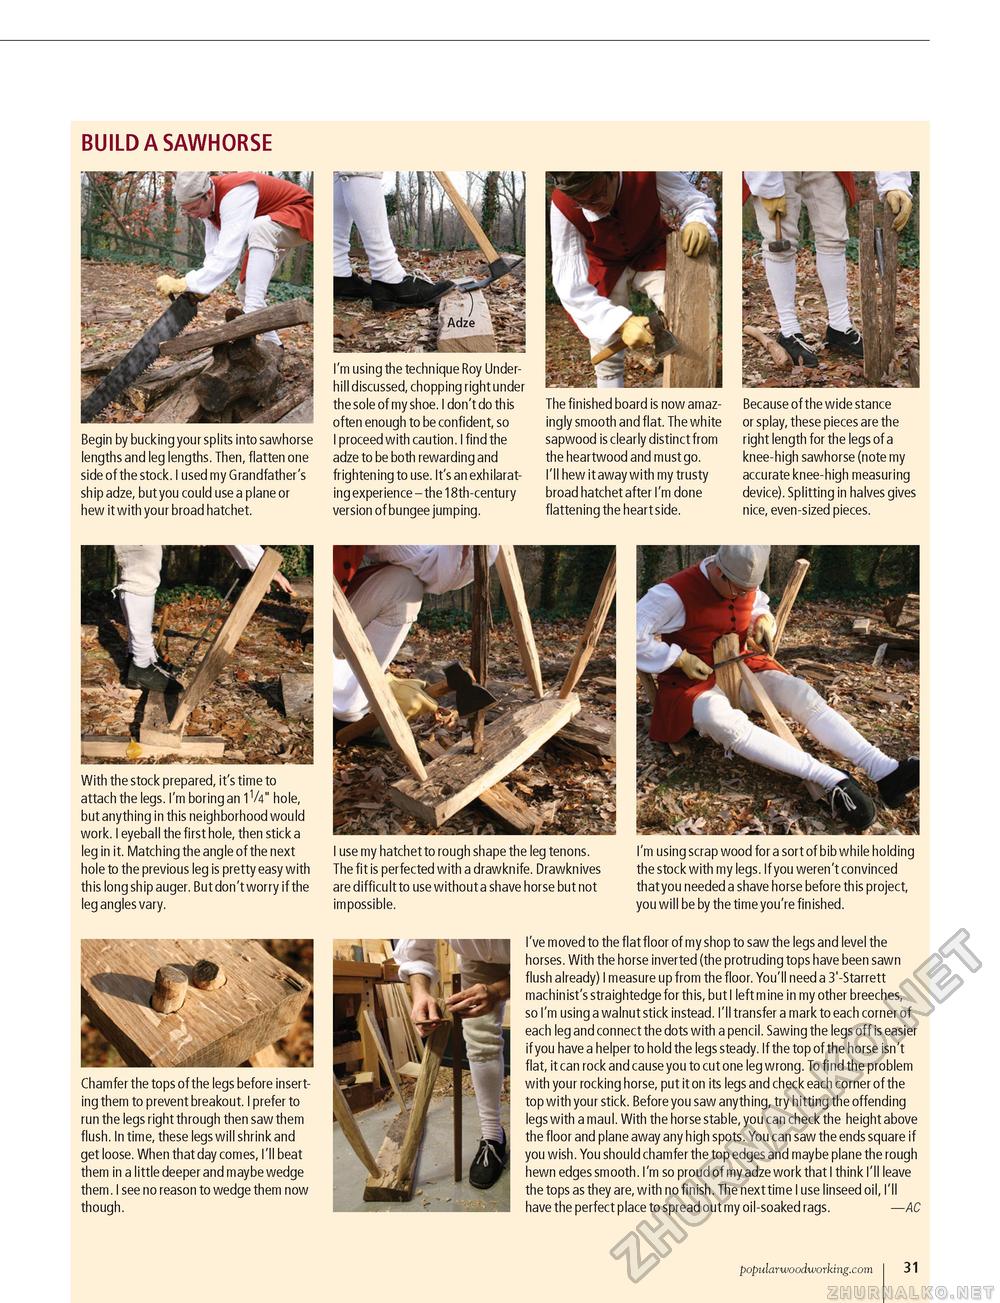
BUILD A SAWHORSE Begin by bucking your splits into sawhorse lengths and leg lengths. Then, flatten one side of the stock. I used my Grandfather's ship adze, but you could use a plane or hew it with your broad hatchet. I'm using the technique Roy Under-hill discussed, chopping right under the sole of my shoe. I don't do th is often enough to be confident, so I proceed with caution. I find the adze to be both rewarding and frightening to use. It's an exhilarating experience - the 18th-century version of bungee jumping. The finished board is now amazingly smooth and flat. The white sapwood is clearly distinct from the heartwood and must go. I'll hew it away with my trusty broad hatchet after I'm done flattening the heart side. Because of the wide stance or splay, these pieces are the right length for the legs of a knee-high sawhorse (note my accurate knee-high measuring device). Splitting in halves gives nice, even-sized pieces. With the stock prepared, it's time to attach the legs. I'm boring an 1V4" hole, but anything in this neighborhood would work. I eyeball the first hole, then stick a leg in it. Matching the angle of the next hole to the previous leg is pretty easy with this long ship auger. But don't worry if the leg angles vary. I use my hatchet to rough shape the leg tenons. The fit is perfected with a drawkn ife. Drawkn ives are difficult to use without a shave horse but not impossible. I'm using scrap wood for a sort of bib while holding the stock with my legs. If you weren't convinced that you needed a shave horse before this project, you will be by the time you're finished. Chamfer the tops of the legs before inserting them to prevent breakout. I prefer to run the legs right through then saw them flush. In time, these legs will shrink and get loose. When that day comes, I'll beat them in a little deeper and maybe wedge them. I see no reason to wedge them now though. I've moved to the flat floor of my shop to saw the legs and level the horses. With the horse inverted (the protruding tops have been sawn flush already) I measure up from the floor. You'll need a 3'-Starrett machinist's straightedge for this, but I left mine in my other breeches, so I'm using a walnut stick instead. I'll transfer a mark to each corner of each leg and connect the dots with a pencil. Sawing the legs off is easier if you have a helper to hold the legs steady. If the top of the horse isn't flat, it can rock and cause you to cut one leg wrong. To find the problem with your rocking horse, put it on its legs and check each corner of the top with your stick. Before you saw anything, try hitting the offending legs with a maul. With the horse stable, you can check the height above the floor and plane away any high spots. You can saw the ends square if you wish. You should chamfer the top edges and maybe plane the rough hewn edges smooth. I'm so proud of my adze work that I think I'll leave the tops as they are, with no finish. The next time I use linseed oil, I'll have the perfect place to spread out my oil-soaked rags. —AC popularwoodworking.com i 31 |


