Popular Woodworking 2006-04 № 154, страница 44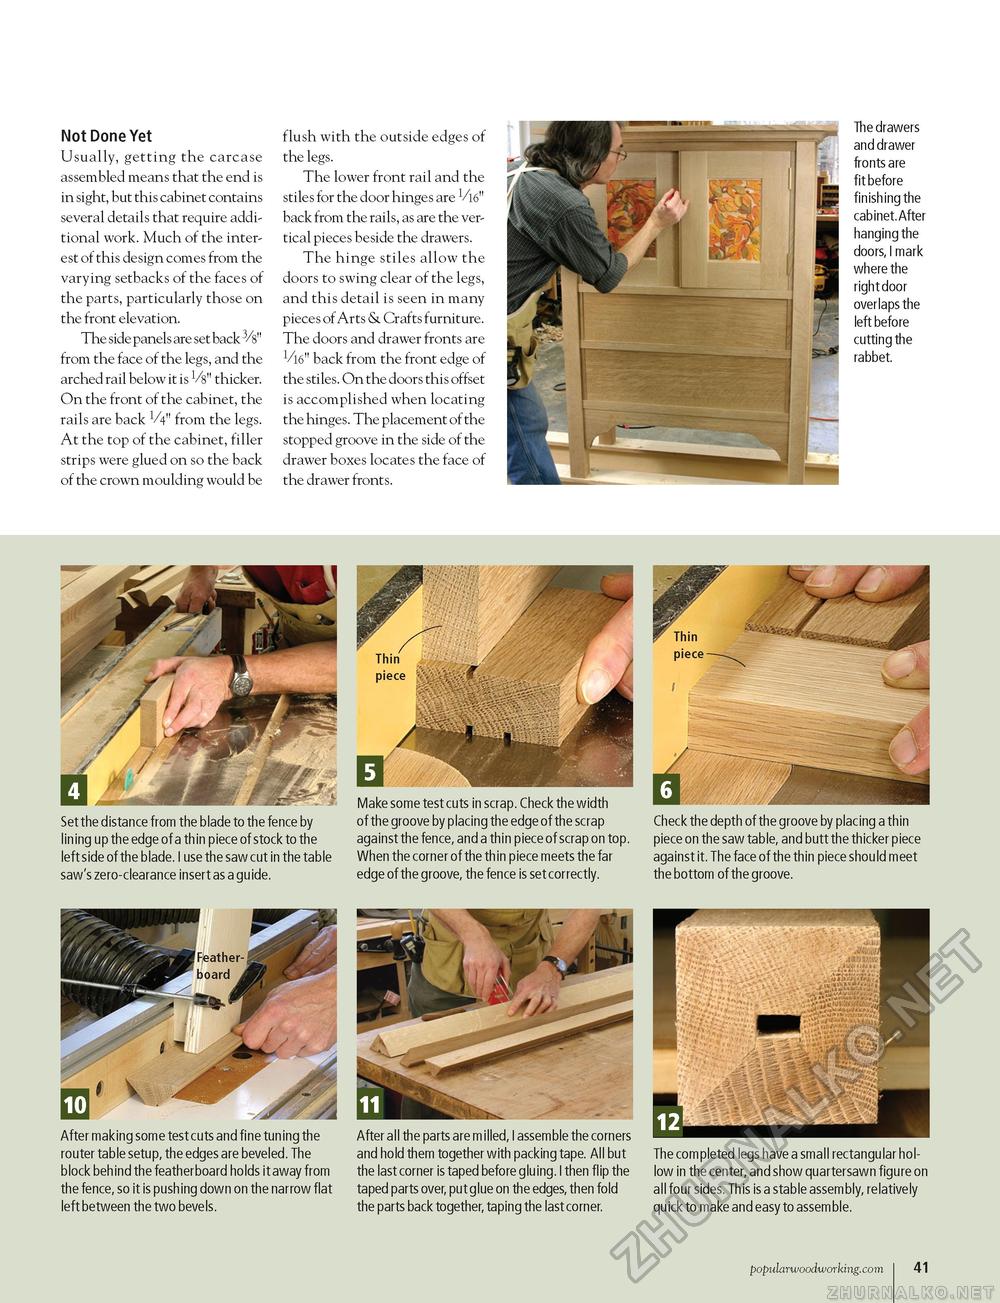
Not Done Yet Usually, getting the carcase assembled means that the end is in sight, but this cabinet contains several details that require additional work. Much of the interest of this design comes from the varying setbacks of the faces of the parts, particularly those on the front elevation. The side panels are set back 3/s" from the face of the legs, and the arched rail below it is Vs" thicker. On the front of the cabinet, the rails are back V4" from the legs. At the top of the cabinet, filler strips were glued on so the back of the crown moulding would be flush with the outside edges of the legs. The lower front rail and the stiles for the door hinges are back from the rails, as are the vertical pieces beside the drawers. The hinge stiles allow the doors to swing clear of the legs, and this detail is seen in many pieces of Arts & Crafts furniture. The doors and drawer fronts are i/i6" back from the front edge of the stiles. On the doors this offset is accomplished when locating the hinges. The placement of the stopped groove in the side of the drawer boxes locates the face of the drawer fronts. The drawers and drawer fronts are fit before finishing the cabinet.After hanging the doors, I mark where the right door overlaps the left before cutting the rabbet. Set the distance from the blade to the fence by lining up the edge of a thin piece of stock to the left side of the blade. I use the saw cut in the table saw's zero-clearance insert as a guide. Make some test cuts in scrap. Check the width of the groove by placing the edge of the scrap against the fence, and a thin piece of scrap on top. When the corner of the thin piece meets the far edge of the groove, the fence is set correctly. Check the depth of the groove by placing a thin piece on the saw table, and butt the thicker piece against it. The face of the thin piece should meet the bottom of the groove. After making some test cuts and fine tuning the router table setup, the edges are beveled. The block behind the featherboard holds it away from the fence, so it is pushing down on the narrow flat left between the two beve ls. After all the parts are milled, I assemble the corners and hold them together with packing tape. All but the last corner is taped before gluing. I then flip the taped parts over, put glue on the edges, then fold the parts back together, taping the last corner. ' ■(Kljiifpf The completed legs have a small rectangular hollow in the center, and show quartersawn figure on all four sides. This is a stable assembly, relatively quick to make and easy to assemble. popularwoodworking.com i 41 |


