Popular Woodworking 2006-04 № 154, страница 46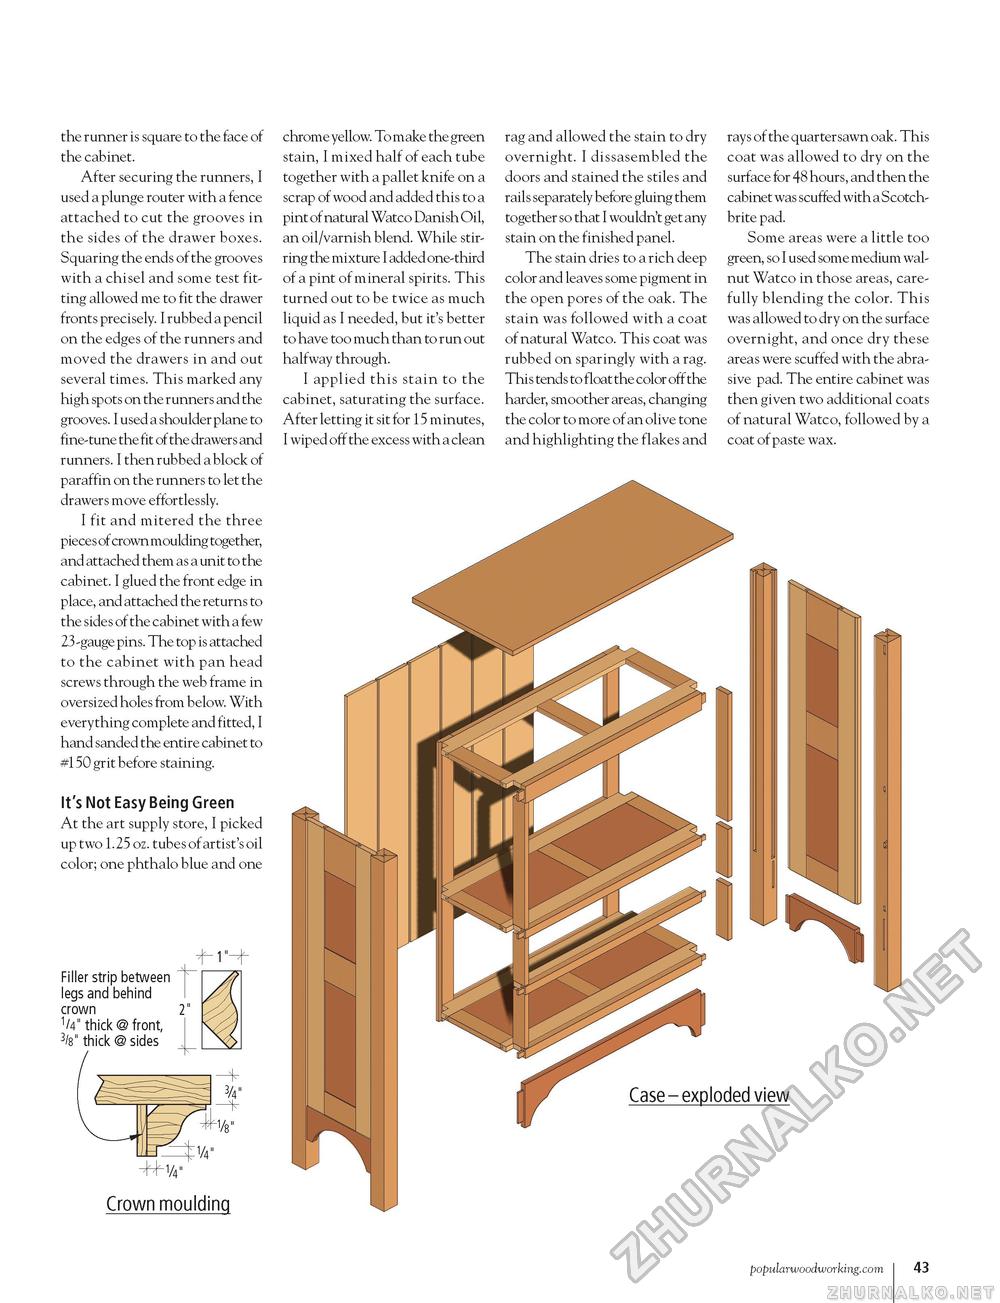
the runner is square to the face of the cabinet. After securing the runners, I used a plunge router with a fence attached to cut the grooves in the sides of the drawer boxes. Squaring the ends of the grooves with a chisel and some test fitting allowed me to fit the drawer fronts precisely. I rubbed a pencil on the edges of the runners and moved the drawers in and out several times. This marked any high spots on the runners and the grooves. I used a shoulder plane to fine-tune the fit of the drawers and runners. I then rubbed a block of paraffin on the runners to let the drawers move effortlessly. I fit and mitered the three pieces of crown moulding together, and attached them as a unit to the cabinet. I glued the front edge in place, and attached the returns to the sides of the cabinet with a few 23 -gauge pins. The top is attached to the cabinet with pan head screws through the web frame in oversized holes from below. With everything complete and fitted, I hand sanded the entire cabinet to #150 grit before staining. It's Not Easy Being Green At the art supply store, I picked up two 1.25 oz. tubes of artist's oil color; one phthalo blue and one Filler strip between ^ legs and behind crown 2" V thick @ front, 3/8" thick @ sides Crown moulding chrome yellow. To make the green stain, I mixed half of each tube together with a pallet knife on a scrap of wood and added this to a pint of natural Watco Danish Oil, an oil/varnish blend. While stirring the mixture I added one-third of a pint of mineral spirits. This turned out to be twice as much liquid as I needed, but it's better to have too much than to run out halfway through. I applied this stain to the cabinet, saturating the surface. After letting it sit for 15 minutes, I wiped off the excess with a clean rag and allowed the stain to dry overnight. I dissasembled the doors and stained the stiles and rails separately before gluing them together so that I wouldn't get any stain on the finished panel. The stain dries to a rich deep color and leaves some pigment in the open pores of the oak. The stain was followed with a coat of natural Watco. This coat was rubbed on sparingly with a rag. This tends to float the color off the harder, smoother areas, changing the color to more of an olive tone and highlighting the flakes and rays of the quartersawn oak. This coat was allowed to dry on the surface for 48 hours, and then the cabinet was scuffed with a Scotch-brite pad. Some areas were a little too green, so I used some medium walnut Watco in those areas, carefully blending the color. This was allowed to dry on the surface overnight, and once dry these areas were scuffed with the abrasive pad. The entire cabinet was then given two additional coats of natural Watco, followed by a coat of paste wax. |


