Popular Woodworking 2006-04 № 154, страница 52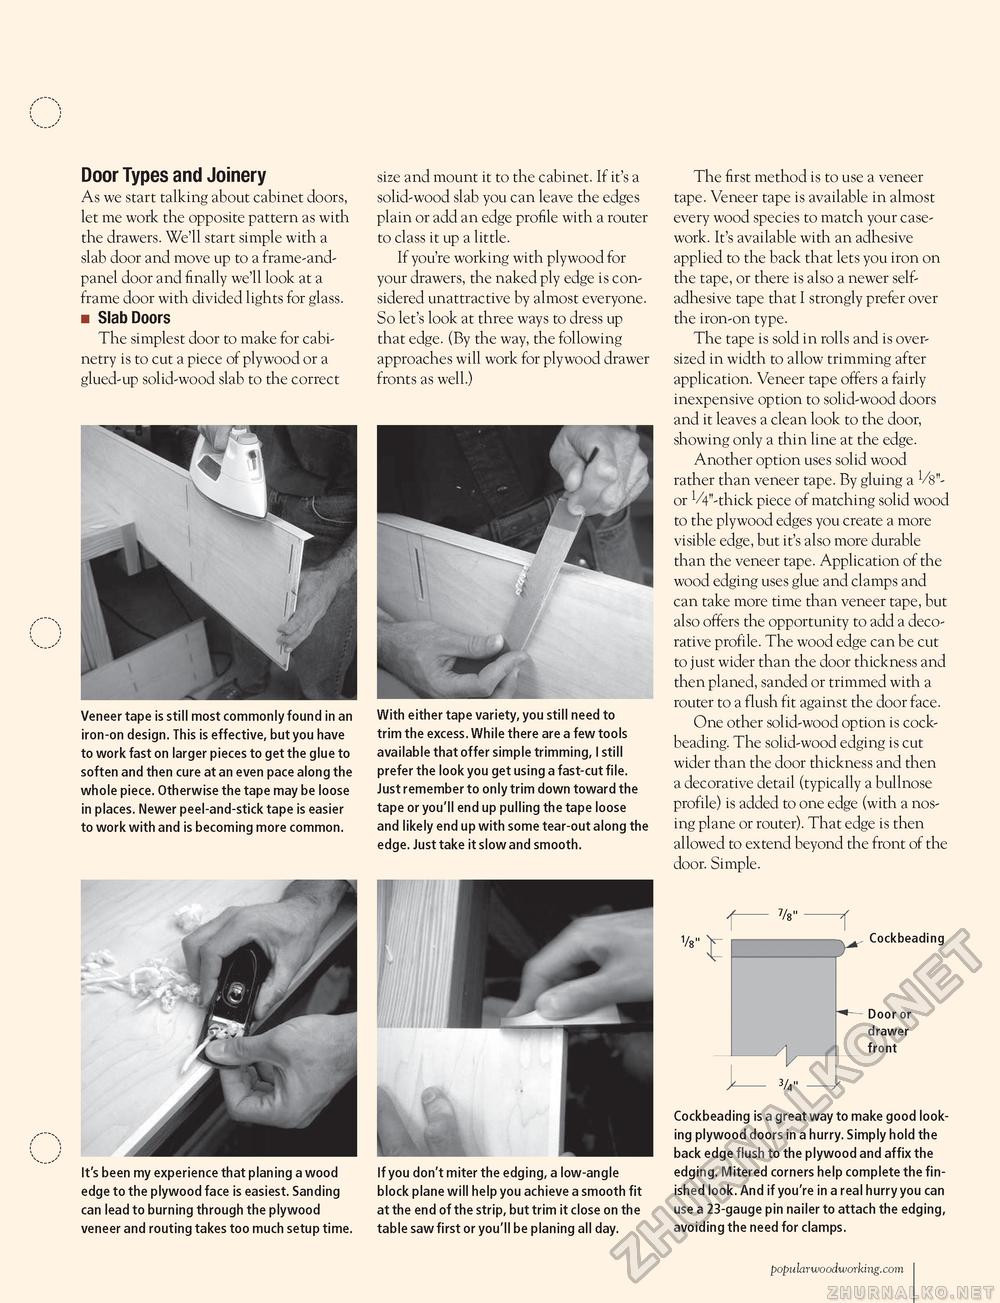
Door Types and Joinery As we start talking about cabinet doors, let me work the opposite pattern as with the drawers. We'll start simple with a slab door and move up to a frame-and-panel door and finally we'll look at a frame door with divided lights for glass. ■ Slab Doors The simplest door to make for cabinetry is to cut a piece of plywood or a glued-up solid-wood slab to the correct Veneer tape is still most commonly found in an iron-on design. This is effective, but you have to work fast on larger pieces to get the glue to soften and then cure at an even pace along the whole piece. Otherwise the tape may be loose in places. Newer peel-and-stick tape is easier to work with and is becoming more common. size and mount it to the cabinet. If it's a solid-wood slab you can leave the edges plain or add an edge profile with a router to class it up a little. If you're working with plywood for your drawers, the naked ply edge is considered unattractive by almost everyone. So let's look at three ways to dress up that edge. (By the way, the following approaches will work for plywood drawer fronts as well.) With either tape variety, you still need to trim the excess. While there are a few tools available that offer simple trimming, I still prefer the look you get using a fast-cut file. Just remember to only trim down toward the tape or you'll end up pulling the tape loose and likely end up with some tear-out along the edge. Just take it slow and smooth. The first method is to use a veneer tape. Veneer tape is available in almost every wood species to match your casework. It's available with an adhesive applied to the back that lets you iron on the tape, or there is also a newer self-adhesive tape that I strongly prefer over the iron-on type. The tape is sold in rolls and is oversized in width to allow trimming after application. Veneer tape offers a fairly inexpensive option to solid-wood doors and it leaves a clean look to the door, showing only a thin line at the edge. Another option uses solid wood rather than veneer tape. By gluing a Hi"-or V4"-thick piece of matching solid wood to the plywood edges you create a more visible edge, but it's also more durable than the veneer tape. Application of the wood edging uses glue and clamps and can take more time than veneer tape, but also offers the opportunity to add a decorative profile. The wood edge can be cut to just wider than the door thickness and then planed, sanded or trimmed with a router to a flush fit against the door face. One other solid-wood option is cock-beading. The solid-wood edging is cut wider than the door thickness and then a decorative detail (typically a bullnose profile) is added to one edge (with a nosing plane or router). That edge is then allowed to extend beyond the front of the door. Simple. It's been my experience that planing a wood edge to the plywood face is easiest. Sanding can lead to burning through the plywood veneer and routing takes too much setup time. Cockbeading Door or drawer front If you don't miter the edging, a low-angle block plane will help you achieve a smooth fit at the end of the strip, but trim it close on the table saw first or you'll be planing all day. Cockbeading is a great way to make good looking plywood doors in a hurry. Simply hold the back edge flush to the plywood and affix the edging. Mitered corners help complete the finished look. And if you're in a real hurry you can use a 23-gauge pin nailer to attach the edging, avoiding the need for clamps. popularwoodworking.com i 52 |


