Popular Woodworking 2006-04 № 154, страница 70
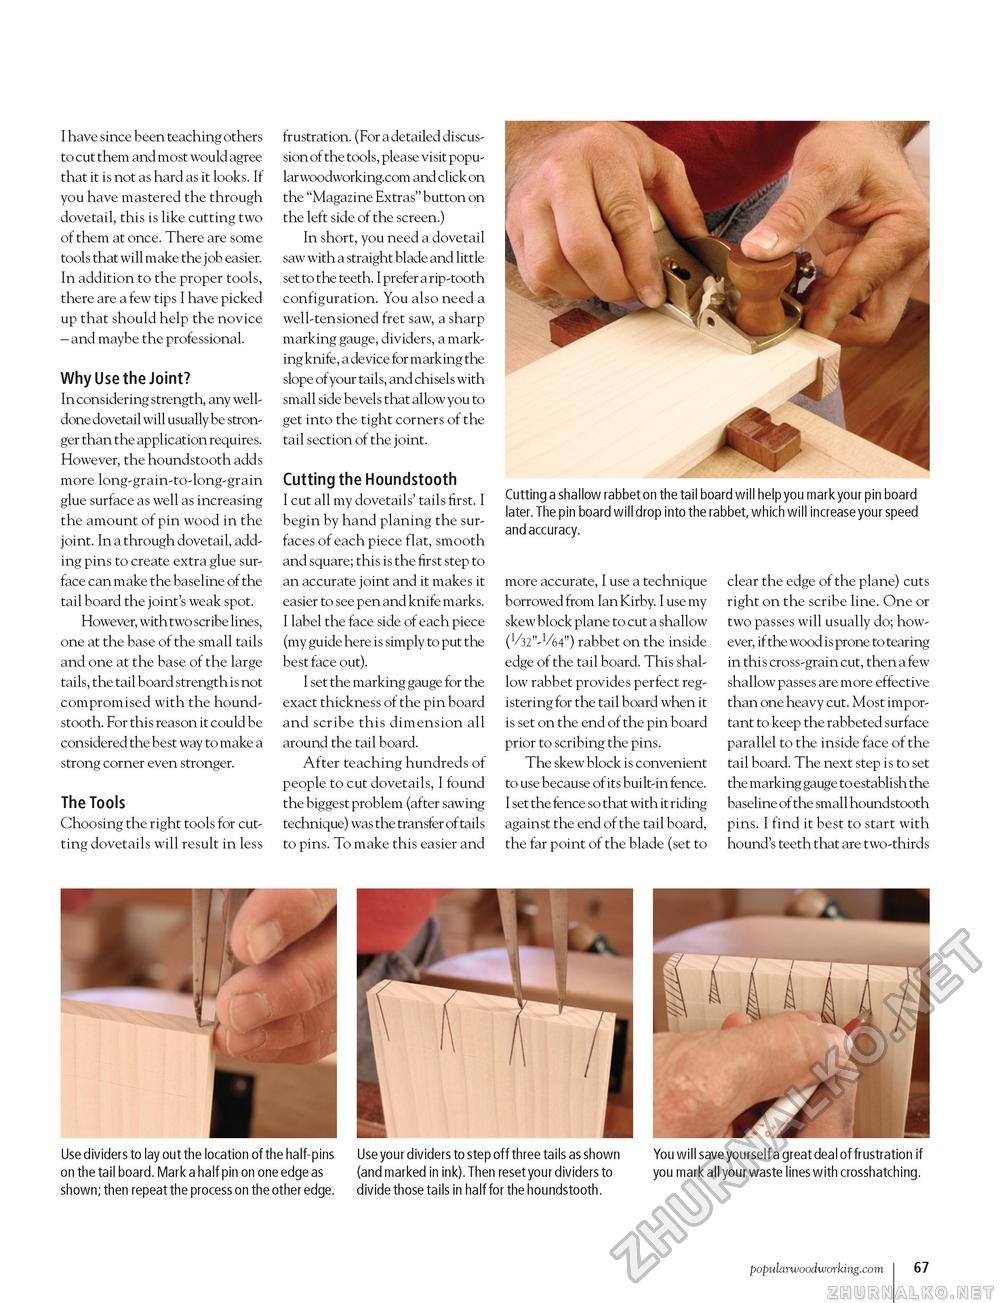
I have since been teaching others to cut them and most would agree that it is not as hard as it looks. If you have mastered the through dovetail, this is like cutting two of them at once. There are some tools that will make the job easier. In addition to the proper tools, there are a few tips I have picked up that should help the novice - and maybe the professional. Why Use the Joint? In considering strength, any well-done dovetail will usually be stronger than the application requires. However, the houndstooth adds more long-grain-to-long-grain glue surface as well as increasing the amount of pin wood in the joint. In a through dovetail, adding pins to create extra glue surface can make the baseline of the tail board the joint's weak spot. However, with two scribe lines, one at the base of the small tails and one at the base of the large tails, the tail board strength is not compromised with the houndstooth. For this reason it could be considered the best way to make a strong corner even stronger. The Tools Choosing the right tools for cutting dovetails will result in less frustration. (For a detailed discussion of the tools, please visit popular woodworking.com and click on the "Magazine Extras" button on the left side of the screen.) In short, you need a dovetail saw with a straight blade and little set to the teeth. I prefer a rip-tooth configuration. You also need a well-tensioned fret saw, a sharp marking gauge, dividers, a marking knife, a device for marking the slope ofyour tails, and chisels with small side bevels that allow you to get into the tight corners of the tail section of the joint. Cutting the Houndstooth I cut all my dovetails' tails first. I begin by hand planing the surfaces of each piece flat, smooth and square; this is the first step to an accurate joint and it makes it easier to see pen and knife marks. I label the face side of each piece (my guide here is simply to put the best face out). I set the marking gauge for the exact thickness of the pin board and scribe this dimension all around the tail board. After teaching hundreds of people to cut dovetails, I found the biggest problem (after sawing technique) was the transfer of tails to pins. To make this easier and Cutting a shallow rabbet on the tail board will help you mark your pin board later. The pin board will drop into the rabbet, which will increase your speed and accuracy. more accurate, I use a technique borrowed from Ian Kirby. I use my skew block plane to cut a shallow (l/32»,l/64») rabbet on the inside edge of the tail board. This shallow rabbet provides perfect registering for the tail board when it is set on the end of the pin board prior to scribing the pins. The skew block is convenient to use because of its built-in fence. I set the fence so that with it riding against the end of the tail board, the far point of the blade (set to clear the edge of the plane) cuts right on the scribe line. One or two passes will usually do; however, if the wood is prone to tearing in this cross-grain cut, then a few shallow passes are more effective than one heavy cut. Most important to keep the rabbeted surface parallel to the inside face of the tail board. The next step is to set the marking gauge to establish the baseline of the small houndstooth pins. I find it best to start with hound's teeth that are two-thirds Use dividers to lay out the location of the half-pins on the tail board. Mark a half pin on one edge as shown; then repeat the process on the other edge. Use your dividers to step off three tails as shown (and marked in ink). Then reset your dividers to divide those tails in half for the houndstooth. You will save yourself a great deal of frustration if you mark all your waste lines with crosshatching. popularwoodworking.com i 67 |


