Popular Woodworking 2006-04 № 154, страница 72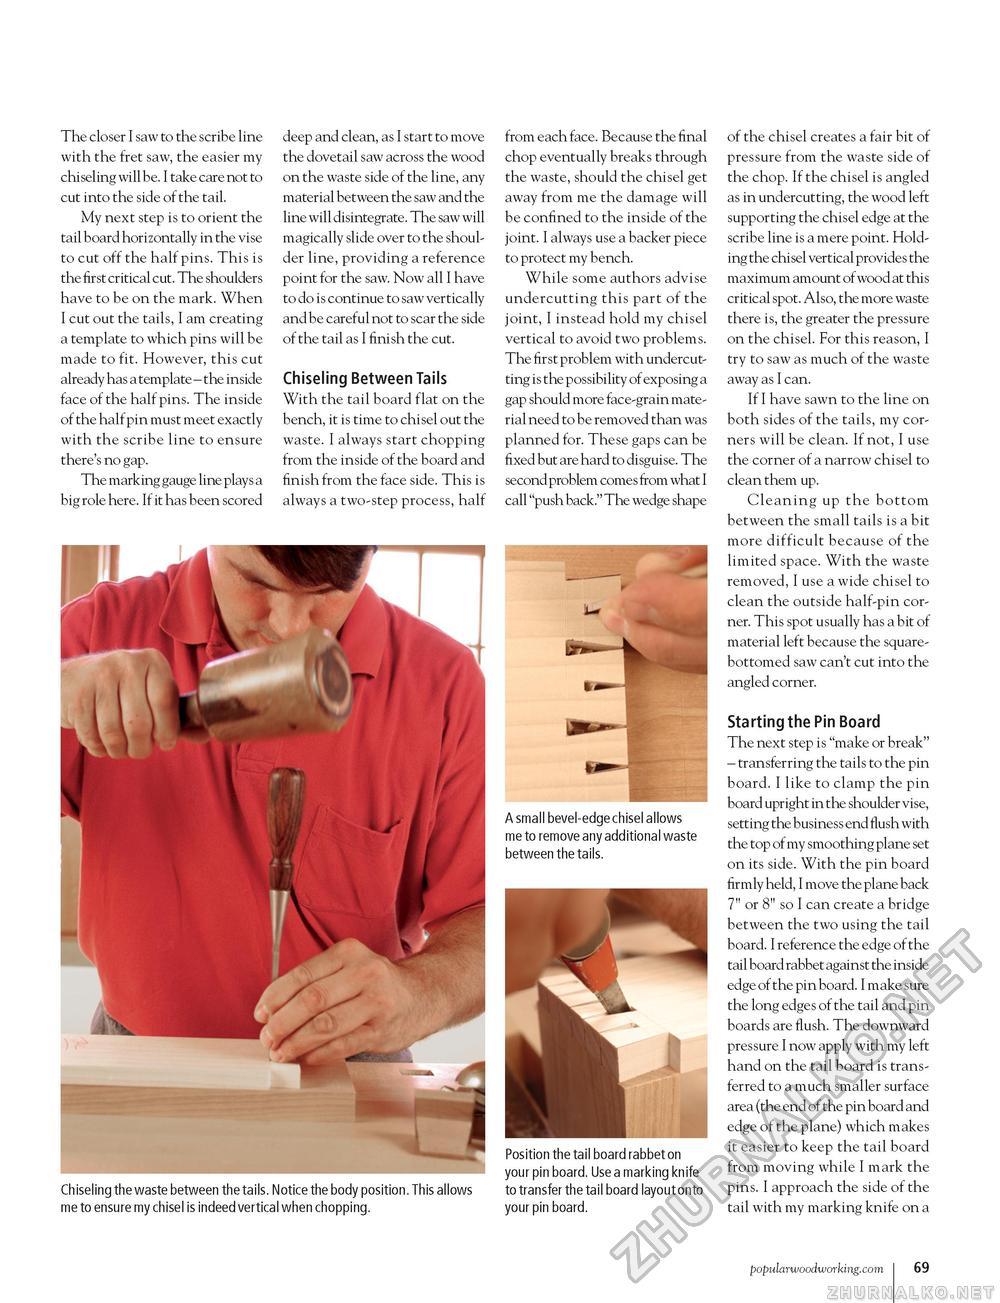
The closer I saw to the scribe line with the fret saw, the easier my chiseling will be. I take care not to cut into the side of the tail. My next step is to orient the tail board horizontally in the vise to cut off the half pins. This is the first critical cut. The shoulders have to be on the mark. When I cut out the tails, I am creating a template to which pins will be made to fit. However, this cut already has a template - the inside face of the half pins. The inside of the half pin must meet exactly with the scribe line to ensure there's no gap. The marking gauge line plays a big role here. If it has been scored deep and clean, as I start to move the dovetail saw across the wood on the waste side of the line, any material between the saw and the line will disintegrate. The saw will magically slide over to the shoulder line, providing a reference point for the saw. Now all I have to do is continue to saw vertically and be careful not to scar the side of the tail as I finish the cut. Chiseling Between Tails With the tail board flat on the bench, it is time to chisel out the waste. I always start chopping from the inside of the board and finish from the face side. This is always a two-step process, half from each face. Because the final chop eventually breaks through the waste, should the chisel get away from me the damage will be confined to the inside of the joint. I always use a backer piece to protect my bench. While some authors advise undercutting this part of the joint, I instead hold my chisel vertical to avoid two problems. The first problem with undercutting is the possibility of exposing a gap should more face-grain material need to be removed than was planned for. These gaps can be fixed but are hard to disguise. The second problem comes from what I call "push back." The wedge shape A small bevel-edge chisel allows me to remove any additional waste between the tails. Position the tail board rabbet on your pin board. Use a marking knife to transfer the tail board layout onto your pin board. of the chisel creates a fair bit of pressure from the waste side of the chop. If the chisel is angled as in undercutting, the wood left supporting the chisel edge at the scribe line is a mere point. Holding the chisel vertical provides the maximum amount of wood at this critical spot. Also, the more waste there is, the greater the pressure on the chisel. For this reason, I try to saw as much of the waste away as I can. If I have sawn to the line on both sides of the tails, my corners will be clean. If not, I use the corner of a narrow chisel to clean them up. Cleaning up the bottom between the small tails is a bit more difficult because of the limited space. With the waste removed, I use a wide chisel to clean the outside half-pin corner. This spot usually has a bit of material left because the square-bottomed saw can't cut into the angled corner. Starting the Pin Board The next step is "make or break" - transferring the tails to the pin board. I like to clamp the pin board upright in the shoulder vise, setting the business end flush with the top of my smoothing plane set on its side. With the pin board firmly held, I move the plane back 7" or 8" so I can create a bridge between the two using the tail board. I reference the edge of the tail board rabbet against the inside edge of the pin board. I make sure the long edges of the tail and pin boards are flush. The downward pressure I now apply with my left hand on the tail board is transferred to a much smaller surface area (the end of the pin board and edge of the plane) which makes it easier to keep the tail board from moving while I mark the pins. I approach the side of the tail with my marking knife on a Chiseling the waste between the tails. Notice the body position. This allows me to ensure my chisel is indeed vertical when chopping. popularwoodworking.com i 69 |


