Popular Woodworking 2006-06 № 155, страница 28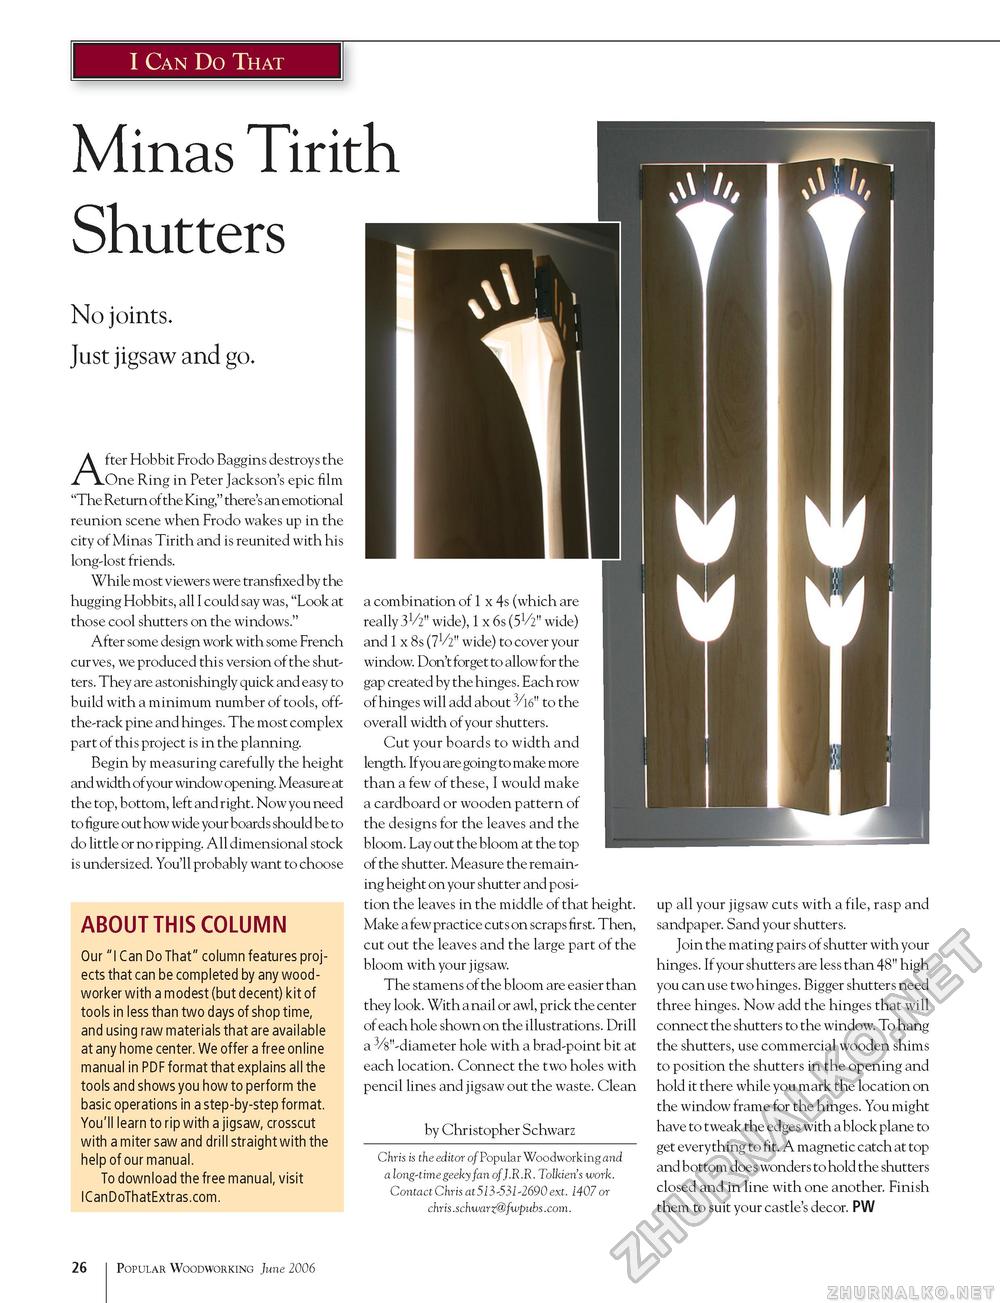
I Can Do That Minas Tirith Shutters No joints. Just jigsaw and go. After Hobbit Frodo Baggins destroys the One Ring in Peter Jackson's epic film "The Return of the King," there's an emotional reunion scene when Frodo wakes up in the city of Minas Tirith and is reunited with his long-lost friends. While most viewers were transfixed by the hugging Hobbits, all I could say was, "Look at those cool shutters on the windows." After some design work with some French curves, we produced this version of the shutters. They are astonishingly quick and easy to build with a minimum number of tools, off-the-rack pine and hinges. The most complex part of this project is in the planning. Begin by measuring carefully the height and width ofyour window opening. Measure at the top, bottom, left and right. Now you need to figure out how wide your boards should be to do little or no ripping. All dimensional stock is undersized. You'll probably want to choose ABOUT THIS COLUMN Our "I Can Do That" column features projects that can be completed by any woodworker with a modest (but decent) kit of tools in less than two days of shop time, and using raw materials that are available at any home center. We offer a free online manual in PDF format that explains all the tools and shows you how to perform the basic operations in a step-by-step format. You'll learn to rip with a jigsaw, crosscut with a miter saw and drill straight with the help of our manual. To download the free manual, visit ICanDoThatExtras.com. a combination of 1 x 4s (which are really 31/2" wide), 1 x 6s (5V2" wide) and 1 x 8s (71'2" wide) to cover your window. Don't forget to allow for the gap created by the hinges. Each row of hinges will add about 3/16" to the overall width of your shutters. Cut your boards to width and length. Ifyou are going to make more than a few of these, I would make a cardboard or wooden pattern of the designs for the leaves and the bloom. Lay out the bloom at the top of the shutter. Measure the remaining height on your shutter and position the leaves in the middle of that height. Make a few practice cuts on scraps first. Then, cut out the leaves and the large part of the bloom with your jigsaw. The stamens of the bloom are easier than they look. With a nail or awl, prick the center of each hole shown on the illustrations. Drill a 3/8"-diameter hole with a brad-point bit at each location. Connect the two holes with pencil lines and jigsaw out the waste. Clean by Christopher Schwarz Chris is the editor of Popular Woodworking and a long-timegeeky fan of J.R.R. Tolkien's work. Contact Chris at 513-531-2690 ext. 1407 or chris .schwarz@fwpubs .com. up all your jigsaw cuts with a file, rasp and sandpaper. Sand your shutters. Join the mating pairs of shutter with your hinges. If your shutters are less than 48" high you can use two hinges. Bigger shutters need three hinges. Now add the hinges that will connect the shutters to the window. To hang the shutters, use commercial wooden shims to position the shutters in the opening and hold it there while you mark the location on the window frame for the hinges. You might have to tweak the edges with a block plane to get everything to fit. A magnetic catch at top and bottom does wonders to hold the shutters closed and in line with one another. Finish them to suit your castle's decor. PW 26 Popular Woodworking June 2006 |


