Popular Woodworking 2006-06 № 155, страница 26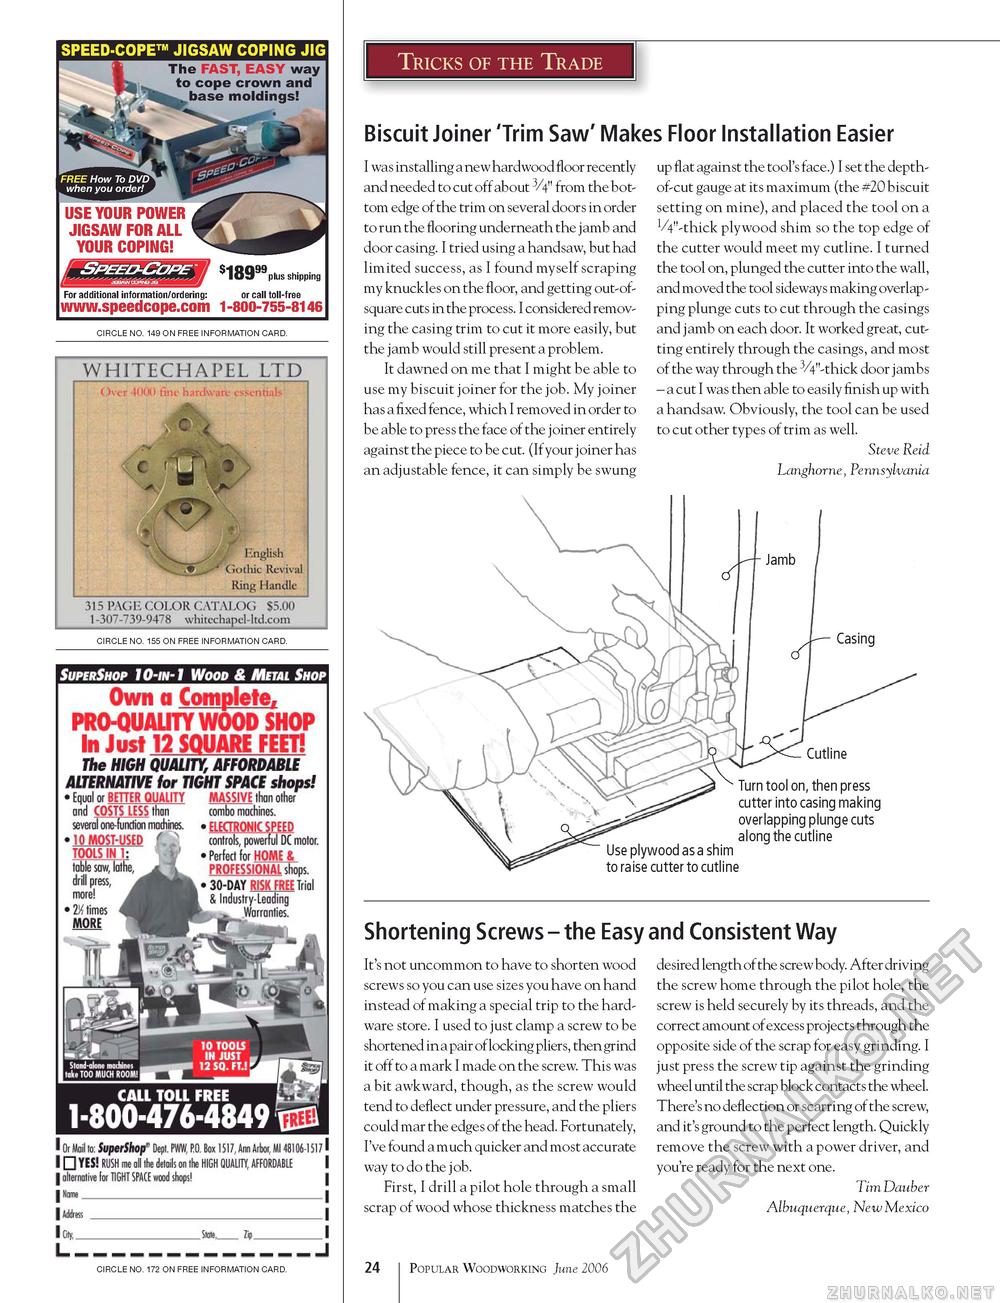
SPEED-COPE™ JIGSAW COPING JIG The FAST, EASY way to cope crown and base moldings! circle no. 149 on free information card. circle no. 155 on free information card. circle no. 172 on free information card. Tricks of the Trade Biscuit Joiner 'Trim Saw' Makes Floor Installation Easier I was installing a new hardwood floor recently and needed to cut off about 3/4" from the bottom edge of the trim on several doors in order to run the flooring underneath the jamb and door casing. I tried using a handsaw, but had limited success, as I found myself scraping my knuckles on the floor, and getting out-of-square cuts in the process. I considered removing the casing trim to cut it more easily, but the jamb would still present a problem. It dawned on me that I might be able to use my biscuit joiner for the job. My joiner has a fixed fence, which I removed in order to be able to press the face of the joiner entirely against the piece to be cut. (If your joiner has an adjustable fence, it can simply be swung up flat against the tool's face.) I set the depth-of-cut gauge at its maximum (the #20 biscuit setting on mine), and placed the tool on a VV'-thick plywood shim so the top edge of the cutter would meet my cutline. I turned the tool on, plunged the cutter into the wall, and moved the tool sideways making overlapping plunge cuts to cut through the casings and jamb on each door. It worked great, cutting entirely through the casings, and most of the way through the 3/4"-thick door jambs - a cut I was then able to easily finish up with a handsaw. Obviously, the tool can be used to cut other types of trim as well. Steve Reid Langhorne, Pennsylvania Use plywood as a shim to raise cutter to cutline Cutline Turn tool on, then press cutter into casing making overlapping plunge cuts along the cutline Shortening Screws - the Easy and Consistent Way It's not uncommon to have to shorten wood screws so you can use sizes you have on hand instead of making a special trip to the hardware store. I used to just clamp a screw to be shortened in a pair of locking pliers, then grind it off to a mark I made on the screw. This was a bit awkward, though, as the screw would tend to deflect under pressure, and the pliers could mar the edges of the head. Fortunately, I've found a much quicker and most accurate way to do the j ob. First, I drill a pilot hole through a small scrap of wood whose thickness matches the desired length of the screw body. After driving the screw home through the pilot hole, the screw is held securely by its threads, and the correct amount of excess projects through the opposite side of the scrap for easy grinding. I just press the screw tip against the grinding wheel until the scrap block contacts the wheel. There's no deflection or scarring of the screw, and it's ground to the perfect length. Quickly remove the screw with a power driver, and you're ready for the next one. Tim Dauber Albuquerque, New Mexico 24 Popular Woodworking June 2006 |


