Popular Woodworking 2006-06 № 155, страница 23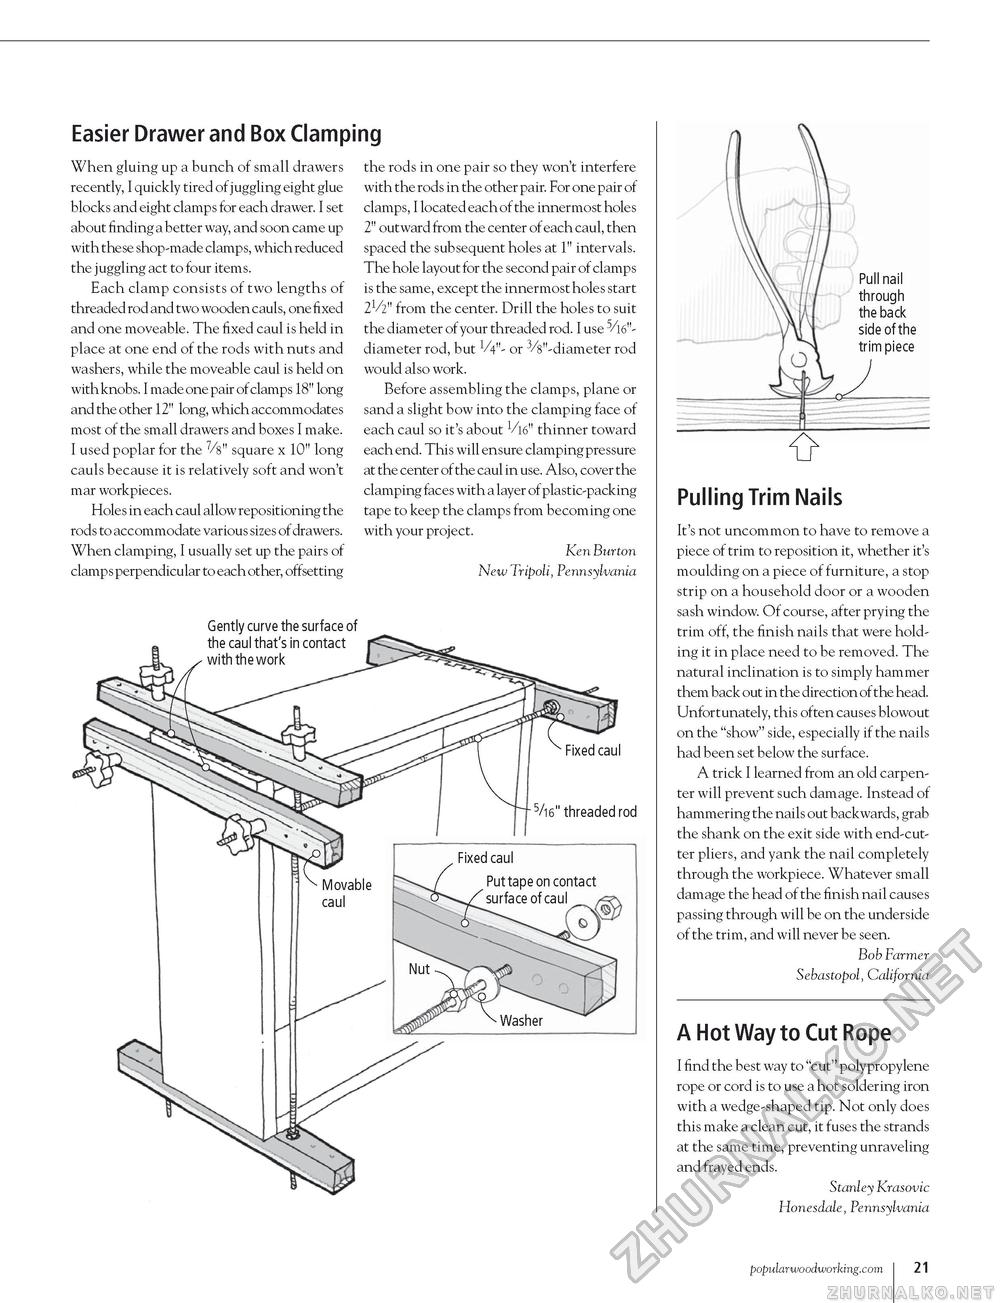
Easier Drawer and Box Clamping When gluing up a bunch of small drawers recently, I quickly tired of juggling eight glue blocks and eight clamps for each drawer. I set about finding a better way, and soon came up with these shop-made clamps, which reduced the juggling act to four items. Each clamp consists of two lengths of threaded rod and two wooden cauls, one fixed and one moveable. The fixed caul is held in place at one end of the rods with nuts and washers, while the moveable caul is held on with knobs. I made one pair of clamps 18" long and the other 12" long, which accommodates most of the small drawers and boxes I make. I used poplar for the 7/s" square x 10" long cauls because it is relatively soft and won't mar workpieces. Holes in each caul allow repositioning the rods to accommodate various sizes of drawers. When clamping, I usually set up the pairs of clamps perpendicular to each other, offsetting the rods in one pair so they won't interfere with the rods in the other pair. For one pair of clamps, I located each of the innermost holes 2" outward from the center of each caul, then spaced the subsequent holes at 1" intervals. The hole layout for the second pair of clamp s is the same, except the innermost holes start 2V2" from the center. Drill the holes to suit the diameter of your threaded rod. I use diameter rod, but V4"- or 3/8"-diameter rod would also work. Before assembling the clamps, plane or sand a slight bow into the clamping face of each caul so it's about V16" thinner toward each end. This will ensure clamping pressure at the center of the caul in use. Also, cover the clamping faces with a layer of plastic-packing tape to keep the clamps from becoming one with your project. Ken Burton New Tripoli, Pennsylvania Gently curve the surface of Pulling Trim Nails It's not uncommon to have to remove a piece of trim to reposition it, whether it's moulding on a piece of furniture, a stop strip on a household door or a wooden sash window. Of course, after prying the trim off, the finish nails that were holding it in place need to be removed. The natural inclination is to simply hammer them back out in the direction of the head. Unfortunately, this often causes blowout on the "show" side, especially if the nails had been set below the surface. A trick I learned from an old carpenter will prevent such damage. Instead of hammering the nails out backwards, grab the shank on the exit side with end-cutter pliers, and yank the nail completely through the workpiece. Whatever small damage the head of the finish nail causes passing through will be on the underside of the trim, and will never be seen. Bob Farmer Sebastopol, California A Hot Way to Cut Rope I find the best way to "cut" polypropylene rope or cord is to use a hot soldering iron with a wedge-shaped tip. Not only does this make a clean cut, it fuses the strands at the same time, preventing unraveling and frayed ends. Stanley Krasovic Honesdale, Pennsylvania popularwoodworking.com I 21 |


