Popular Woodworking 2006-06 № 155, страница 70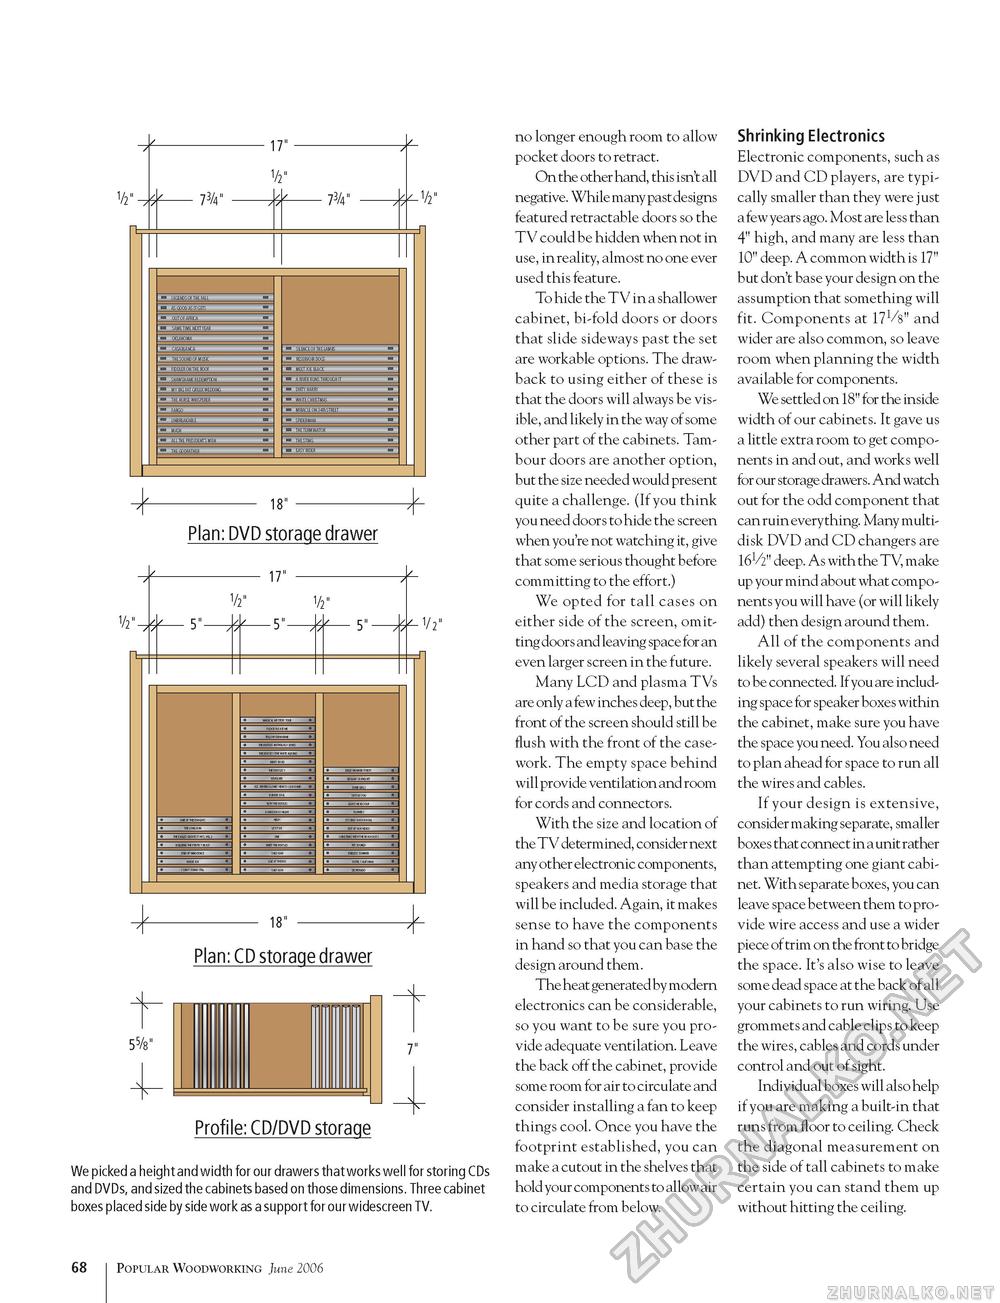
V2" -17"- V2" - 73/4" -#-73/4" n 18" Plan: DVD storage drawer 1/2"- V2" 5"- 17" -5"- V2" n 18" + Plan: CD storage drawer 55/8" 7" Profile: CD/DVD storage We picked a height and width for our drawers that works well for storing CDs and DVDs, and sized the cabinets based on those dimensions. Three cabinet boxes placed side by side work as a support for our widescreen TV. no longer enough room to allow pocket doors to retract. On the other hand, this isn't all negative. While many past designs featured retractable doors so the TV could be hidden when not in use, in reality, almost no one ever used this feature. To hide the TV in a shallower cabinet, bi-fold doors or doors that slide sideways past the set are workable options. The drawback to using either of these is that the doors will always be visible, and likely in the way of some other part of the cabinets. Tambour doors are another option, but the size needed would present quite a challenge. (If you think you need doors to hide the screen when you're not watching it, give that some serious thought before committing to the effort.) We opted for tall cases on either side of the screen, omitting doors and leaving space for an even larger screen in the future. Many LCD and plasma TVs are only a few inches deep, but the front of the screen should still be flush with the front of the casework. The empty space behind will provide ventilation and room for cords and connectors. With the size and location of the TV determined, consider next any other electronic components, speakers and media storage that will be included. Again, it makes sense to have the components in hand so that you can base the design around them. The heat generated by modern electronics can be considerable, so you want to be sure you provide adequate ventilation. Leave the back off the cabinet, provide some room for air to circulate and consider installing a fan to keep things cool. Once you have the footprint established, you can make a cutout in the shelves that hold your components to allow air to circulate from below. Shrinking Electronics Electronic components, such as DVD and CD players, are typically smaller than they were just a few years ago. Most are less than 4" high, and many are less than 10" deep. A common width is 17" but don't base your design on the assumption that something will fit. Components at 17^'/8" and wider are also common, so leave room when planning the width available for components. We settled on 18" for the inside width of our cabinets. It gave us a little extra room to get components in and out, and works well for our storage drawers. And watch out for the odd component that can ruin everything. Many multi-disk DVD and CD changers are 16V2" deep. As with the TV, make up your mind about what components you will have (or will likely add) then design around them. All of the components and likely several speakers will need to be connected. If you are including space for speaker boxes within the cabinet, make sure you have the space you need. You also need to plan ahead for space to run all the wires and cables. If your design is extensive, consider making separate, smaller boxe s that connect in a unit rather than attempting one giant cabinet. With separate boxes, you can leave space between them to provide wire access and use a wider piece of trim on the front to bridge the space. It's also wise to leave some dead space at the back of all your cabinets to run wiring. Use grommets and cable clips to keep the wires, cables and cords under control and out of sight. Individual boxes will also help if you are making a built-in that runs from floor to ceiling. Check the diagonal measurement on the side of tall cabinets to make certain you can stand them up without hitting the ceiling. 68 Popular Woodworking June 2006 |


