Popular Woodworking 2006-06 № 155, страница 77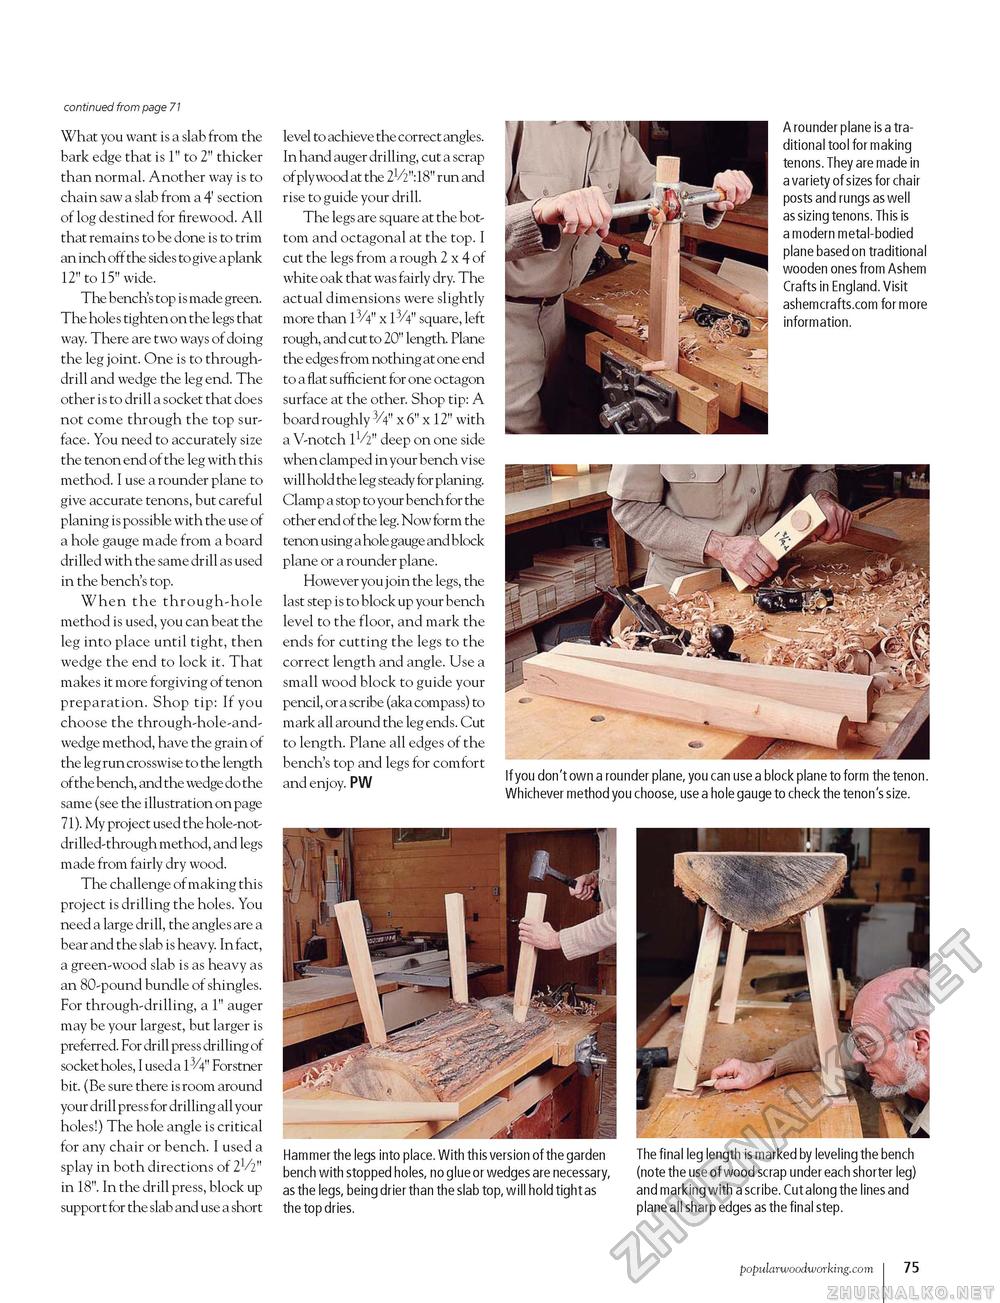
continued from page 71 What you want is a slab from the bark edge that is 1" to 2" thicker than normal. Another way is to chain saw a slab from a 4' section of log destined for firewood. All that remains to be done is to trim an inch off the sides to give a plank 12" to 15" wide. The bench's top is made green. The holes tighten on the legs that way. There are two ways of doing the leg joint. One is to through-drill and wedge the leg end. The other is to drill a socket that does not come through the top surface. You need to accurately size the tenon end of the leg with this method. I use a rounder plane to give accurate tenons, but careful planing is possible with the use of a hole gauge made from a board drilled with the same drill as used in the bench's top. When the through-hole method is used, you can beat the leg into place until tight, then wedge the end to lock it. That makes it more forgiving of tenon preparation. Shop tip: If you choose the through-hole-and-wedge method, have the grain of the leg run crosswise to the length of the bench, and the wedge do the same (see the illustration on page 71). My project used the hole-not-drilled-through method, and legs made from fairly dry wood. The challenge of making this project is drilling the holes. You need a large drill, the angles are a bear and the slab is heavy. In fact, a green-wood slab is as heavy as an 80-pound bundle of shingles. For through-drilling, a 1" auger may be your largest, but larger is preferred. For drill press drilling of socket holes, I used a Forstner bit. (Be sure there is room around your drill pres s for drilling all your holes!) The hole angle is critical for any chair or bench. I used a splay in both directions of 2V2" in 18". In the drill press, block up support for the slab and use a short level to achieve the correct angles. In hand auger drilling, cut a scrap ofplywood at the 21/2":18" run and rise to guide your drill. The legs are square at the bottom and octagonal at the top. I cut the legs from a rough 2 x 4 of white oak that was fairly dry. The actual dimensions were slightly more than 13/4" x 13/4" square, left rough, and cut to 20" length. Plane the edges from nothing at one end to a flat sufficient for one octagon surface at the other. Shop tip: A board roughly 3/4" x 6" x 12" with a V-notch 1V2" deep on one side when clamped in your bench vise will hold the leg steady for planing. Clamp a stop to your b ench for the other end of the leg. Now form the tenon using a hole gauge and block plane or a rounder plane. However you join the legs, the last step is to block up your bench level to the floor, and mark the ends for cutting the legs to the correct length and angle. Use a small wood block to guide your pencil, or a scribe (aka compass) to mark all around the leg ends. Cut to length. Plane all edges of the bench's top and legs for comfort and enjoy. PW A rounder plane is a traditional tool for making tenons. They are made in a variety of sizes for chair posts and rungs as well as sizing tenons. This is a modern metal-bodied plane based on traditional wooden ones from Ashem Crafts in England. Visit ashemcrafts.com for more information. If you don't own a rounder plane, you can use a block plane to form the tenon. Whichever method you choose, use a hole gauge to check the tenon's size. Hammer the legs into place. With this version of the garden bench with stopped holes, no glue or wedges are necessary, as the legs, being drier than the slab top, will hold tight as the top dries. The final leg length is marked by leveling the bench (note the use of wood scrap under each shorter leg) and marking with a scribe. Cut along the lines and plane all sharp edges as the final step. popularwoodworking.com I 75 |


